craft

Make your own Seashell Garland

Hello World,

I have been on an ocean kick lately: from accessories, to the bottles of wine I buy, to home decor. I have found it difficult to find beach-inspired home decor though that isn’t too ‘loud.’

With that being said, I decided to make some simple seashell garland. I currently don’t have any power tools, so I used a wrapping method to make my garland (instead of drilling holes into each shell.)
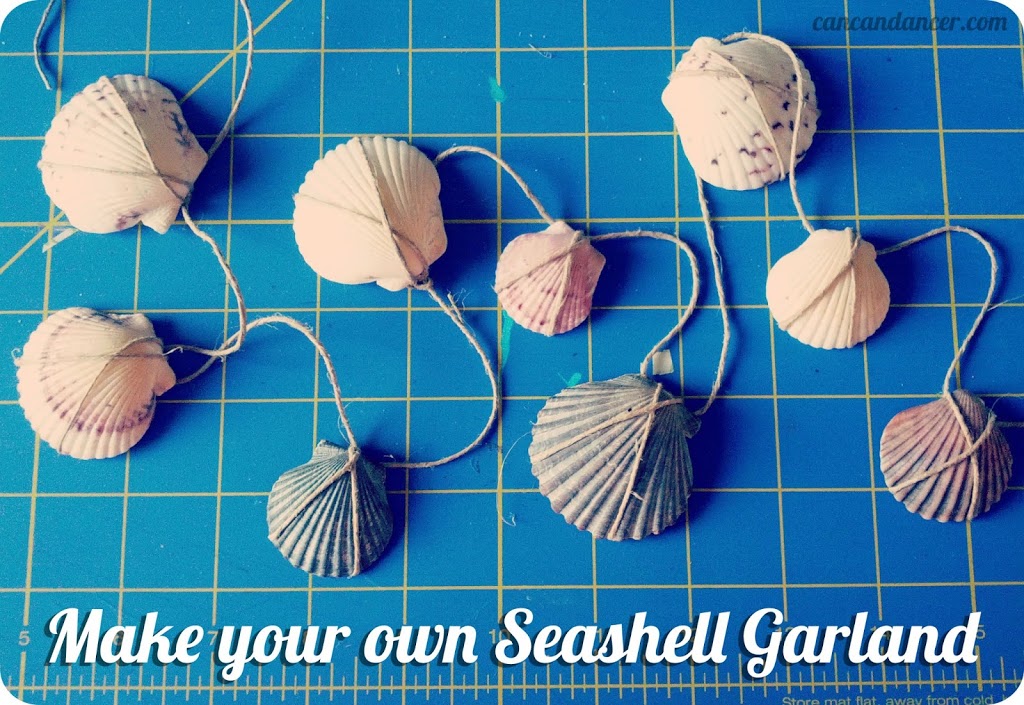
7.14.13-shells-intro

Check out below for the instructions:
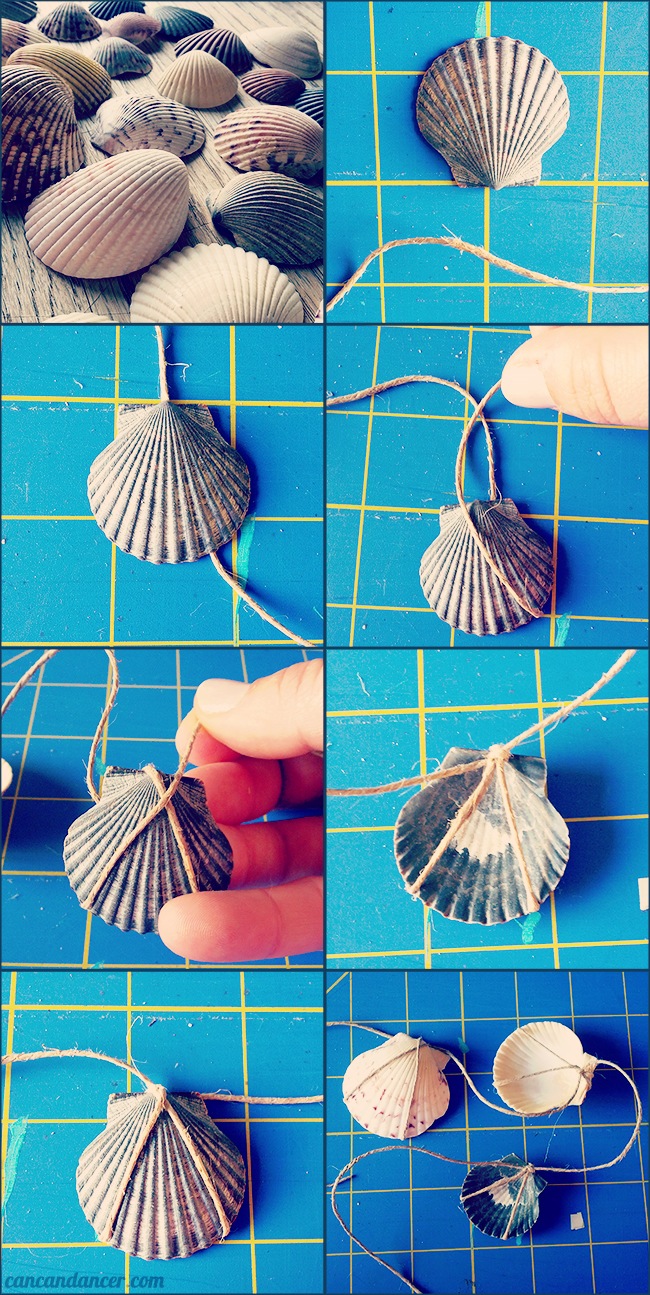
7.14.13-shells-smaller1

1.  Gather your supplies: seashells (I found a nice, big bag at a thrift shop for $2), twine (mine is hemp) and scissors.

2.  Pick your first sea shell. I picked ones for this project that had a nice ‘bulge’ on the top. (So my twine wouldn’t slide off.)

3.  Lay your seashell on top of your twine, with your tail end above it. (I didn’t cut my twine until I was done with my garland.)

4.  Wrap your twine around your shell, and loop it around the back, making an upside down ‘V’ in the back.

5.  Continue wrapping your twine around the front, making an uneven ‘X.’

6.  With both ends of your twine at the top, pull it tightly around the shell. Tie a knot, trapping the back ‘V’ in the knot.

7.  If your twine ends are aiming in wonky directions, simply feed the twine under your knot to force it to lay more flat.

8. Continue with the rest of your shells. I left 3-4 inches of twine between each shell.

Happy Crafting!
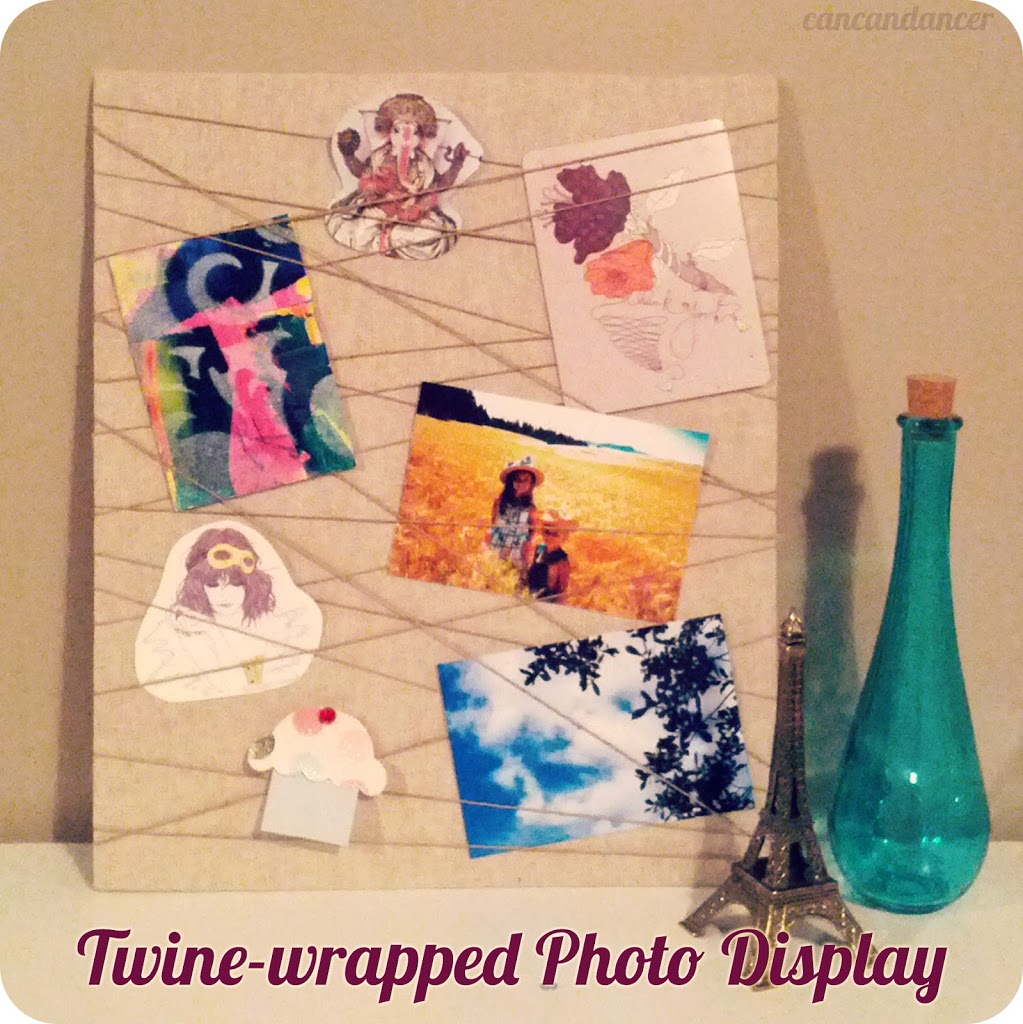
Twine-wrapped Photo Display

Hello World!

With my new internship, I have my own work area. It was looking rather bland (with just standard office supplies), so I decided to make my own photo display.

I made a symmetrical-style display in the past, but it was tough to get all the ribbon angles exactly the same. This time around, I decided to make one that didn’t need to be perfect and was more sporadic in the wrapping. I chose neutral fabric and twine so my desk doesn’t scream GIRL.

string

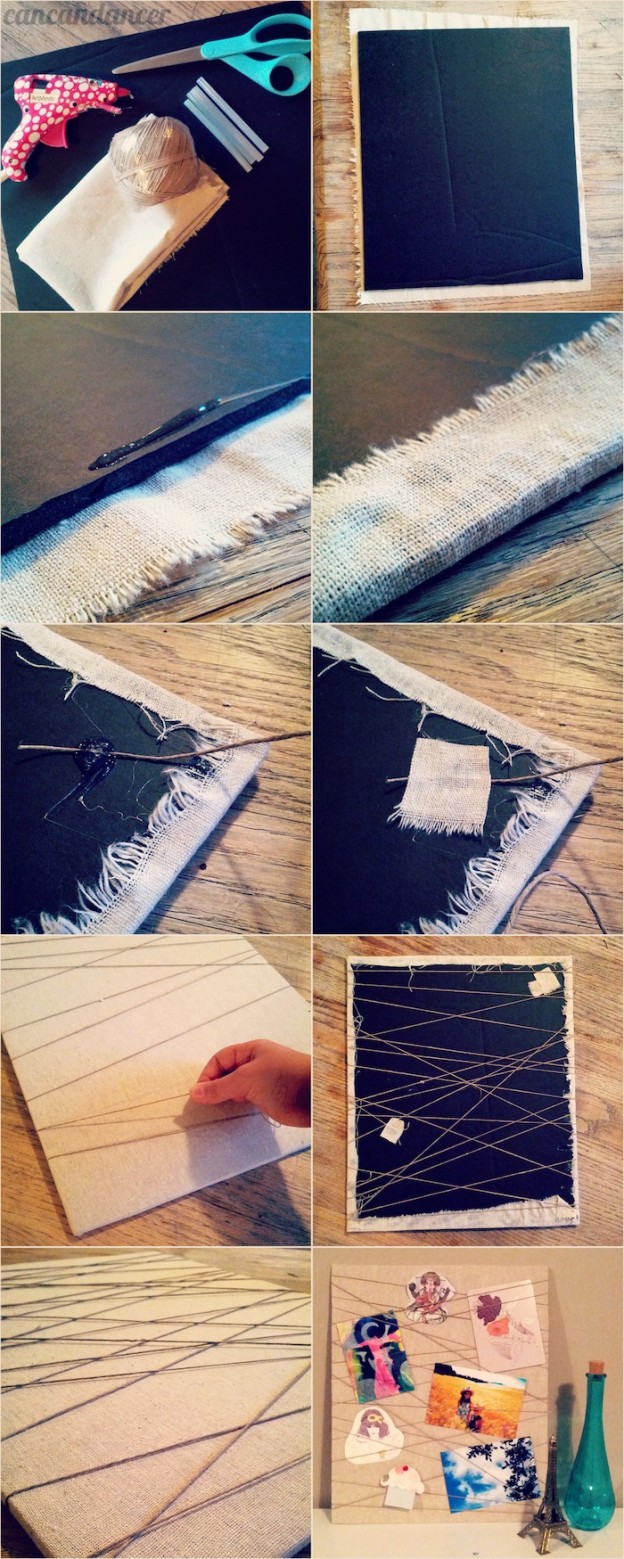
Check out below for the instructions:

image-holder1-624x1559

1.  Gather your supplies: foam core, fabric, twine, scissors, and hot glue with sticks.

2.  Place your fabric (right side down) on your workspace, and place your foam core on top of it.

3.  Begin by placing a string of hot glue on your foam core.

4.  Wrap your fabric around your foam core and stick to the hot glue. (If you are worried about burning yourself, push the fabric into the glue with a pencil or chopstick.) Continue glueing and pressing your fabric until it is completely adhered.

5.  Place a pile of hot glue on the back side of your foam core, and place the tail end of your twine into it.

6.  Sandwich your twine and hot glue with a piece of scrap fabric. (This will help to better secure it, once the glue dries.)

7.  Begin wrapping your twine tightly around your foam core. Go in random directions, or form a pattern if you wish.

8.  Once you feel you have enough twine wrapped, repeat step 5 with the other tail end.

9. Allow everything to completely cool. Glue fabric to the back if you want to hide the sloppy backside.

10. Slide photos, cards, ect between your strings, and enjoy!

Happy crafting!