craft

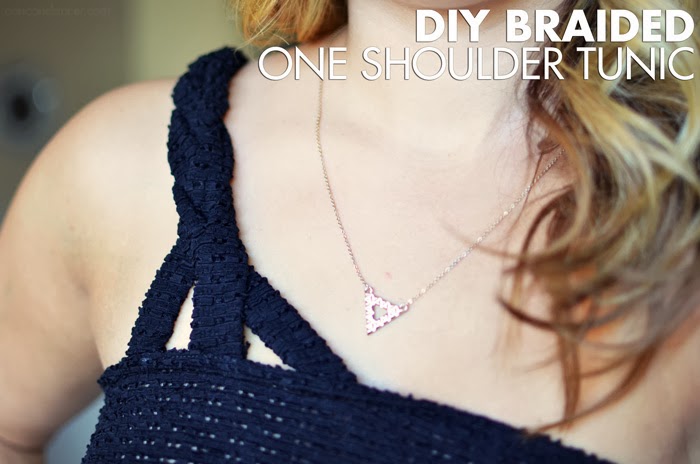
Braided One Shoulder Tunic

Hello World,

I reconstructed a sweater similar to this a few years ago, but I never made a tutorial for it. Check out the tutorial below to see how to turn an over-sized shirt into a one-shoulder tunic or dress:
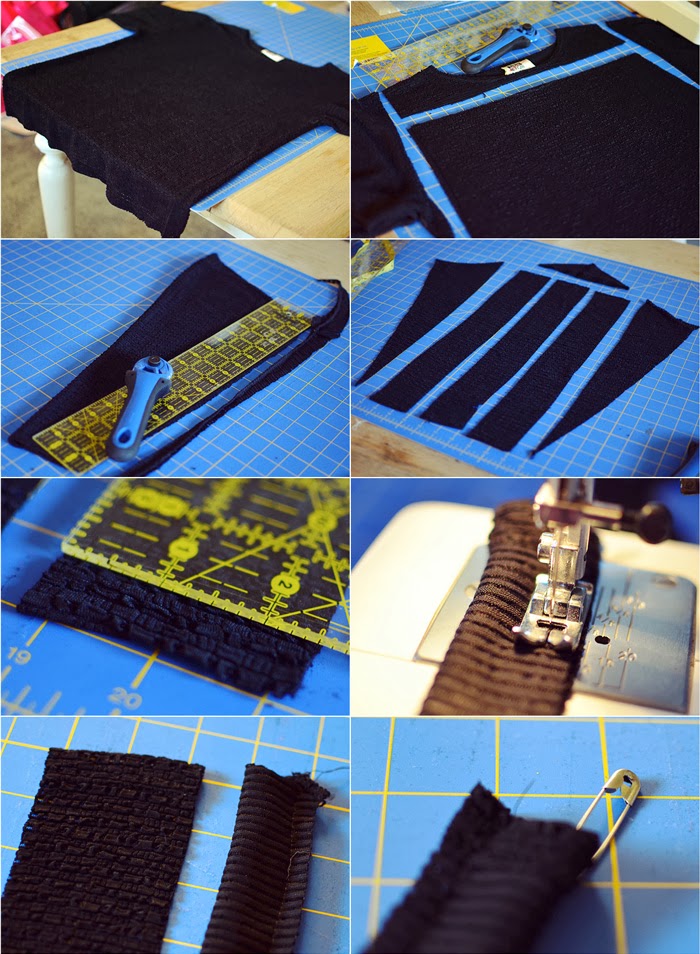
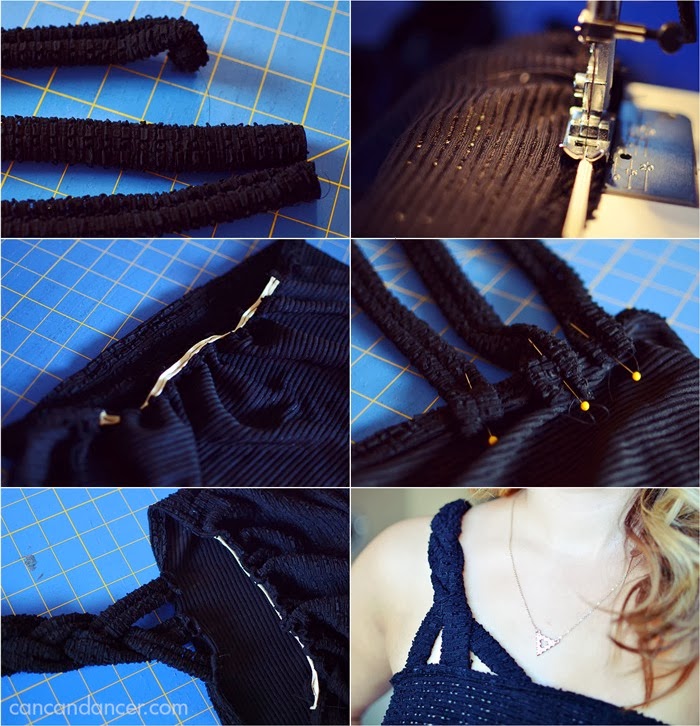
1. Gather your supplies: an long-sleeved over-sized shirt, elastic, scissors or rotary cutter and board, pins, a safety pin, and a sewing machine. (You could hand sew this project, it would just take longer.)

2. Lay your shirt flat. Cut off the sleeves and neckline.

3. Take one sleeve, and cut off the side seam.

4. Lay the sleeve out flat.

5. Cut 3 long strips from that sleeve. Mine were each 2.5″ x 18.”

6. Fold each of those strips in half lengthwise and sew, right sides together.

7. Sew the other two strips this way.

8. Place a safety pin at the end of your first strip, and feed it back through the tube you made. This will turn the tube right side out. Repeat will the other two strips.

9. (I don’t have pictures of this step, but take the large portion of your original shirt and sew up the side seams (right sides together) and hem the top of it. This will create a baggy tube top.)

10. If your tube top is super baggy, sew elastic to the back top hem. Stretch the elastic as you sew so that it gathers evenly.

11. Try on your baggy tube top, and mark with pins where you want each of your braid strips to hit. Also note where you would like the strap to connect on the back. I used my bra strap as a guild and just marked a pin there.

12. Remove the tunic, and pin your three strips where your front pins were located.

13. Sew your strips to your top hem. Make sure your seams end up inside the dress of the tunic.

14. Braid your strips and then pin and sew the other ends to the back of your tunic.

Add a belt if your tunic is a little too baggy, and enjoy.

Happy crafting!

 

Autumn Leaves Garland

Hello World,

I have two large maple trees in my yard, and they shed a decent amount of leaves every year. This year instead of making fall decor with paper leaves, I made garland with real leaves. The garland will eventually completely die, but while it is still alive, it will transform in appearance with the different stages of fall.

Check out the simple tutorial below:

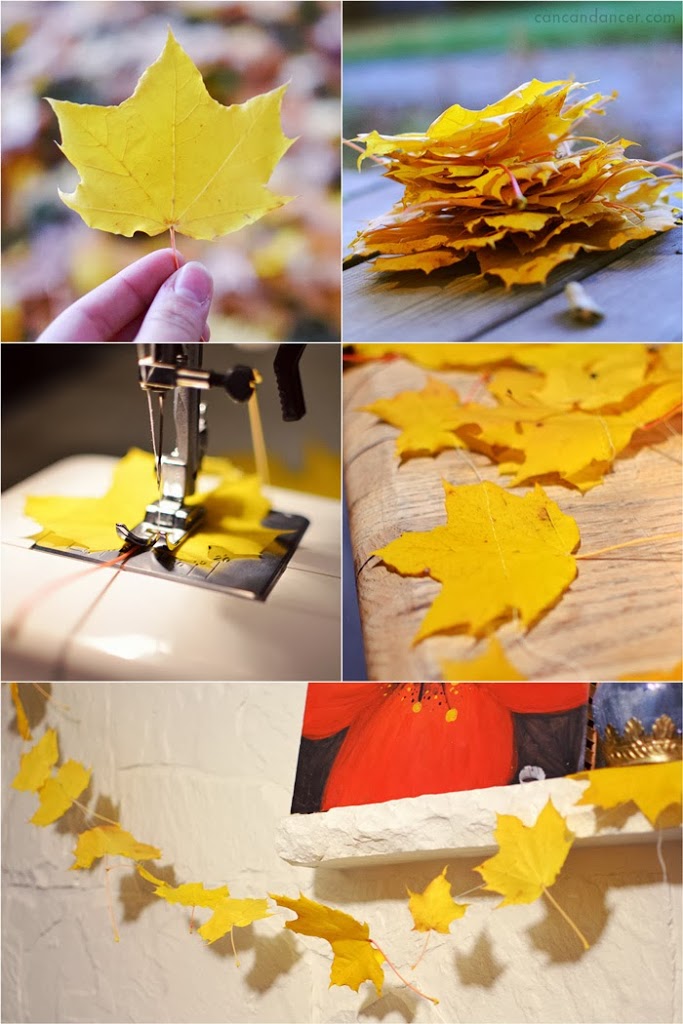
1. Gather your leaves. Pick freshly fallen leaves so your garland will have a slightly longer life.

2. Check for bugs and allow your leaves to dry if they are wet.

3. Sew through your leaves with a long straight stitch, allowing an inch or two between each leaf of threading. I sewed my leaves at random angles so they would resemble the actual act of falling.

4. Tie knots at the ends of your garland to secure the end leaves.

5. Hang and enjoy it as it changes in appearance.

Happy Crafting!

DIY Jewelry Display

Hello World,

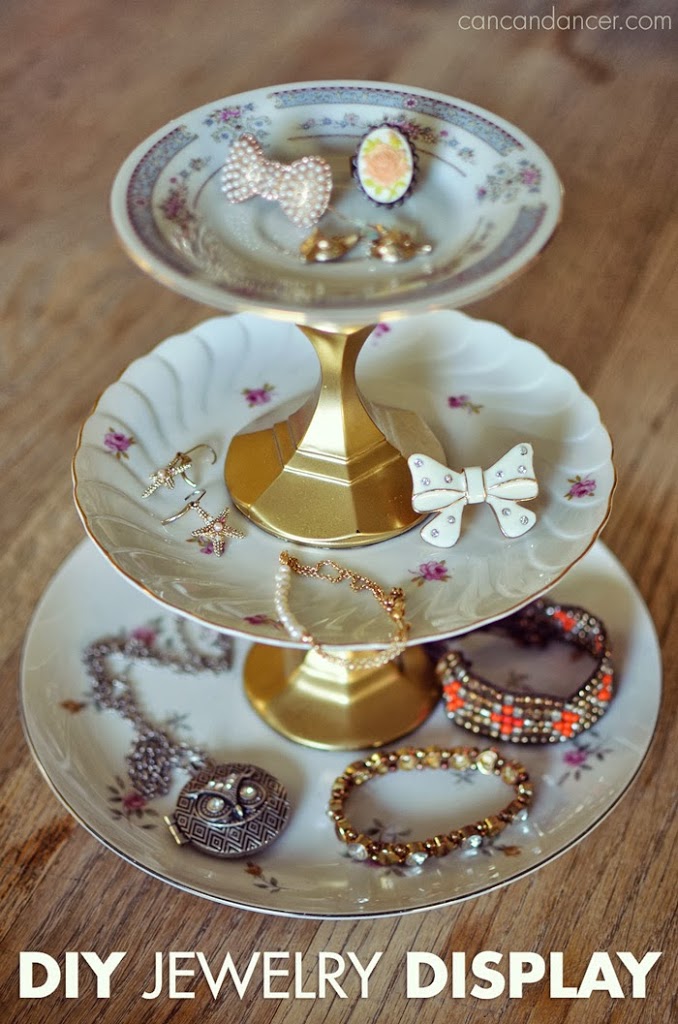
Have you seen those darling jewelry stands made with vintage plates at consignment shops or craft fairs, but not wanted to fork over $25-$40 for one? Well, I went thrifting, and found 3 plates and 2 candle sticks for less than $4!

Check out the tutorial below, to make one of your own:

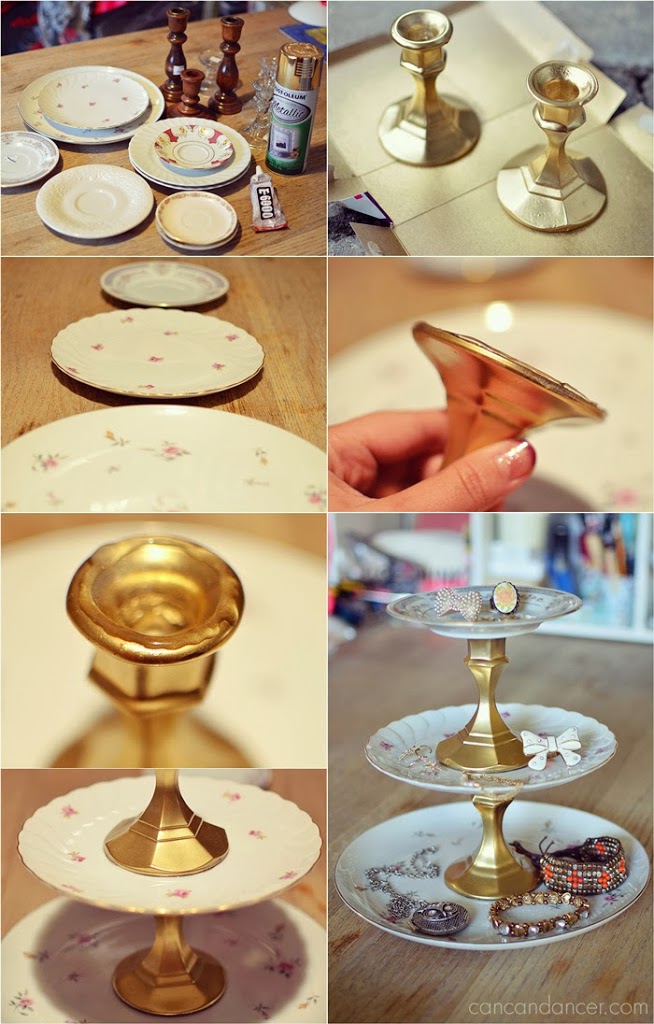
1. Gather your supplies: vintage plates, candle sticks, E6000 or caulk, and spray paint if you don’t like the color of your candle sticks. (Maybe, I bought more plates than I needed, but some of them were only $0.35 each!)

2. Remove any stickers, wash and then dry your candle sticks and plates. Spray paint your candle sticks if you wish, I’m on a gold kick lately.

3. Decide on which plates to use. I used 3 different sizes so my display, with the smallest plate on top.

4. Apply a nice amount of E6000 or caulk to the bottom of your candle stick, and place that baby down on the top of your first plate.

5. Apply E6000 or caulk to the top of that candle stick, and then place your next plate on top of it.

6. Repeat for the last candle stick and plate.

7. Allow to dry overnight and then enjoy!

Happy Crafting!