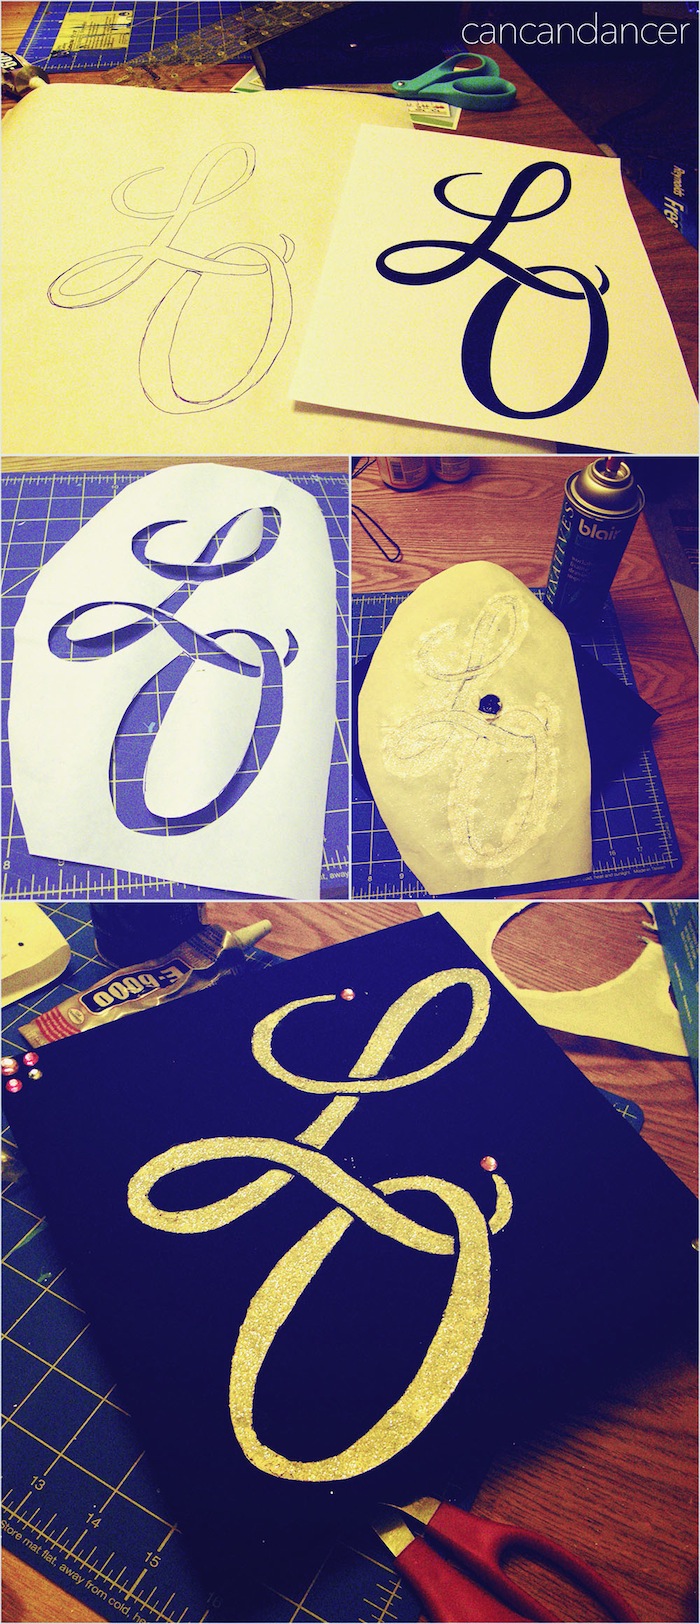
Decorate your Graduation Cap (using freezer paper)
Hello World.
I recently graduated from college! I decided to spruce up my cap to better show my personality (also because I graduated from the College of Art and Architecture).
It was so easy to do! (Please excuse my terrible white balance. I decorated my cap at 2 AM the day of graduation…lol) Check out below for instructions:
1. Print out your desired image. Choose an image that would make an appropriate stencil (no orphan pieces after cutting it out).
2. Place your freezer paper waxy side down, on top of your image. Trace with a writing utensil.
3. Cut out your image with an exacto blade or carefully with scissors.
4. Iron your freezer paper waxy side down, onto your cap. My cap was made with a plastic-blend fabric so I put my iron on the lowest setting. I also placed a piece of scrap fabric in-between my freezer paper and iron. (To prevent my cap from melting.)
5. Paint your cap with acrylic or fabric paint. Allow to dry and repeat with a second coat.
6. Add glitter if you wish while your second layer of paint is still wet.
7. Spray down your glitter with fixative or hair spray to prevent fall off.
8. Carefully peel off your freezer paper once everything is dry and marvel at your unique cap!
I added some rhinestones to mine as well.
Happy crafting!


