Hello World,
Last year, one of my friends had the idea that we should go out on both Friday and Saturday of Halloween weekend- so we could wear two different costumes. We decided on scary/sexy for the first night and cute/fun costumes the second night.
I DIY’d both of my costumes. I was a vampire the first night and a firefly the second night.
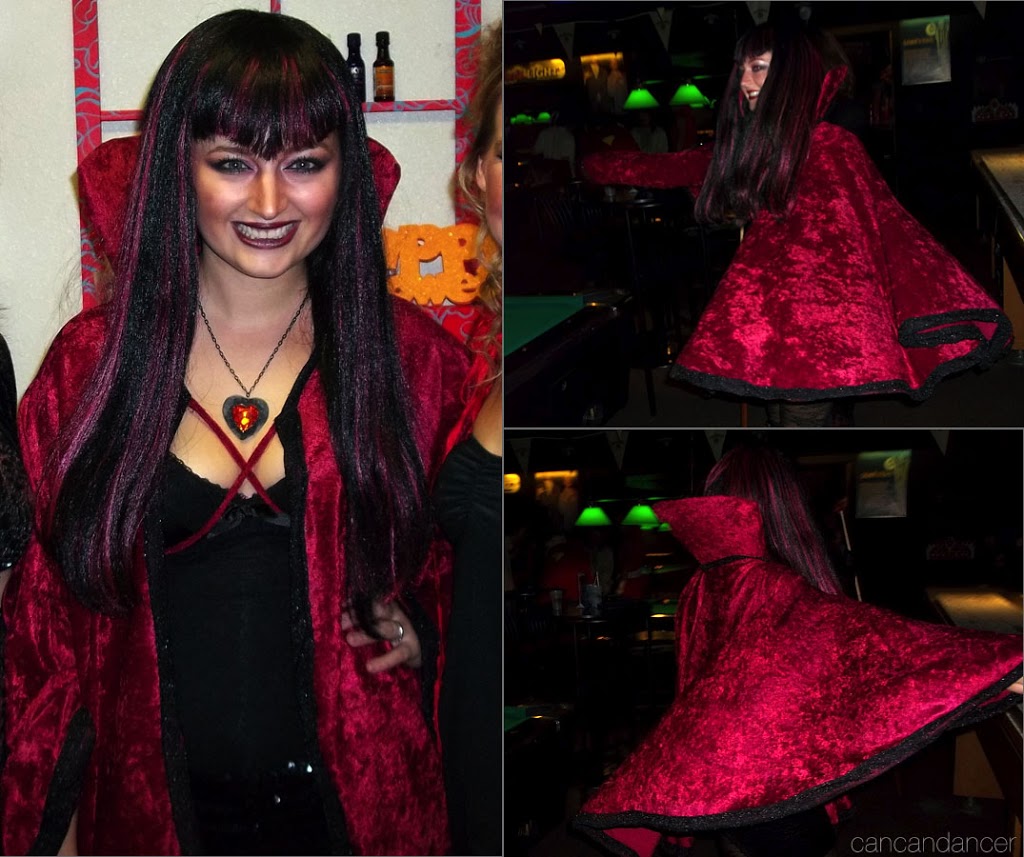
For my vampire costume, I made my cape with 2 yards of cheap velour from Joann’s and some leftover black, glittery, stretchy fabric. I was having a really hard time finding a cape that wasn’t over $30 so I made mine for less than $10 (I used a coupon).
For the body of my cape, I cut 2 huge circles – selvedge to selvedge of 60″ fabric – each with one yard of the velour. I cut a smaller circle in the middle of each circle for a neckline. I measured the circumference of a tshirt I wear as a guide. With these two huge circles, I cut up the radius of each circle and sewed up one edge of each piece together. (This created one HUGE body piece that had a lot of volume. Using one circle would also work to create a cape.)
To make the huge collar I actually cut out the shape from some corrugated cardboard with the corrugation in the vertical direction. This way my collar would curve around my head, not over it. I then cut out two pieces of fabric the same shape of my cardboard cutout with an additional inch of seam allowance added to each side. I sewed the top and side seams together creating a pocket shape and then sewed this to the body of my cape.
To sew the collar to the cape was quite the task, since I had cardboard in the collar. I did not sew through the cardboard at all. I sewed the final seam very close to it, trapping it inside the collar cover and attaching it to the center back of my cape’s inner circle.
I sewed the black glitter fabric around every free edge in a bias-tape manner. I also attached two long strips of fabric in the front of my cape so I could tie it closed, but my collar was so heavy it fell backward with a simple bow. By criss-crossing the ties under my bust and knotting in the back, there was enough tension to hold the collar cape up.
I wore a corset that was on clearance at Hot Topic in March, black lace tights, and a glitter tube top actually as a skirt. The necklace I have had since I was 18, and I can’t remember where I bought it.
I bought my wig from Joann’s on clearance and it originally was wavy. I draped it over a bucket and poured boiling water over it in my shower to straighten it. I let it air dry and then gave it a little trim.
The cape was my favorite part and it kept me warm even in the chilly Idaho Halloweens.
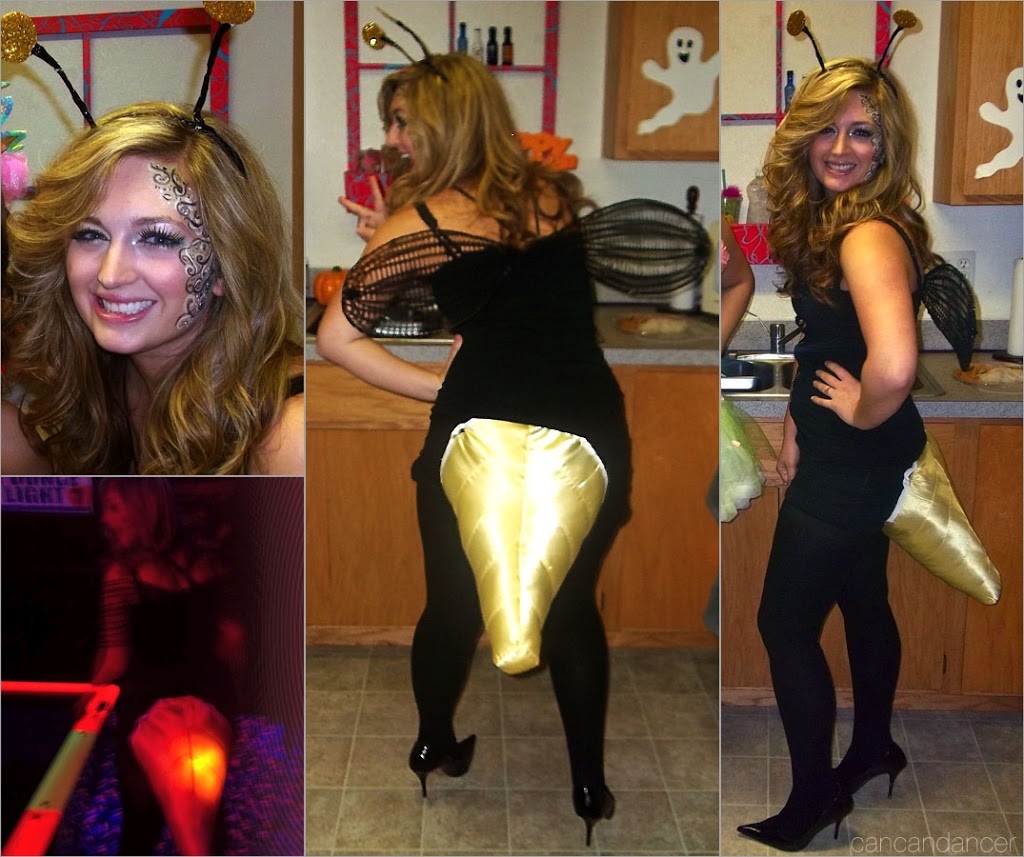
For my second costume, I really wanted a costume that lit up. I instantly thought of a firefly. Making the abdomen for my firefly costume was a… learning process.
I basically made an open ended pillow that tapered to a small circle end. I cut out long strips of fabrics and trimmed the sides so they were each a trapezoid. I sewed these trapezoids together and end up with one elongated trapezoid with a ton of seams. I sewed the final angled sides together and sewed a small circle of fabric to the tip end to create a 3D shape.
I then created shorts and sewed the huge abdomen to the butt of the shorts. I then cut the ‘crack’ of my shorts open and shoved polyester batting into the firefly abdomen making it full in shape. Because I cut the ‘crack’ seam of my shorts open, I was able to push lights into the firefly bottom.
I used two tap lights from the Dollar Store, but I think glow sticks would have been better and more reliable. In the picture above, one of my lights had died, leaving my butt half-illuminated. The lights did not get too hot and thankfully my butt did not light on fire.
I created my wings with two metal hangers, electric tape and a ripped pair of fishnets. I used the waist bands from the fishnets as the straps for my wings. I created my feelers with a Dollar Store hard headband, pipe cleaners, electric tape, cardstock, glitter and Mod Podge.
I love makeup, so I drew organic swirls on one side of face in yellow, green, white and black eyeliners. People were confused by my costume and kept asking me if I was a bee or a wasp all night, but I would just hit my butt light on and they would understand. I couldn’t sit on anything but stools all night, but it was still fun!
This year I am going to be a lion. I want a huge MANE. What are you going to be?