Year: 2012

Zipper Flowers

School started up again, but luckily I had some free time to make some more zipper flowers.  I was really into the muted and earthy tones the day I made them.  They all have a beachy feel.  Maybe its because I want winter to be over. lol

I even named some of them after oceans.  I would love to live near the ocean.  Last spring, I went to the Oregon coast for my spring break.  The smell, sound, and wild life are all beautiful.

Zipper Flower Hair Piece- Natural

Zipper Flower Hair Piece- Pacific

Zipper Flower Hair Piece- Atlantic

Valentine Decorations

I always decorate for holidays really early.  I decorated for Halloween in September, I decorated for Christmas the day after Halloween.  Now, I decorated for Valentine’s Day on New Year’s.

I love Valentine’s Day.  Not because its supposed to be a romantic holiday, but because I love the colors and how cutesy the decorations can be.  It also is the month I was born in, so it reminds me of when I was younger and would have pink, princess birthday parties.

I cut out paper hearts from scrapbook paper, and bought a 50 yard roll of red, sparkle ribbon from Michael’s for $7!  It was from their custom floral department after Christmas. I really want to buy a paper heart punch and make my own magazine garland to hang everywhere. (Thanks to Pinterest for inspiration. 🙂 )

I bought this fabric in high school, and made skirts for me and my friends with it.  5 years later it was just waiting to be used.
I tried to make my own pom-poms.  They take so much yarn!

I bought these sparkle branches at Micheal’s for $1 each after Christmas. They don’t scream Valentine’s Day, but I love the teal color.
I shoved them in a dollar store flower pot, filled it with rocks from my property, and pulled apart a dollar store fake plant and twisted it around the stems.  Super easy!

Book Mobiles

2 years ago, I took an art class where our project was to make altered book art.  One of my friends actually introduced me to these. We would sit and fold book pages for what seemed like hours.  She even made a book mobile with a World Book.  It was sooooo heavy!

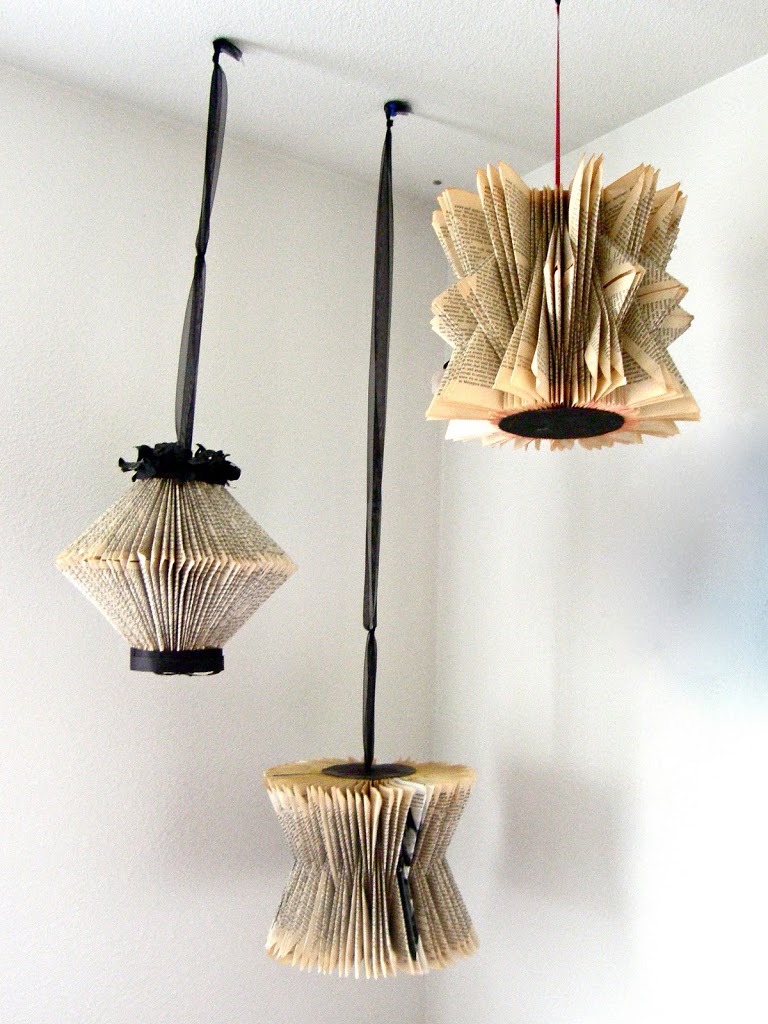
I have 3 hanging in my bedroom.  They are really easy and free/cheap to make.  Where I live, we have a recycling center that has a book bin.  We would rummage through the bin to find book sizes that were suitable.

Your hands will get very dirty in the process, from all the ink.

P1050233

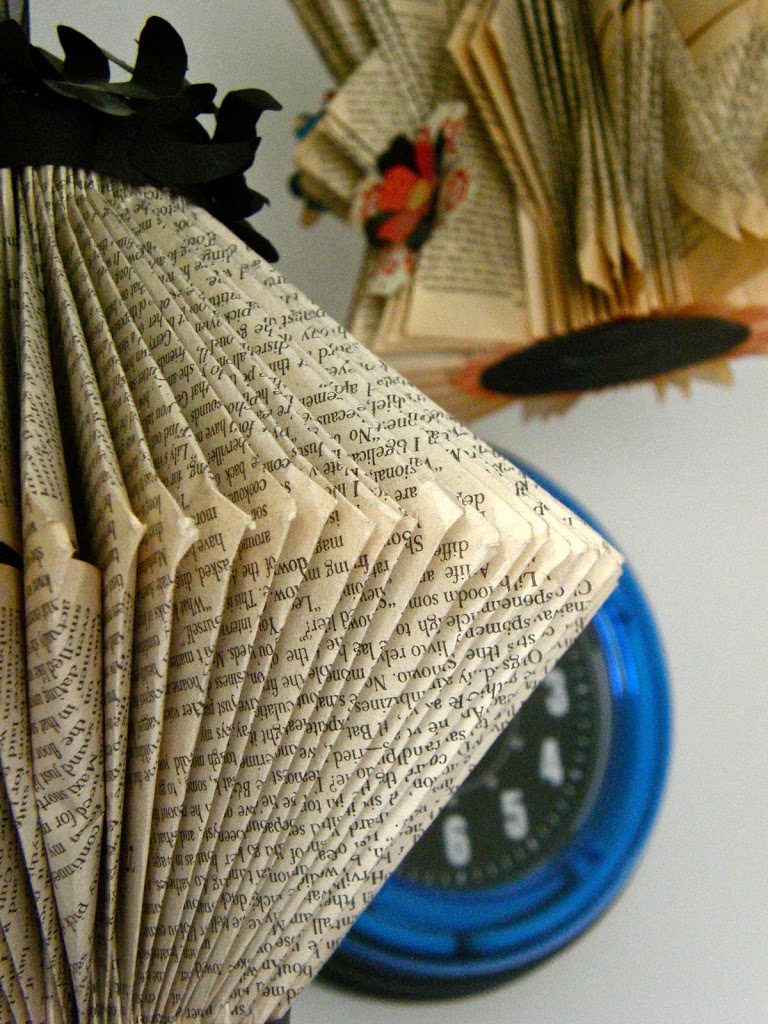
1.  To start the project, first tear the covers off of your books.  (Using a paperback makes it much easier.) Begin by folding one of your pages in half. Fold the next two pages in half as well.

2.  Everything in the mobiles is done in groups of threes.  This way there is nice volume.  Fold the next three pages individually at any angle you want.

3.  Fold three pages individually in half again.

4.   Fold the next three pages individually at any angle you want. (It could be the opposite, so that the mobile is symmetrical, or fold the pages ends toward the middle to make a lantern shape.

5.  Continue alternating until you have folded the entire book, or until the book has curled up on itself.

6.  The pages will be so tight that the mobile will form itself.  Next, use a long piece of ribbon, tie a knot, and feed the ribbon through the center of the book mobile.  Hot glue the knot at the base to secure it.

7.  Cut out two pieces of scrapbook paper in large circles.  Glue one on the bottom to hide the ribbon knot.

8.  Poke or punch a hole in the second circle of paper, feed the ribbon through it, and hot glue it to the top of the mobile.

9.  Because these mobiles are so light weight and bonded with hot glue, the ribbon should not pull through.

10.  Now you have a recycled piece of art. Hang and enjoy!

P1050229

I just noticed that this one was glued upside down.