Year: 2012

DIY Glitter Wedges

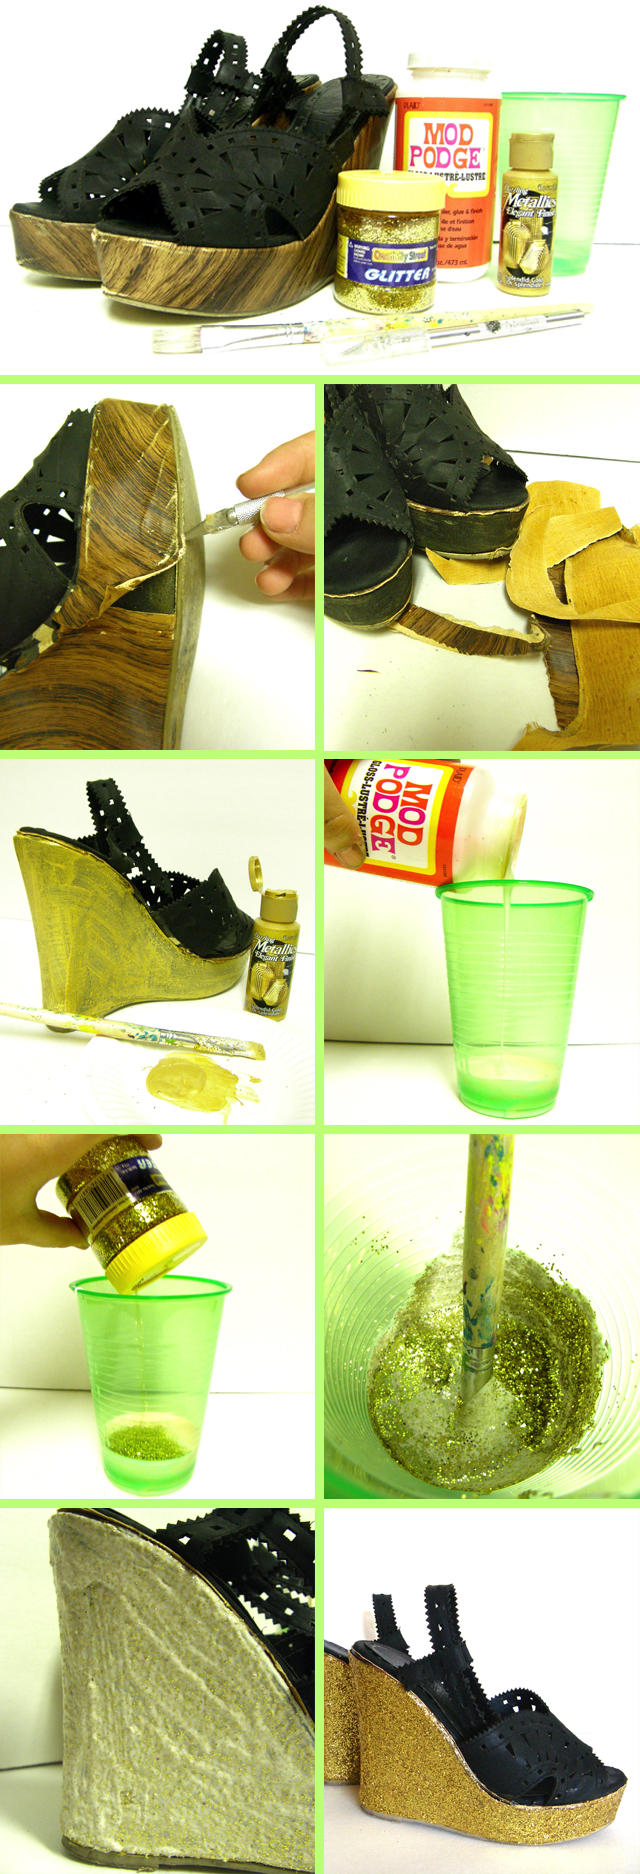
I love thrift stores, yard sales and consignment shops.  I picked up these wedges at a consignment shop, and over time I’ve given them some boo-boos.  I got them wet and the fake wood vinyl started to bubble and look gross.

Here is a tutorial on how to transform some old shoes to be sparkly and fantastic!  Why buy when you can just DIY? 🙂

11-tutorial1

1.   Gather your supplies: old shoes, Mod Podge, glitter, matching paint, a paintbrush, an x-acto knife, and a cup or bowl that you don’t mind getting a little messy.

2.   My shoes had vinyl that was lifting, so I cut it off with an exacto.  If yours doesn’t, you can just skip this step.

3.   I had no idea what color wedge would be under the vinyl, and I put a coat on gold paint to save myself from having to do a thousand layers of mod podge. (If you want to be super neat tape off the part of the shoes that you want to stay clean. I’m lazy so I just winged it.)

4.   Mix mod podge and glitter together.  Mix until you have a consistency you are happy with.

5.   Cover your shoes with the mod podge.  I did 3 layers because I wanted my shoes super glittery. Let them dry overnight and tada!  You now have some awesome DIY shoes to rock.  (After finishing I wish I had done a different color with black or grey glitter, but oh well!  I’ll just have to DIY some other shoes.)

I took a macro shot of the glitter and made this image.  Feel free to use it for your desktop or for your Facebook banner. 🙂  (Right click and open in a new tab, then either download or drag and drop it.)

Below are some glitter shoes for more inspiration:
Zipper Flowers at Art Gallery

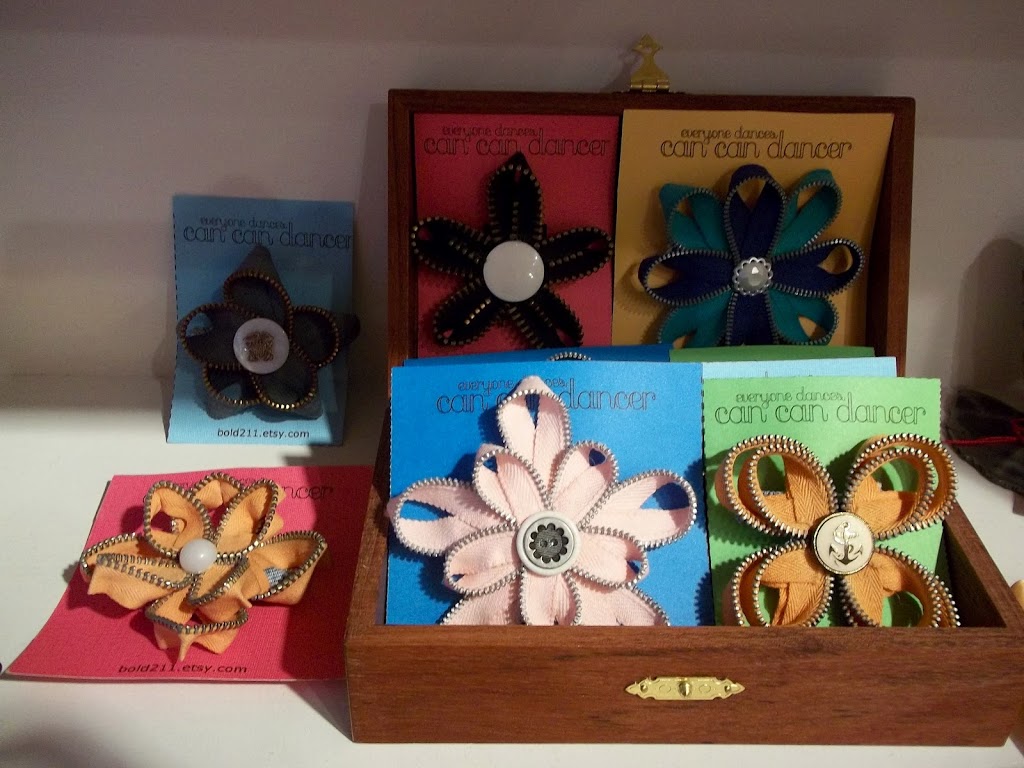
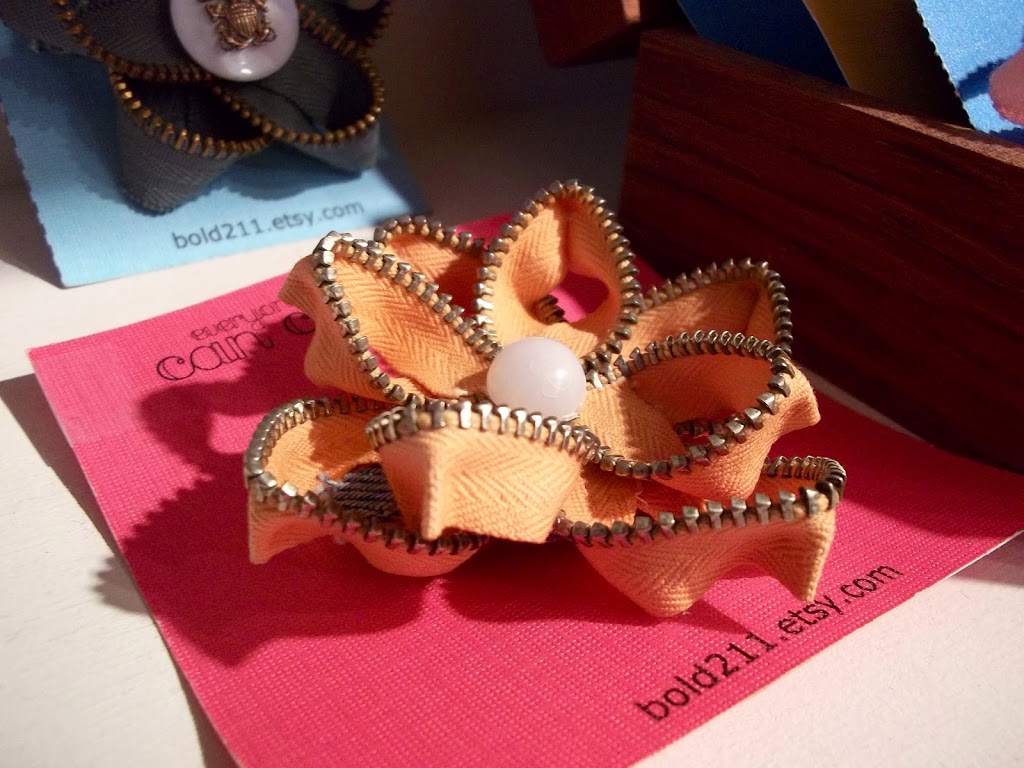
I have been selling my zipper flowers at the Prichard Art Gallery for over a year now, and I finally have a picture of them that wasn’t taken on my cellphone. lol

This one reached over 1000 views on Etsy in one day when it was featured on the front page of Etsy.  Now its for sale at the Prichard.

Here is a fraction of the zipper flower I have made.  The old URL www.bold211.etsy.com luckily redirects to my new one of CanCanDancer.etsy.com

Find Can Can Dancer on Facebook: Link

I’m starting to make some more jewelry and hopefully will be listing it on Etsy soon!

Fanny Pack made with Scrap Fabric

Hello World,

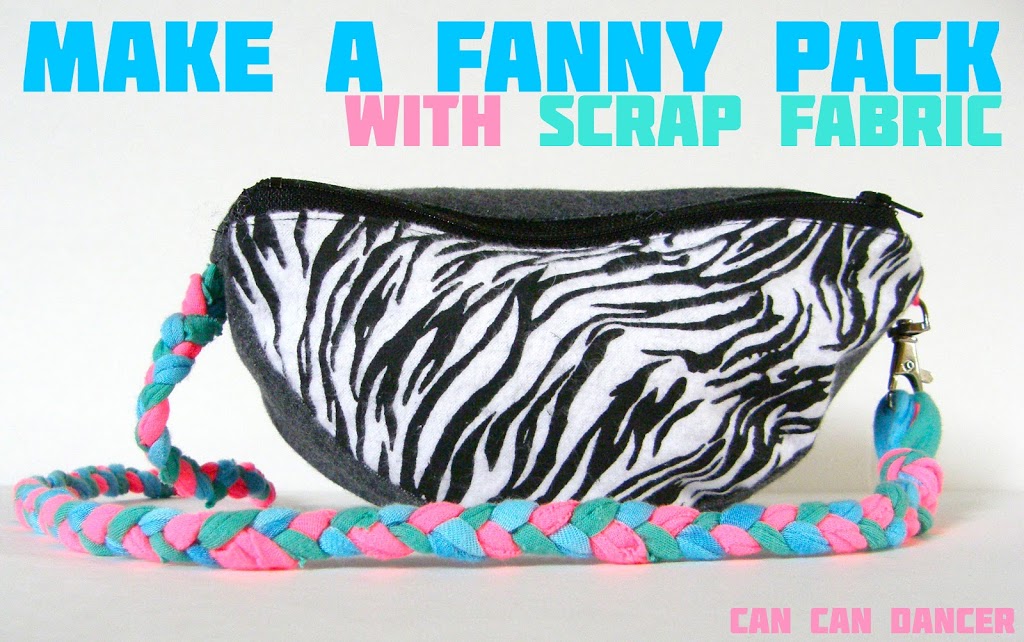
Over spring break I went to a 12,000 person rave in Seattle.  I didn’t want to carry a purse, so I whipped up a fanny pack with a fabric from my scraps pile.  I used flannel, sweatshirt fleece and t shirt scraps. My fabric choices were a little crazy, but hey its a rave and everyone dresses a little weird. lol  Buying a fanny pack just for one night didn’t seem very sustainable, and making one is so easy!

10-tutorial1

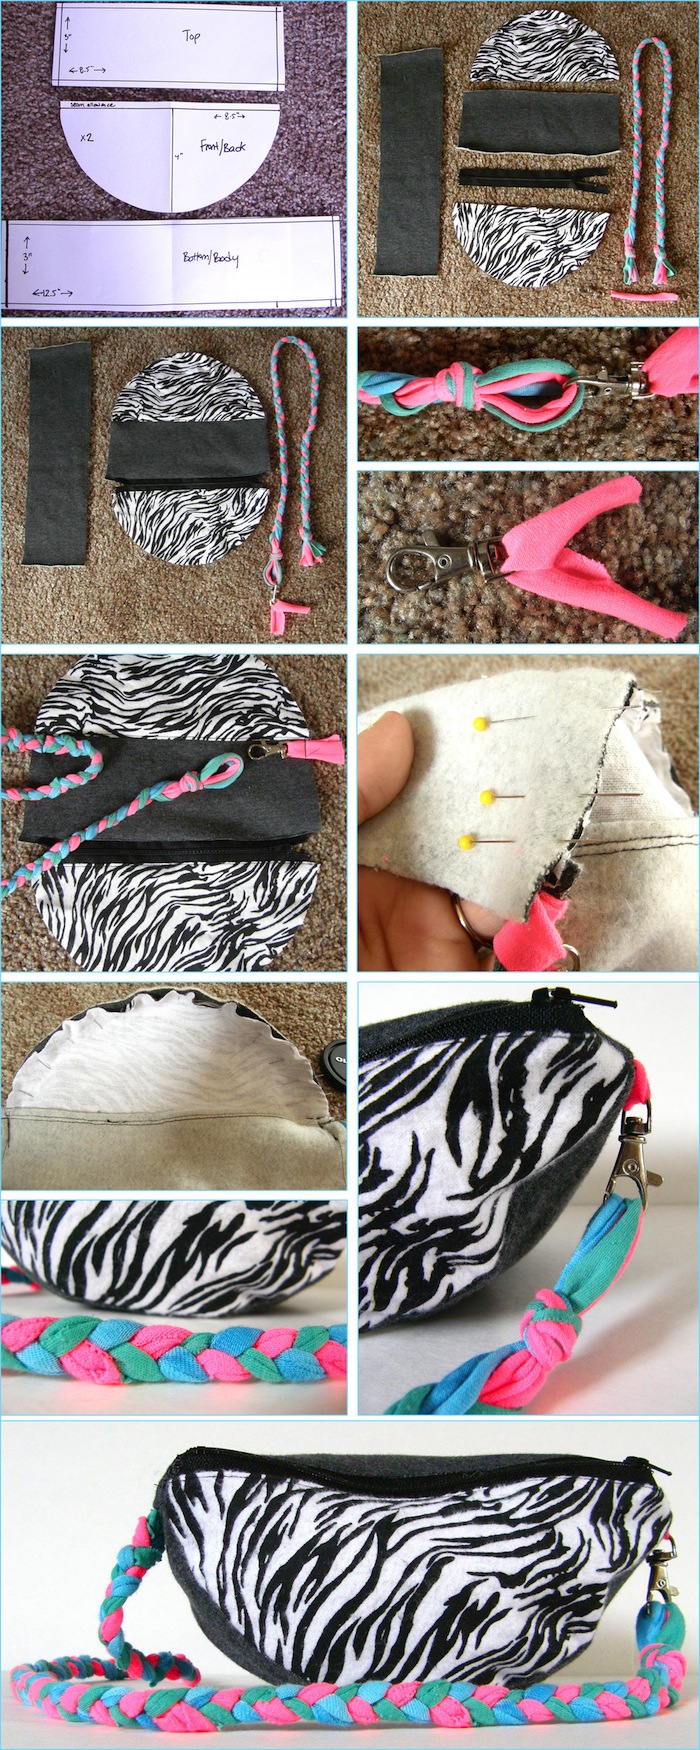
1.  Here are my pattern pieces.  They weren’t perfect but they fit pretty close together.  I wouldn’t add seam allowance if you make one, I had to trim it off once sewn together because I had too much excess.

2.  Cut out your pattern pieces and find something to use for the waistband.  You could use a necklace, an old belt, even a ribbon could work.  I made a very long braid with t shirt scraps.  (The hot pink is actually leftover from my previous tutorial.)  When I made my braid, I folded all of my strips in half so I would have a loop at the other end.

3.  Sew the two semi-circles to the small rectangle (gray top piece).  Insert the zipper between one semi circle edge and the matching edge of the short rectangle.  You’ll end up with a oval-ish shape.

4.  I used a hook from a broken necklace for the closure of my waist piece.

5.  If you use this method, cut out a 2 inch scrap of fabric and feed it through the loop side of the closure piece.

6.  Sew your waist pieces onto the oval shape you created.  NOTE:  I sewed mine on the wrong side and I had to seam rip them off and re-sew them because my fanny pack hung awkward.  Sew them on the opposite side (aka near the zipper).  Raw edges to the outside.  (see picture)

7.  Now I didn’t get a good picture and this is hard to explain, but you will need to attach the long (gray) rectangle piece to each of the semi circle rounded edges (zebra).  Sew right sides together with your waist (braid) pieces safely inside.

8.  After those two edges are sewn, sew the short sides (gray) to the short matching edges (gray too).  Make sure you unzip your zipper during this last step, so it is easier to turn right side out.

9.  Turn your fanny pack right side out, and your ending shape is a semi-cylinder fanny-pack.

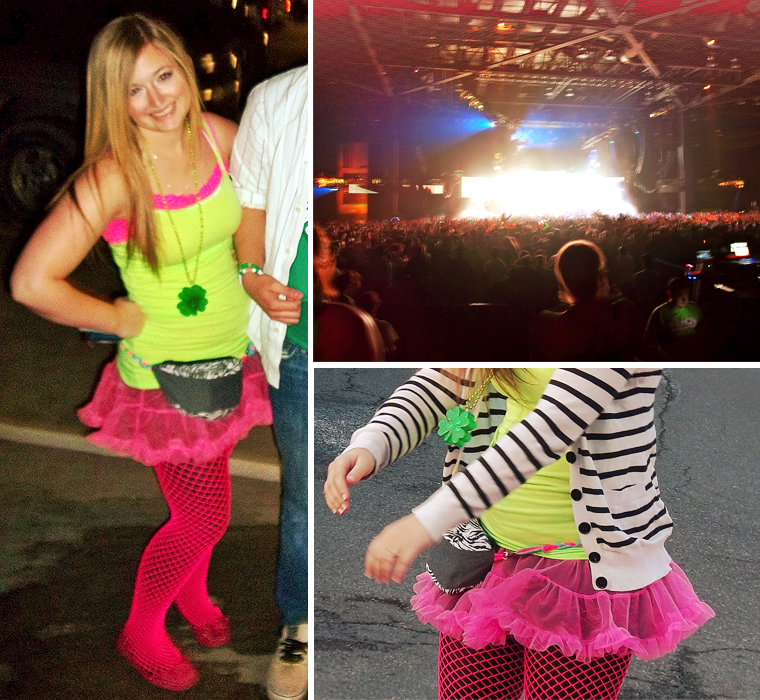
My fanny pack (even though I wore it in the front, lol) held up really well.  It lasted through the entire rave and I fit a smart phone, camera, wallet and pepper spray all in it just fine.

These are the only pics I have of it from the rave.  The bottom right picture is from a jumping picture fail. lol  I also wore two sets of nylons, which gave my legs the look of an optical illusion.