wood

Driftwood Jewelry Organizer

Driftwood Jewelry Organizer

Hello World,

I love the beach. Having sand between my toes, sun on my skin, and a beach bag full of found treasures makes me happy as a clam at high tide. Because I don’t live near an ocean, I collect rocks and driftwood instead of sea shells. (Fun Fact- I have never found a whole sand dollar, only bits and pieces. The Pacific Ocean is rough on those guys!)

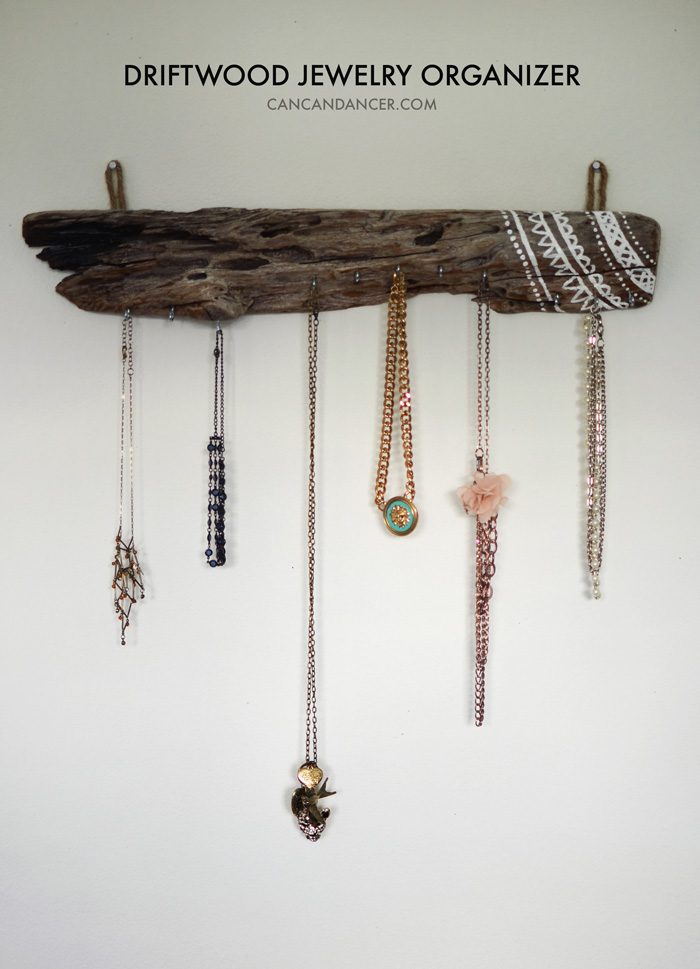
Back to my driftwood collection- I have long ones displayed in a vase, other interesting ones decorating my shelves, and then a pile of make-something-with-mes sitting outside. Well, I finally put a little dent in that pile, and made two jewelry organizers:

Driftwood Jewelry Organizer

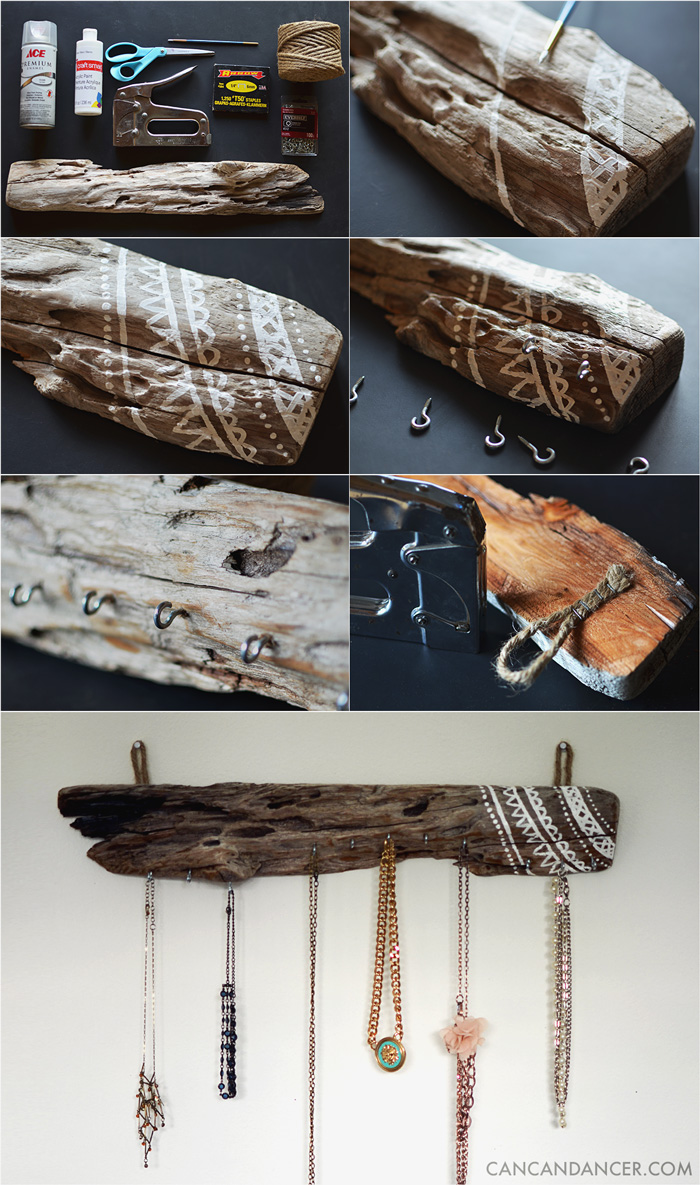
1. Gather your supplies: clean driftwood, screw-in hooks, a clear sealant (spray paint or polyurethane), acrylic paint, paint brush, stapler, staples, rope, and scissors.

2. If you want to decorate your driftwood, paint a design and allow it to dry.

3. Seal your driftwood and allow it to dry. This will make it darker and slightly glossy, but it will preserve it. (Note- be careful with woodworm. My piece of driftwood had shallow surface bites on it, but I kept it outside for months (away from other wood), where it could cook in the hot sun. When it doubt, throw it out or insecticide it.)

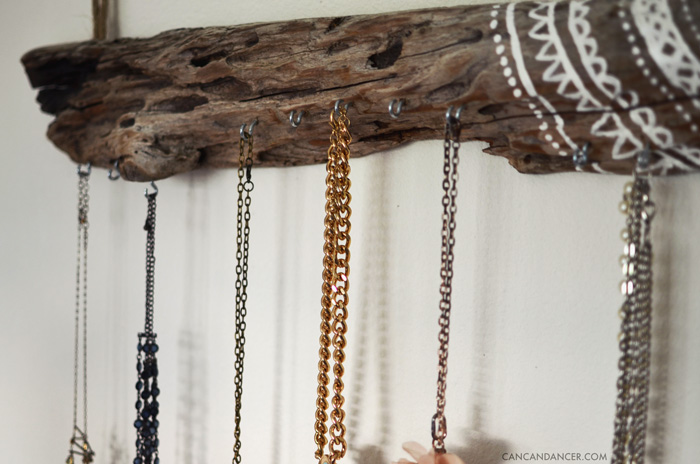
4. Screw your hooks into your wood. I followed the flow of my driftwood instead of placing them in a straight line.

5. Staple two short pieces of rope to the back of your wood- one on each end. This is how you will hang it. (You’ll probably notice that my wood is bright orange on the backside. This is because I sawed the back of it off, so it would be flush with the wall.)

6. Hang and enjoy!

driftwoodjewelry4

Driftwood Jewelry Organizer


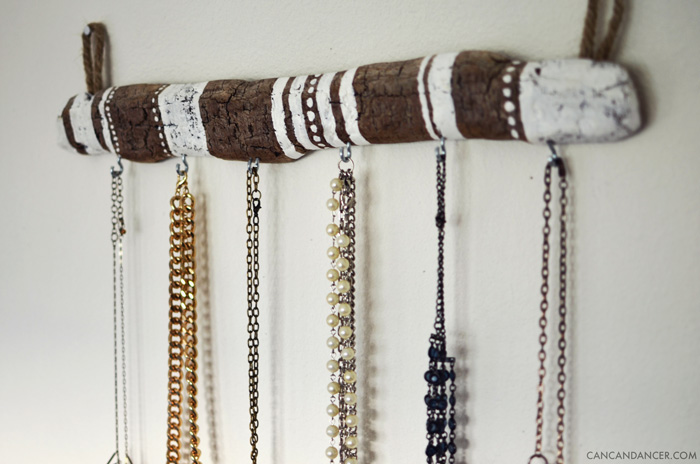
For my second jewelry organizer, I used a flatter piece of driftwood and painted a more basic design.

Happy Crafting!

DIY String Art

Hello World,

It seems that thrift shops have been raising their prices. I used to come home with a bag full of finds almost every time I went shopping, and now I tend to only buy one or two items. I was in luck last week though, when I found this wooden plaque for only $0.25!

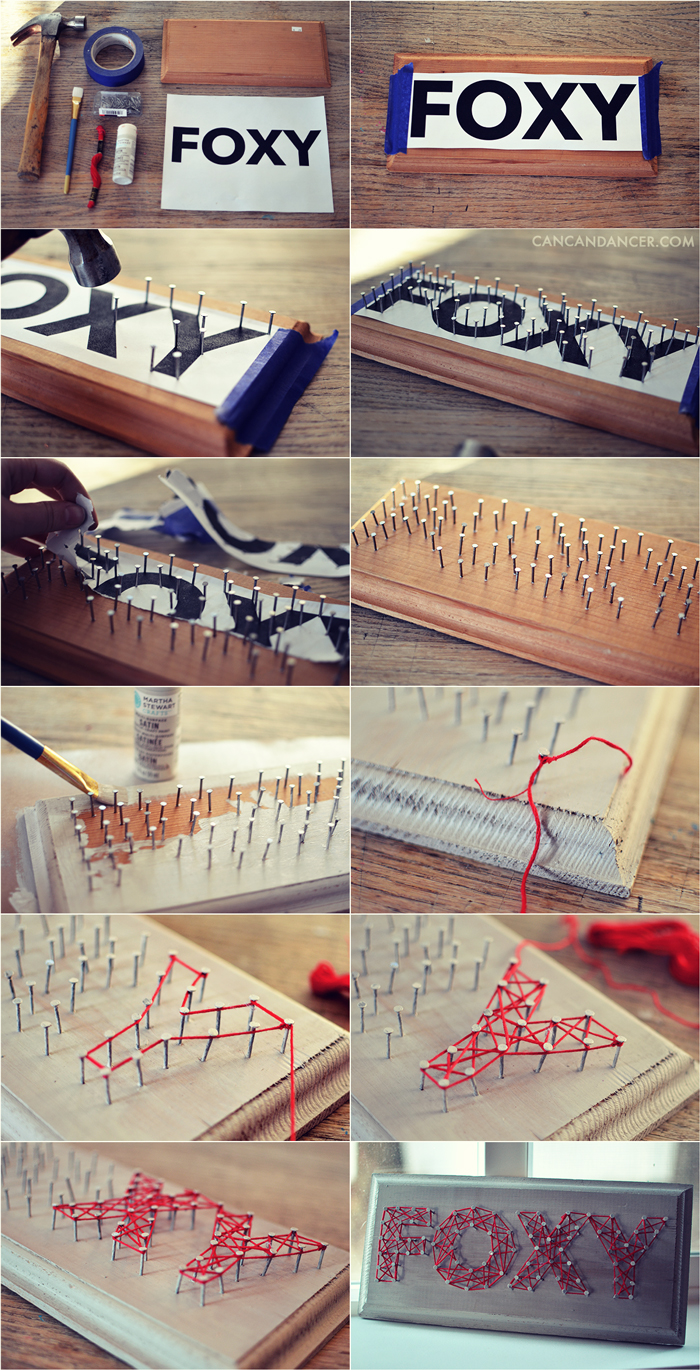
I originally was going to hand paint a design on it, but decided to switch it up and make some string art instead. Check out the tutorial below to see how to make your own:

stringart1

1.  Gather your supplies: wood, metal nails, hammer, embroidery floss, a printed design, tape, paint, and a paintbrush.

2.  I used Avenir ® Next Bold for my design and decreased the kerning around the ‘O.’ I printed it, trimmed my paper, and taped it down to my wood.

3.  I hammered nailed into the corners of my letters first. Make sure you hammer your nails deep enough into your wood. I had a few of mine come loose, and I had to teach them a lesson.

4.  After securing the corners of my letters, I eyeballed the spacing and added more nails to each letter.

5.  Remove your paper at this point.

6.  If you have any paper pieces leftover that are difficult to remove with your bare hands, use some tweezers to remove them.

7.  I painted my wood and nails at this point because I wanted them the same color. If you don’t care about your metal nails standing out, it would be better to paint your wood prior to hammering all your nails in place.

8.  Tie a knot around a corner nail. Twist the tail end of your thread around the rest of your thread to secure it.

9.  Outline each letter by working your thread around the outer edge of your nails.

10.  Fill in each letter by randomly wrapping your thread around the nails, pulling tight the entire time. Tie a knot around a nail once you are satisfied, and trim your tail end.

11.  Continue this process with the rest of your letters.

12. And tada, you have your own custom string art!

I love the shadows created by the strings on the wood!

Happy Crafting!