wedding

DIY Monogram Coasters

DIY Monogram Coasters

Hello World,

I have finally hit the age where many of my friends have started getting married and having children. As a recent college graduate, buying my to-be-married friends a kitchen aide mixer or something super impressive is slightly out of my budget.

I went to my first bridal shower this last weekend, and scoured the internet for advice on what to give. Most of the advice I came across said that the bridal shower gift is usually less expensive than the wedding gift, with an acceptable price range being $25 – $75. Gifts can come from the registry if you want to play it safe, or you can go against the grain and give something handmade.

At first I thought about giving a spa set with bath items and toiletries, but decided against that because Pinterest was flooded with similar images and I had this feeling someone else probably had done that idea. I then scrolled through the bridal/wedding registry and noticed they asked for many kitchen items like: bakeware, pots, cooking utensils, etc.

Being Italian, I finally decided on giving a Italian dinner date night basket. (I figured food was safe, because it will eventually be used. Maybe after the fit-into-the-dress diet, but still useful.) I also read that giving monogram gifts is bad luck. In my case though, both the bride and the grooms’ last names start with the same letter.

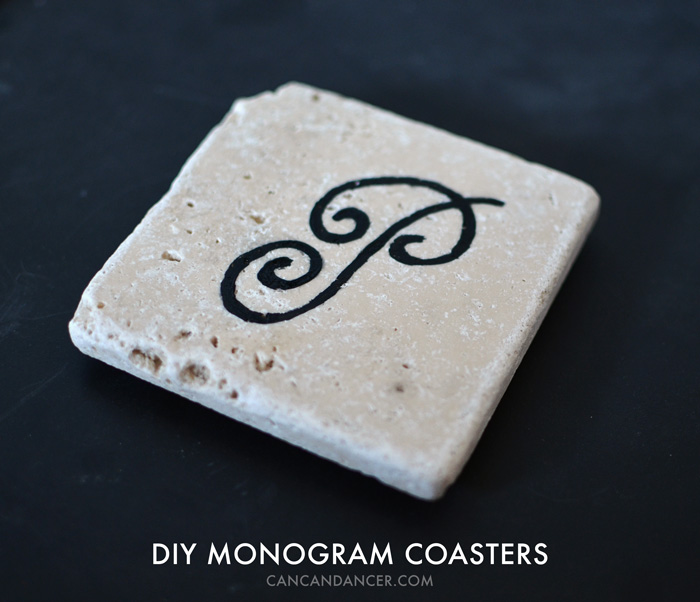
To add a dash of handmade to the basket, I made some simple coasters:

DIY Monogram Coasters

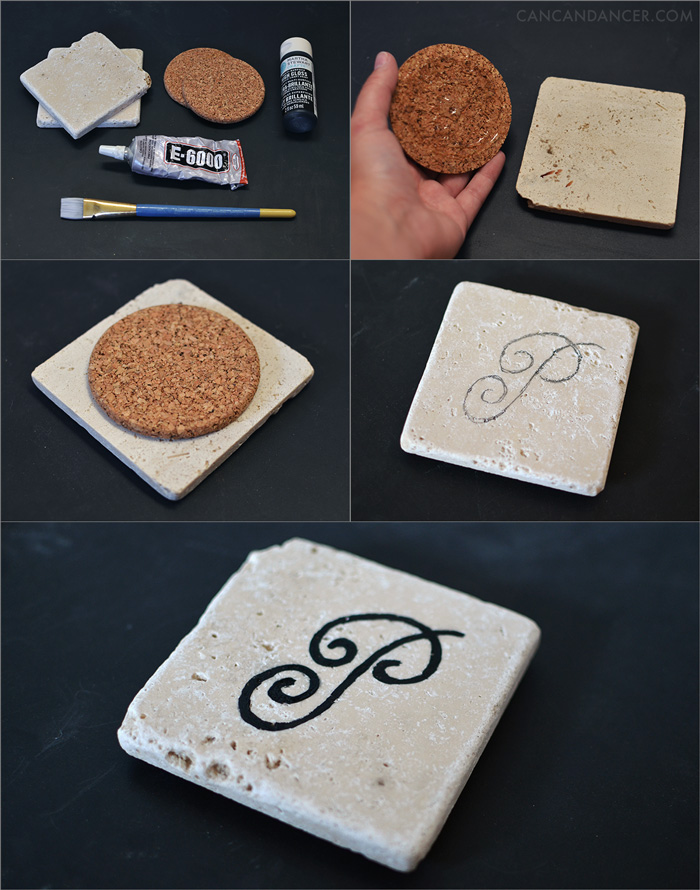
1. Gather your supplies: small tiles, cork or felt bases, strong glue, paint, a paintbrush, and a clear sealer (not pictured).

2. Apply glue to your cork base and attach to the bottom of your tile.

3. With a pencil, I sketched out a single-letter monogram.

4. Paint your design and allow to dry.

5. Repeat with your other coaster(s) and spray them with clear spray paint or apply Mod Podge to waterproof them.

Bridal Shower Present - Italian Dinner Date Night

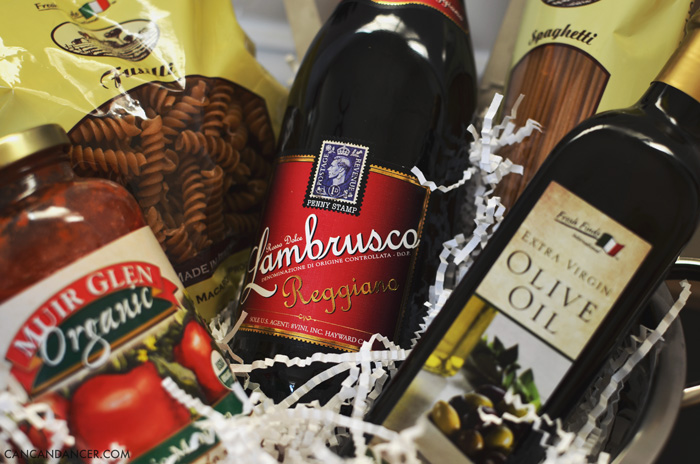
Here is the basket I gave. It included: a pasta scoop, a slotted spoon, organic pasta sauce, whole wheat pastas, extra virgin olive oil, a bottle of red wine, the coasters (not pictured because they were drying) and a metal colander.

Bridal Shower Present - Italian Dinner Date Night

The wine, pastas and extra virgin olive oil were also all made in Italy! I added crinkle paper shreds (from one of my Darby Smart boxes), wrapped the entire thing in cellophane, and topped it with a simple white bow.

This type of basket would also work as a house-warming or holiday gift.

Happy Crafting!

Rustic Summer Wedding

Hello World,

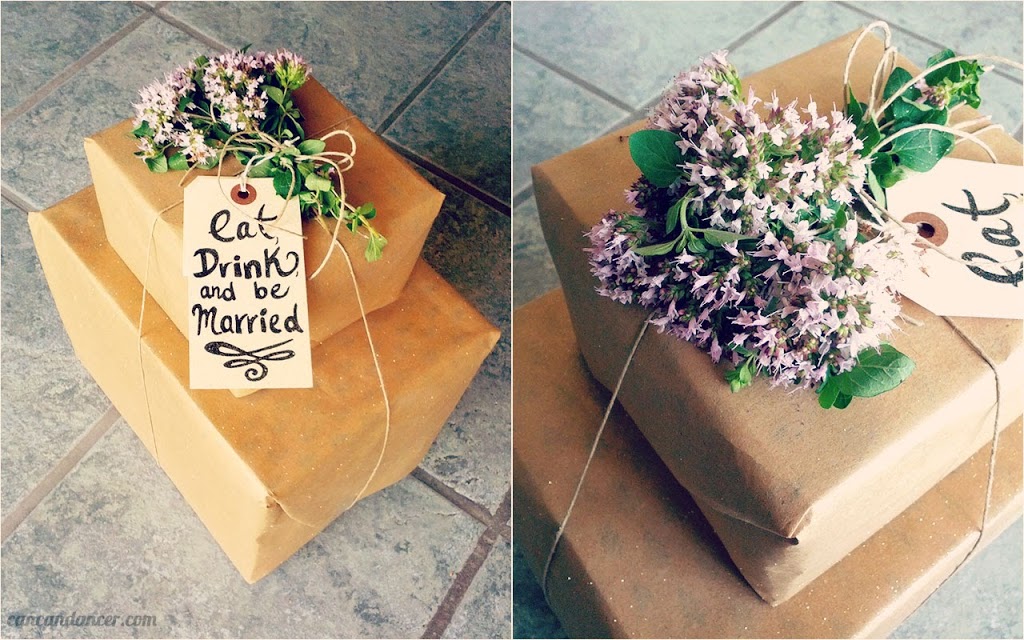
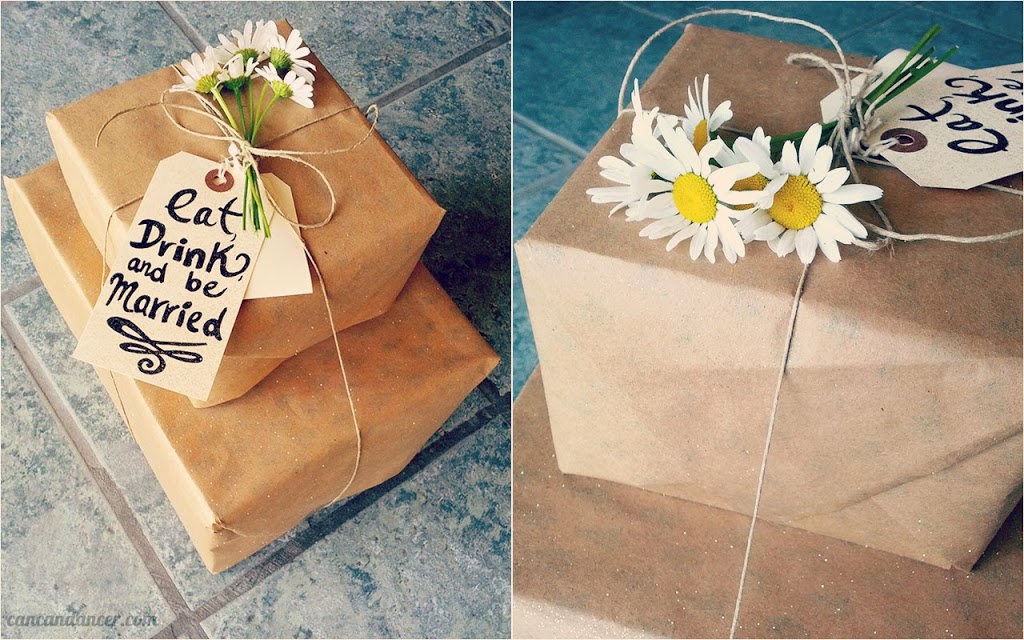
Last weekend, I went to a friend’s wedding in Northern Idaho. I wrapped their gift in kraft paper, hemp twine and topped with live herbs/flowers. I bought a pack of tags two years ago at Office Depot, and finally found a reason to use one!

I used a thin sharpie to draw out the “Eat, drink, and be married” design, and sprayed the entire package with gold glitter to add some minimalistic pizazz. At first I topped the gift with fresh oregano from my yard, but it wilted very quickly. Right before leaving for the wedding I switched the oregano out for wild daisies.

wedding1

wedding2

wedding3

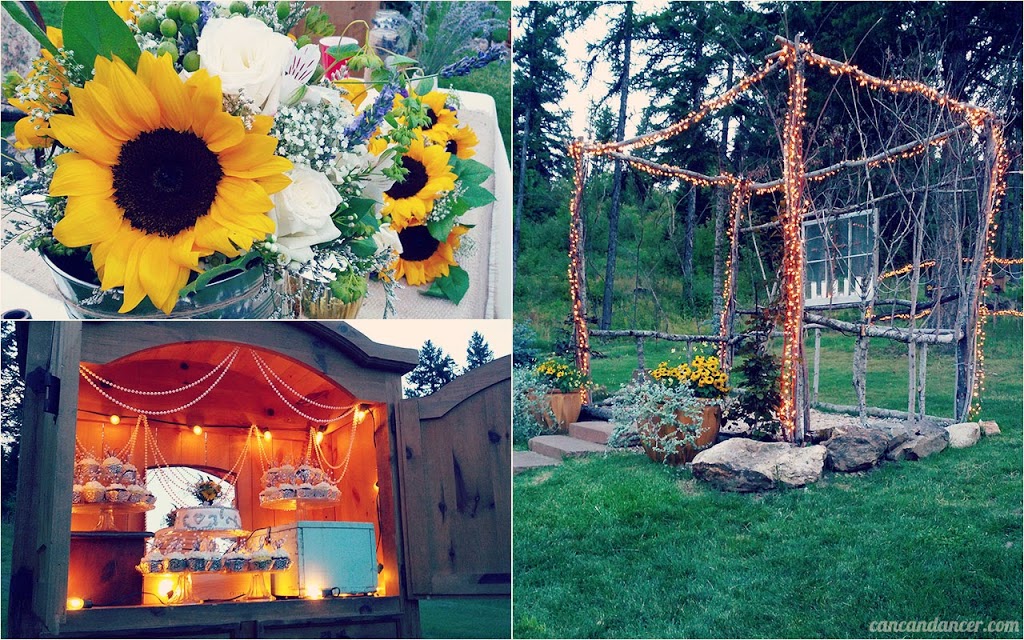
I only snapped a few photos of the wedding decorations before it got too dark. Luckily, I did snap a photo of cupcakes in the armoire; very clever.

Happy Crafting!

DIY Wedding Guest Book

Hello World,

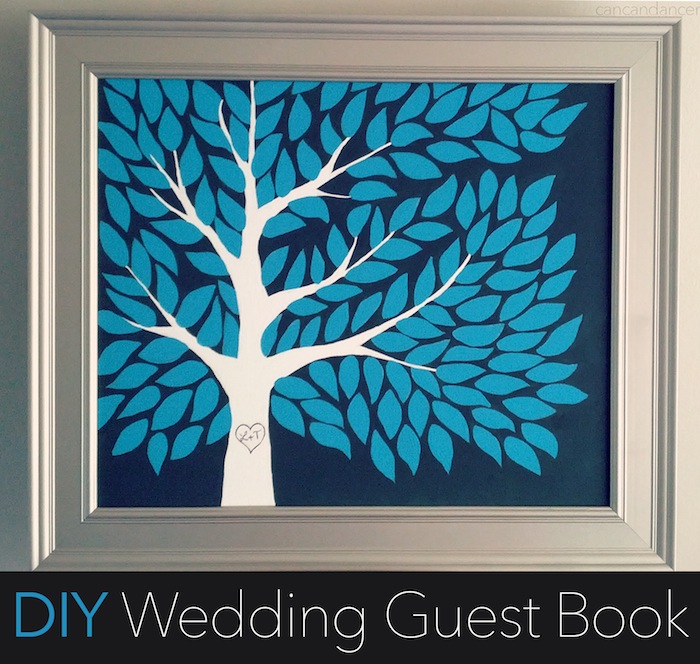
One of my friends was married last weekend, and she asked me if I would make her a guest book. She wanted a non-traditional guestbook, where each guest can sign a leaf instead of a bookpage. After the wedding, it can become a piece of home decor.

For this project, you will need plenty of free time, patience, and a steady hand.

june-2-intro21

Check out how to make own below:

june-261

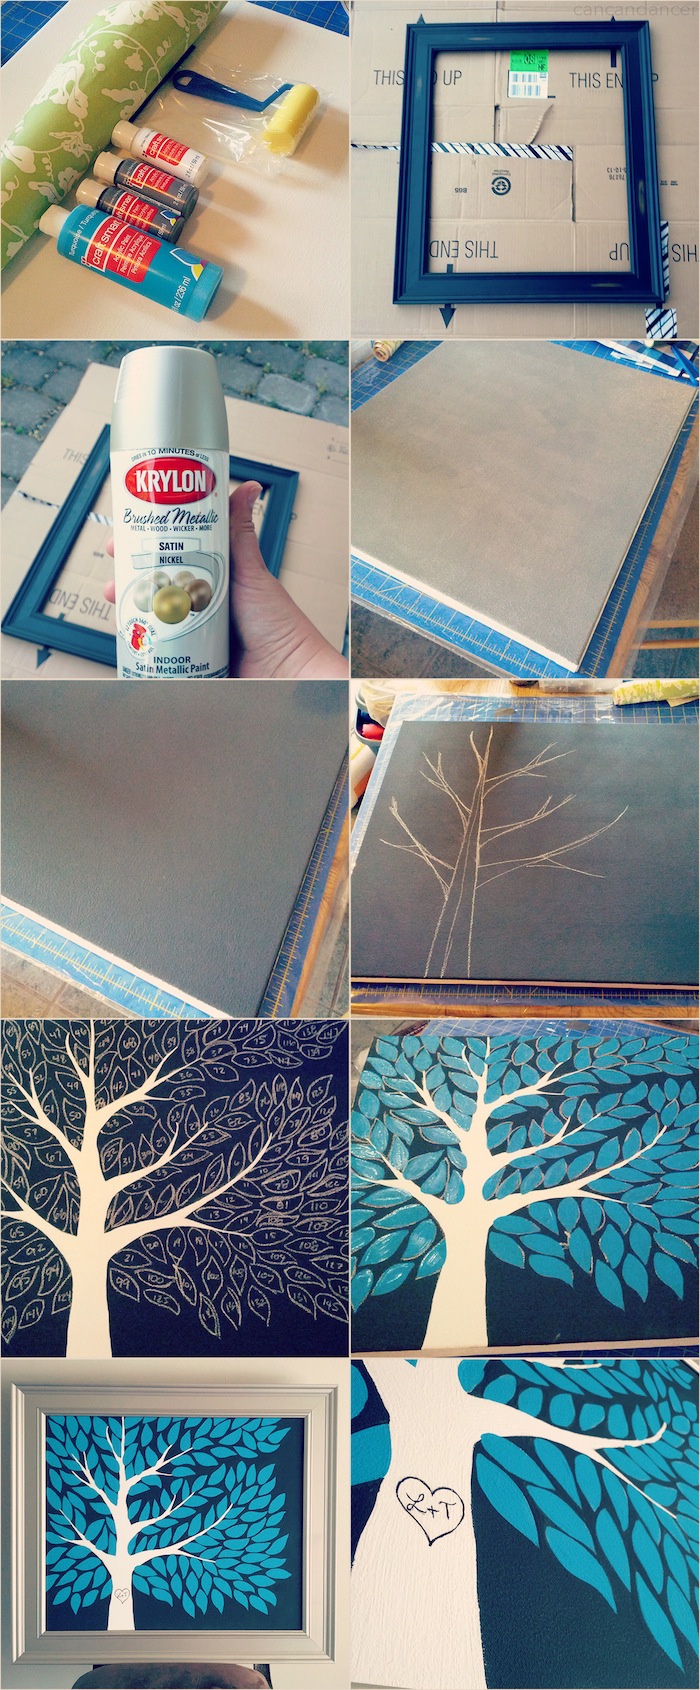
1.  Gather your supplies: canvas, frame, acrylic paint, paint brushes/rollers, and chalk/pencil. (I had contact paper, but ended up not using it to isolate areas.)

2.  Head outside or in a ventilated area, cover your work area to protect it from paint.

3.  I bought this frame for $30 (originally $60) at Michael’s. I couldn’t find a simple silver frame, so I bought some spray paint to cover it. I did 3 coats of spray paint, allowing my paint to dry between coats.

4.  Paint your canvas. I used a roller for the grey base to avoid visible brush strokes.

5.  After letting two coats of paint dry, I disliked how the grey seemed greenish. Instead, I made my own dark grey paint by mixing generic black and white paints from Michael’s together.

6.  Determine how large you want your tree to be, and sketch it out with your chalk/pencil.

7.  Paint in your tree body and draw out every single leaf. I numbered each of them to keep track. I ended up with around 150 leaves once I was finished.

8.  Paint inside your leaves. I did two coats of blue paint. TIP: Completely cover your chalk/pencil marks when you paint your leaves. I thought I could just wipe the outlines away, but it removed my grey paint. I had to repaint around the edging of my leaves (which was time consuming).

9.  I added a small heart with their initials, to the tree trunk, with a thin sharpie. Then, frame your guest book.

10.  Tada! If you ship this, I recommend not procrastinating. My shipping cost just as much as the project did because I had to expedite it.

Happy Crafting!

P.S. The two other no-sew tutorials are still coming, I just wanted to blog about this first. 🙂