stud

Make Your Own Constellation Art

starsintro

Hello World,

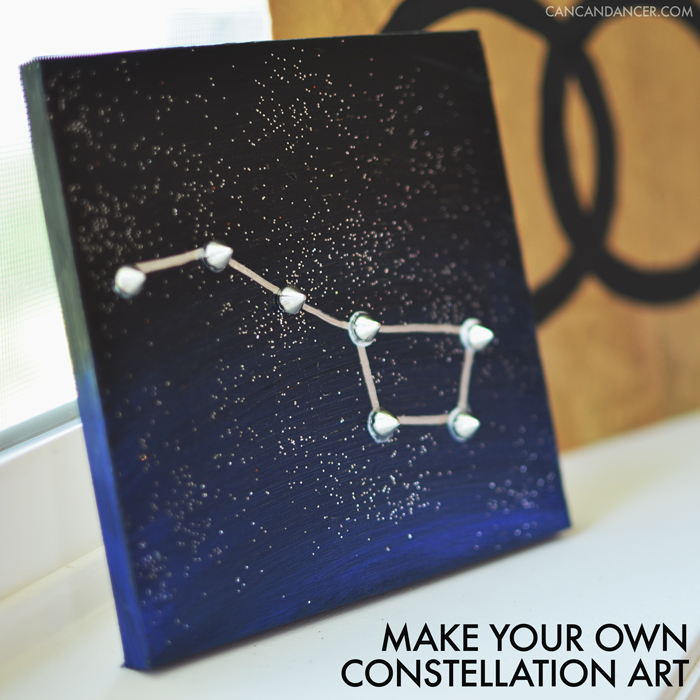
It’s no secret I love anything outer space related and stargazing. Before I discovered my passion for design, I actually wanted to be an astronomer or a physicist. I even was almost going to be a galaxy for Halloween this last year.  To bring a little of the night sky into my home, I DIY-ed some simple wall decor featuring one of my favorite constellations- Ursa Major.

Check out the tutorial to make your own:

constellationart

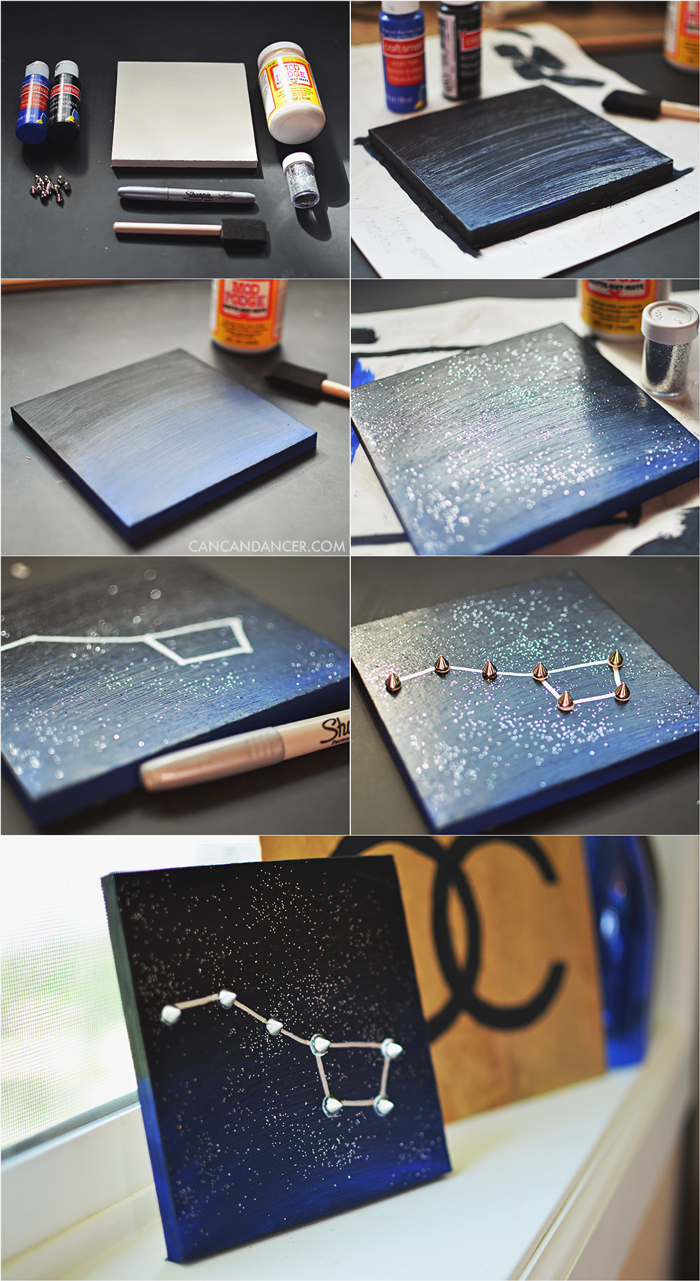
1. Gather your supplies: a small canvas, black and blue acrylic paints, Mod Podge, glitter, a Sharpie, studs, and a brush.

2. Paint your canvas. I painted black paint on the top half, and blue on the bottom half, and then blended them together to create a gradient night sky.

3. Allow paint to dry, and then apply a layer of Mod Podge.

4. Sprinkle glitter onto the wet Mod Podge and allow it to dry. Once dry, add a second layer of Mod Podge to seal the glitter.

5. Once all your Mod Podge is dried, draw out your favorite constellation with the Sharpie.

6. Dip the back of each stud in some Mod Podge, and place it on the canvas at each star location. Allow to dry and enjoy!

If I can get my hands on more small canvases, I think I’ll make a series of these and hang them up in a row. What is your favorite constellation?

Happy Crafting!

Glitter & Stud Your Phone Case

Hello World,

I have a Google Nexus, and finding cases for it can sometimes be a challenge. I decided to spruce up my plain case with two of my favorite things- glitter and studs. Check out the tutorial below for this super simple DIY project:

phone-case2

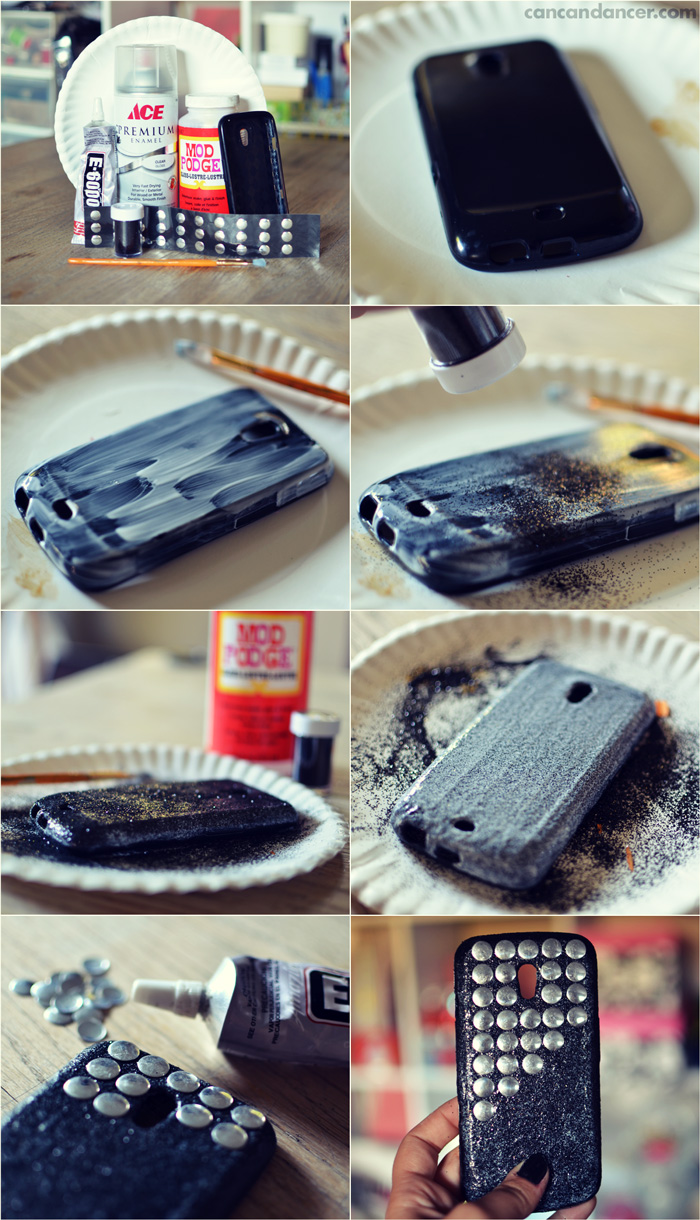
1. Gather your materials: a phone case, Mod Podge, glitter, clear spray paint, a paint or foam brush, flat-back studs, and E-6000.

2.  Place your phone case on top of a paper plate. I used a paper plate so that I could funnel my leftover glitter back into the container.

3.  Apply your first layer of Mod Podge.

4.  Cover that baby with glitter.

5.  Allow to dry, then add another layer of Mod Podge.

6.  Add more glitter. I used black glitter on a black case so if I missed spots it wouldn’t be as noticeable.

7.  Allow to dry. Spray with clear spray paint to waterproof it.

8.  Glue on your studs (in a ventilated area). Mine were from a clearance bin at Michael’s and were meant to be ironed on… but they were only $0.50.

9.  Allow everything to dry overnight. In the last picture above, everything was still a little tacky because I was impatient.

Tada! You have a personalized case! Other DIY case ideas could be to use: images, scrapbook paper, rhinestones, etc. Once I find another cheap case for my phone, I really want to make one completely covered with pyramid studs.

Happy Crafting!