display

Driftwood Jewelry Organizer

Driftwood Jewelry Organizer

Hello World,

I love the beach. Having sand between my toes, sun on my skin, and a beach bag full of found treasures makes me happy as a clam at high tide. Because I don’t live near an ocean, I collect rocks and driftwood instead of sea shells. (Fun Fact- I have never found a whole sand dollar, only bits and pieces. The Pacific Ocean is rough on those guys!)

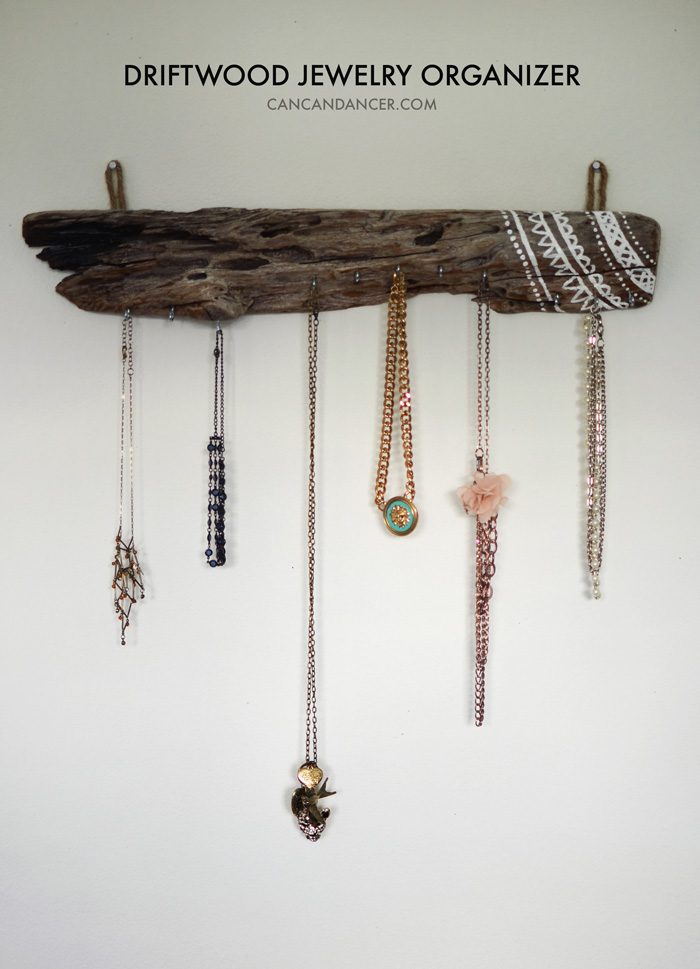
Back to my driftwood collection- I have long ones displayed in a vase, other interesting ones decorating my shelves, and then a pile of make-something-with-mes sitting outside. Well, I finally put a little dent in that pile, and made two jewelry organizers:

Driftwood Jewelry Organizer

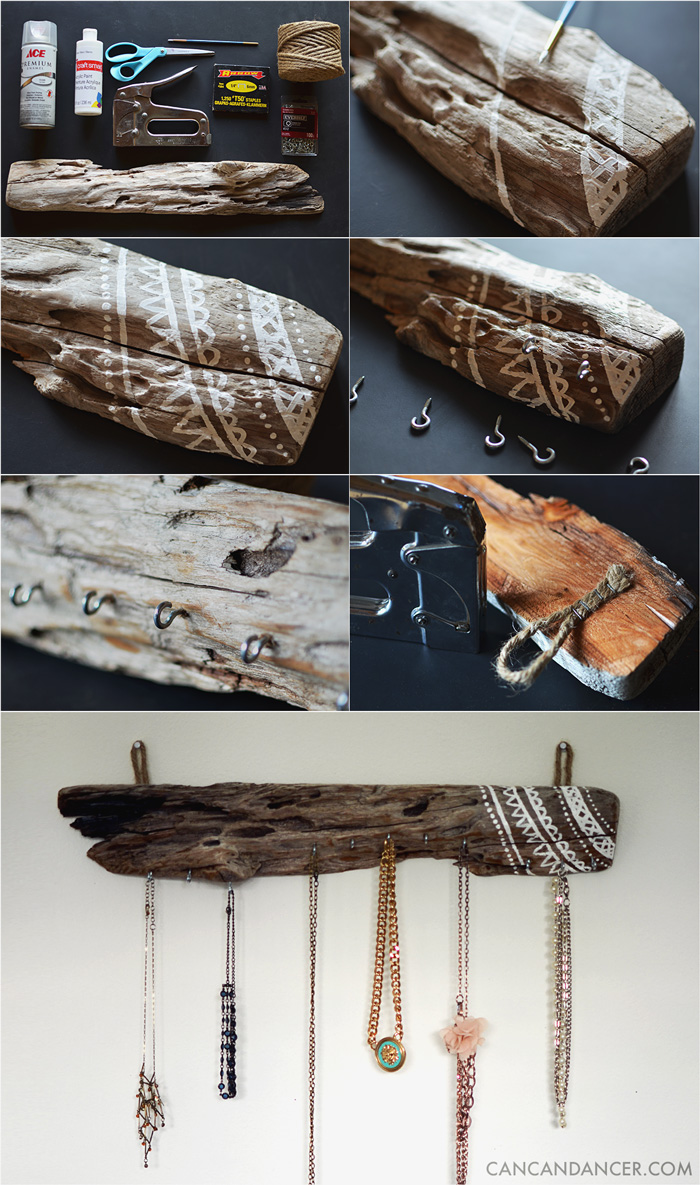
1. Gather your supplies: clean driftwood, screw-in hooks, a clear sealant (spray paint or polyurethane), acrylic paint, paint brush, stapler, staples, rope, and scissors.

2. If you want to decorate your driftwood, paint a design and allow it to dry.

3. Seal your driftwood and allow it to dry. This will make it darker and slightly glossy, but it will preserve it. (Note- be careful with woodworm. My piece of driftwood had shallow surface bites on it, but I kept it outside for months (away from other wood), where it could cook in the hot sun. When it doubt, throw it out or insecticide it.)

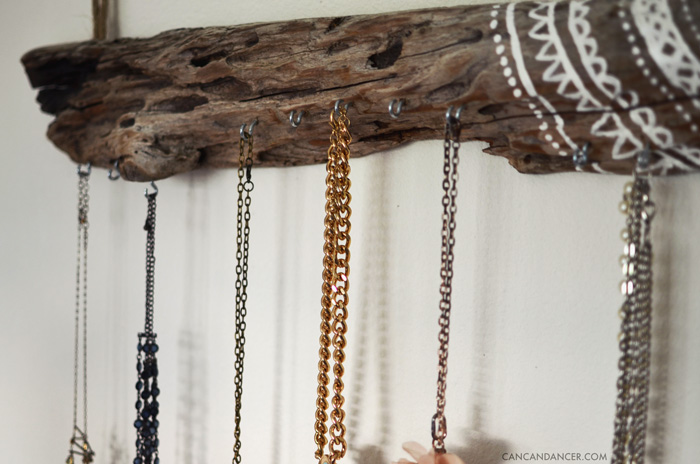
4. Screw your hooks into your wood. I followed the flow of my driftwood instead of placing them in a straight line.

5. Staple two short pieces of rope to the back of your wood- one on each end. This is how you will hang it. (You’ll probably notice that my wood is bright orange on the backside. This is because I sawed the back of it off, so it would be flush with the wall.)

6. Hang and enjoy!

driftwoodjewelry4

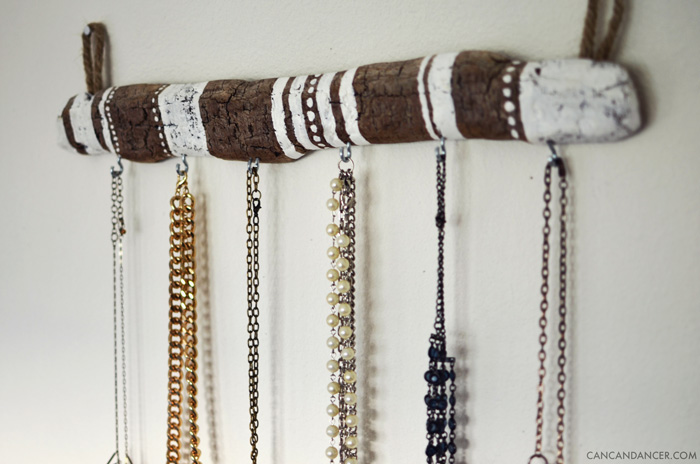
Driftwood Jewelry Organizer


For my second jewelry organizer, I used a flatter piece of driftwood and painted a more basic design.

Happy Crafting!

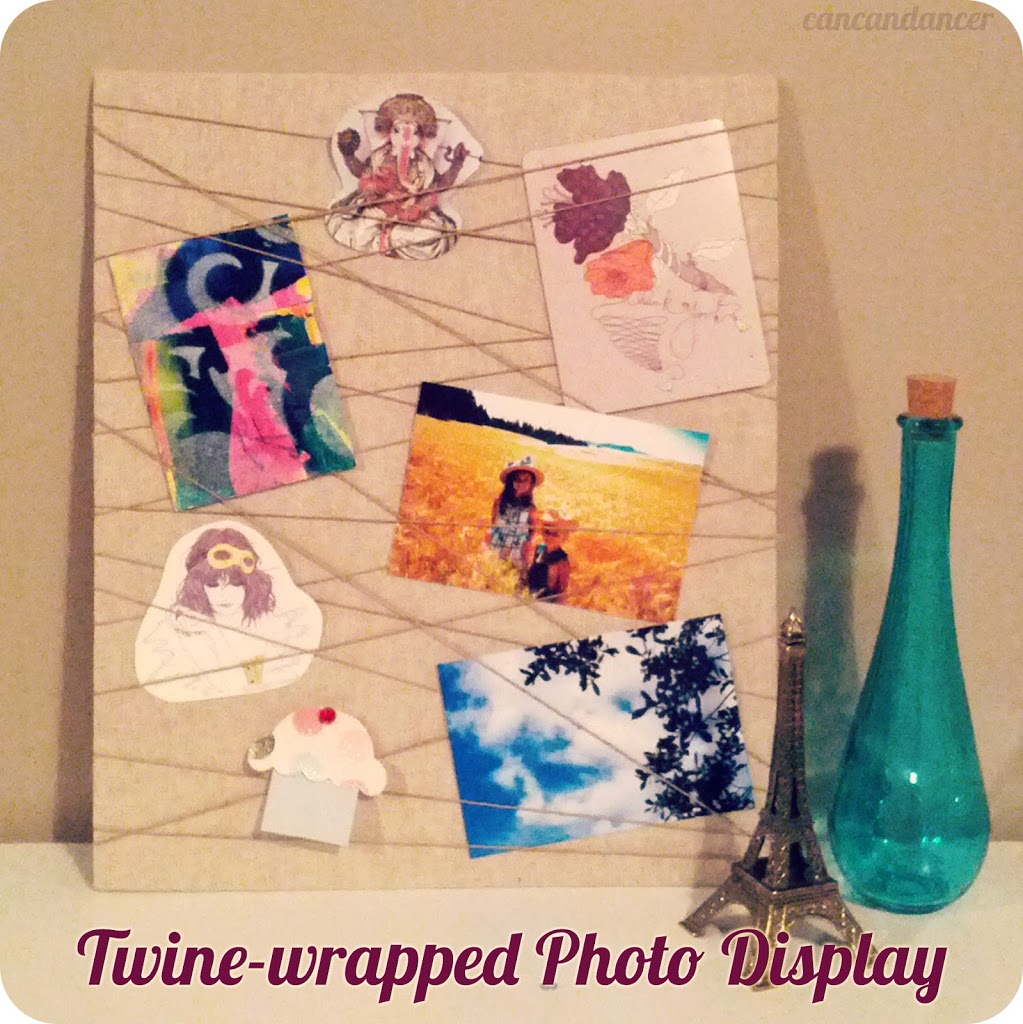
Twine-wrapped Photo Display

Hello World!

With my new internship, I have my own work area. It was looking rather bland (with just standard office supplies), so I decided to make my own photo display.

I made a symmetrical-style display in the past, but it was tough to get all the ribbon angles exactly the same. This time around, I decided to make one that didn’t need to be perfect and was more sporadic in the wrapping. I chose neutral fabric and twine so my desk doesn’t scream GIRL.

string

Check out below for the instructions:

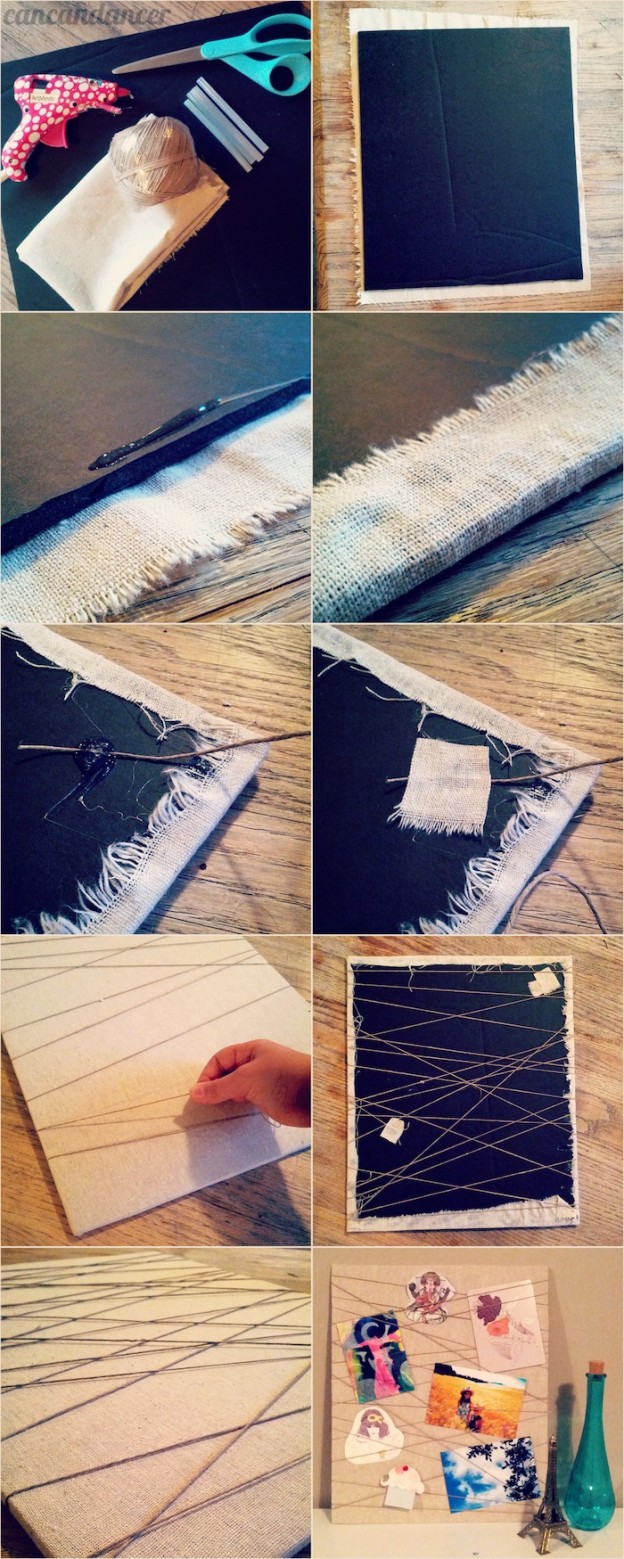
image-holder1-624x1559

1.  Gather your supplies: foam core, fabric, twine, scissors, and hot glue with sticks.

2.  Place your fabric (right side down) on your workspace, and place your foam core on top of it.

3.  Begin by placing a string of hot glue on your foam core.

4.  Wrap your fabric around your foam core and stick to the hot glue. (If you are worried about burning yourself, push the fabric into the glue with a pencil or chopstick.) Continue glueing and pressing your fabric until it is completely adhered.

5.  Place a pile of hot glue on the back side of your foam core, and place the tail end of your twine into it.

6.  Sandwich your twine and hot glue with a piece of scrap fabric. (This will help to better secure it, once the glue dries.)

7.  Begin wrapping your twine tightly around your foam core. Go in random directions, or form a pattern if you wish.

8.  Once you feel you have enough twine wrapped, repeat step 5 with the other tail end.

9. Allow everything to completely cool. Glue fabric to the back if you want to hide the sloppy backside.

10. Slide photos, cards, ect between your strings, and enjoy!

Happy crafting!