Author: Laura

DIY Cut-Off Tank

muscleteeintro2

Hello World,

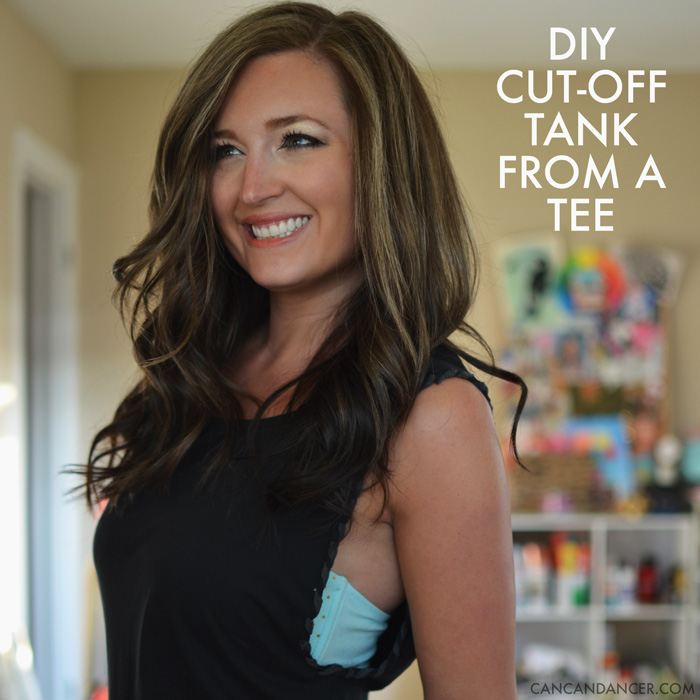
I recently went to Kohl’s and saw some cut-off tanks with weaved armholes for $20+. Instead of buying one, I decided to reconstruct a tee I never wear anymore. This project is a quick way to give an old shirt new life, and it doesn’t require any sewing! Check out the simple tutorial:

DIY Cut-Off Tank

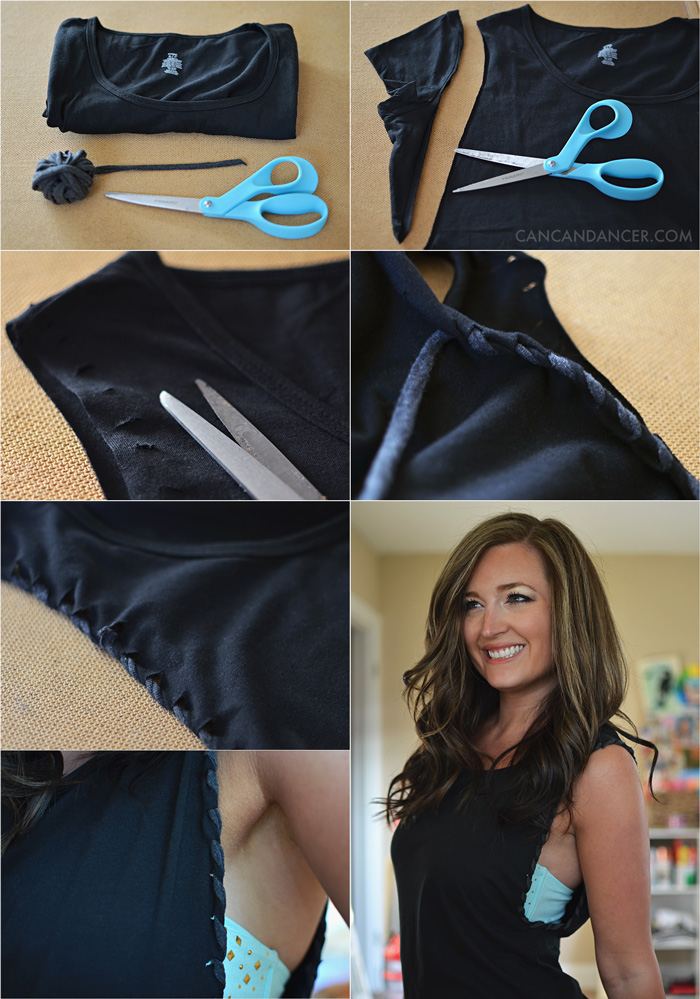
1. Gather your supplies: a t-shirt, scissors, and t-shirt yarn or scrap jersey cut into two long, stretched strips.

2. Cut the sleeves off of your shirt. For an exaggerated armhole, cut more of the shirt away.

3. Cut small, equally-spaced slices along the raw edge of each armhole, at least 0.25″ away from the edge.

4. Starting at the bottom of your arm hole, feed your t-shirt yarn each slice until you reach your starting point. Tie a knot with the other tail end, tails aiming towards the inside of your shirt.

5. Repeat with the other armhole and tada!

Pair it with your favorite bandeau, wear it as a work-out tank, or whatever floats your boat! Want to spruce it up even more? Customize it with a freezer-paper stencil or paint it with water-downed bleach.

Happy crafting!

(Can’t Eat Just One) Chocolate Chip Cookies

cookie1

Hello World,

This Thursday (May 15th) is National Chocolate Chip Day, and cookies are one of my favorite desserts. To celebrate this magnificent ingredient, I whipped up some ooey-gooey chocolate chip cookies! Check out the recipe below:

cookie2

Ingredients:

  • 1 cup softened butter
  • 1 cup white sugar
  • 1 cup brown sugar
  • 2 tsp vanilla extract
  • 2 eggs
  • 1 tsp baking soda
  • 3 cups flour
  • 2 cups semi-sweet chocolate chips

Preheat oven to 350°F. In a large mixing bowl, mix together everything except the flour and chocolate chips. Next, mix the flour into your mixture one cup at a time (this makes mixing by hand easier). Mix in the chocolate chips. Spoon dough onto ungreased cookie sheets, in two-tablespoon-ish sized scoops. Bake for 10 minutes, or until tops are golden.

Makes approximately 36 decent-sized cookies.

Make Your Own Constellation Art

starsintro

Hello World,

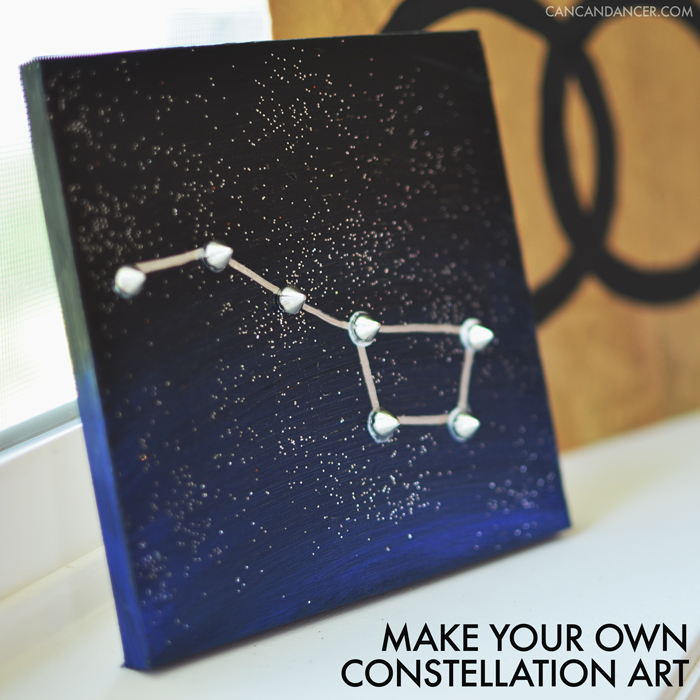
It’s no secret I love anything outer space related and stargazing. Before I discovered my passion for design, I actually wanted to be an astronomer or a physicist. I even was almost going to be a galaxy for Halloween this last year.  To bring a little of the night sky into my home, I DIY-ed some simple wall decor featuring one of my favorite constellations- Ursa Major.

Check out the tutorial to make your own:

constellationart

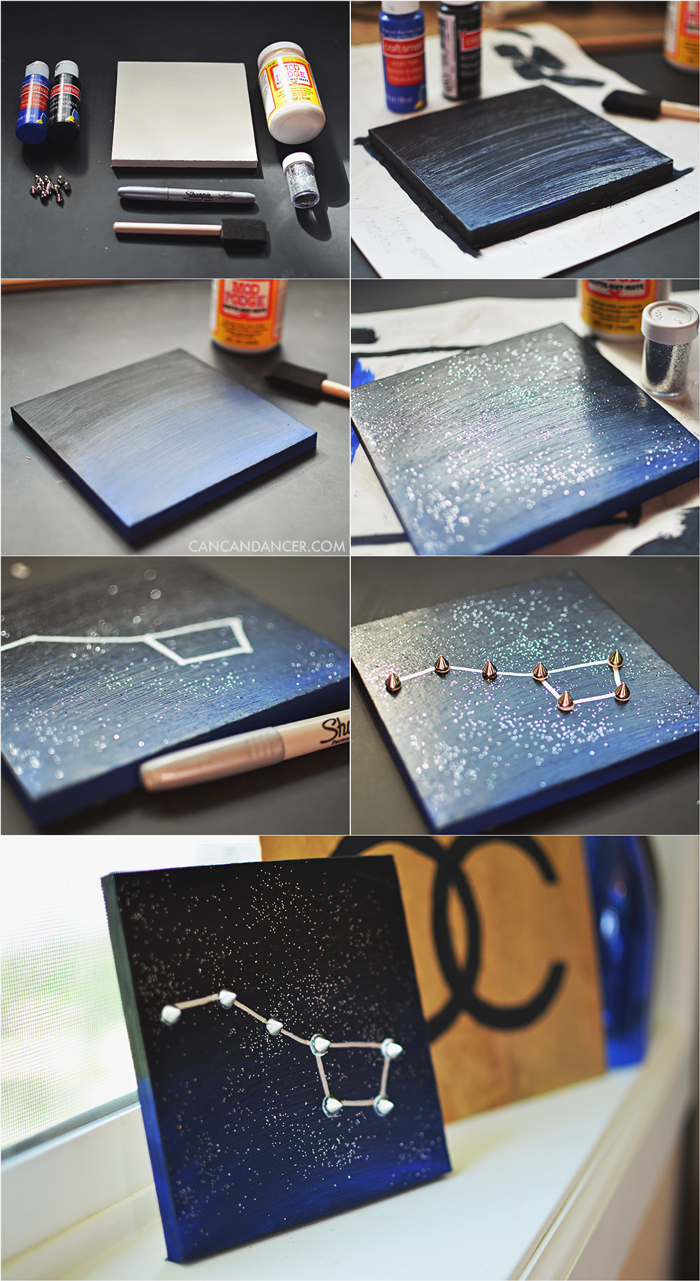
1. Gather your supplies: a small canvas, black and blue acrylic paints, Mod Podge, glitter, a Sharpie, studs, and a brush.

2. Paint your canvas. I painted black paint on the top half, and blue on the bottom half, and then blended them together to create a gradient night sky.

3. Allow paint to dry, and then apply a layer of Mod Podge.

4. Sprinkle glitter onto the wet Mod Podge and allow it to dry. Once dry, add a second layer of Mod Podge to seal the glitter.

5. Once all your Mod Podge is dried, draw out your favorite constellation with the Sharpie.

6. Dip the back of each stud in some Mod Podge, and place it on the canvas at each star location. Allow to dry and enjoy!

If I can get my hands on more small canvases, I think I’ll make a series of these and hang them up in a row. What is your favorite constellation?

Happy Crafting!