Author: Laura

Bacon wrapped dates (with goat cheese and almonds)

Hello World,

Last week for my birthday, a friend made these and I just had to share them with you. Due to their bacon-ness, they were gobbled up pretty quickly by my guests. They are really easy to make and only require four ingredients:
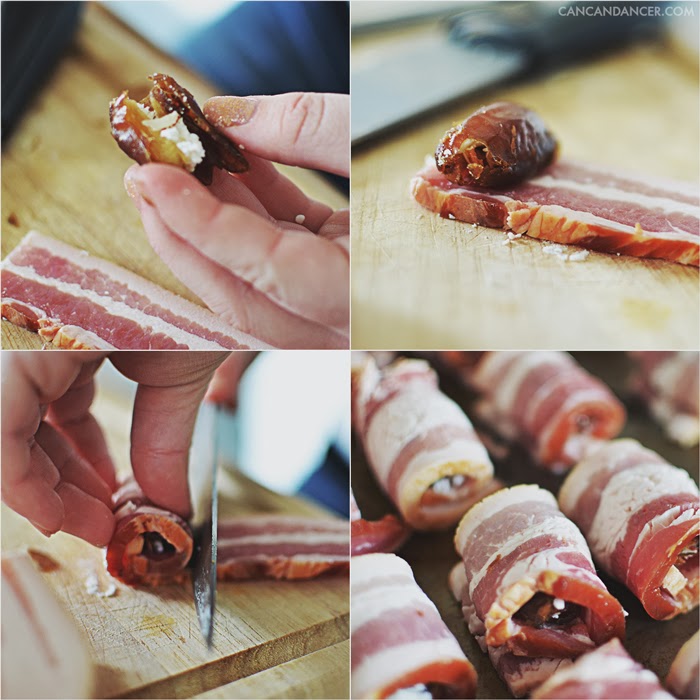
To make this finger food you will need: raw bacon, dried dates, goat cheese, and sliced almonds.

Start by butterflying your dates. Add goat cheese and a few sliced almonds to your open date. Next, fold the date closed, trapping the cheese and almonds inside it. Wrap the raw bacon around your filled date, and trim the bacon once the meat has overlapped. Place this roll overlap-side down on a baking sheet.

Repeat this process until you have filled an entire baking sheet. Broil them in the oven until the top side is crispy. Flip the rolls over and broil until the other side is crispy as well. Remove rolls from your baking sheet, dispose of the bacon grease properly, and enjoy!
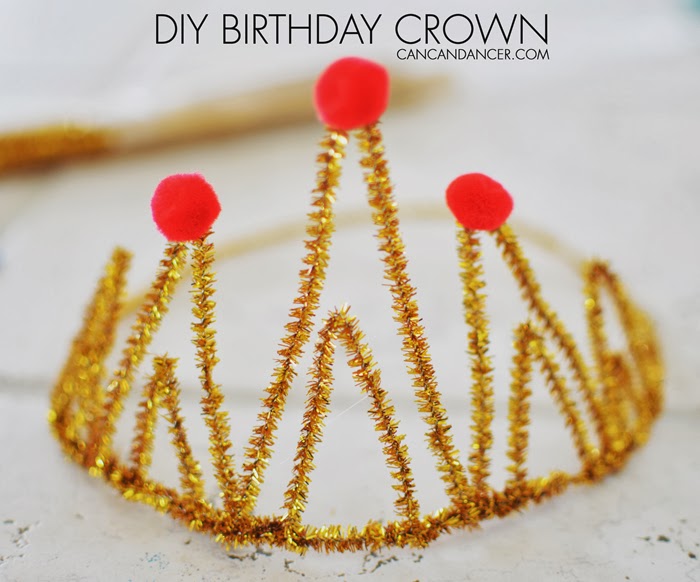
DIY Birthday Crown

Hello World,

Today is my 24th birthday! This last weekend I celebrated my birthday jointly with my friend Sam (who is two days older than me) and made us birthday crowns. I am a firm believer that age is just a number, and that you should never stifle your inner child.

When I was in junior high I remember looking at college graduates and thinking they were so old. Now that I am that age, I don’t feel like a total grown up, but junior high students do look young to me.

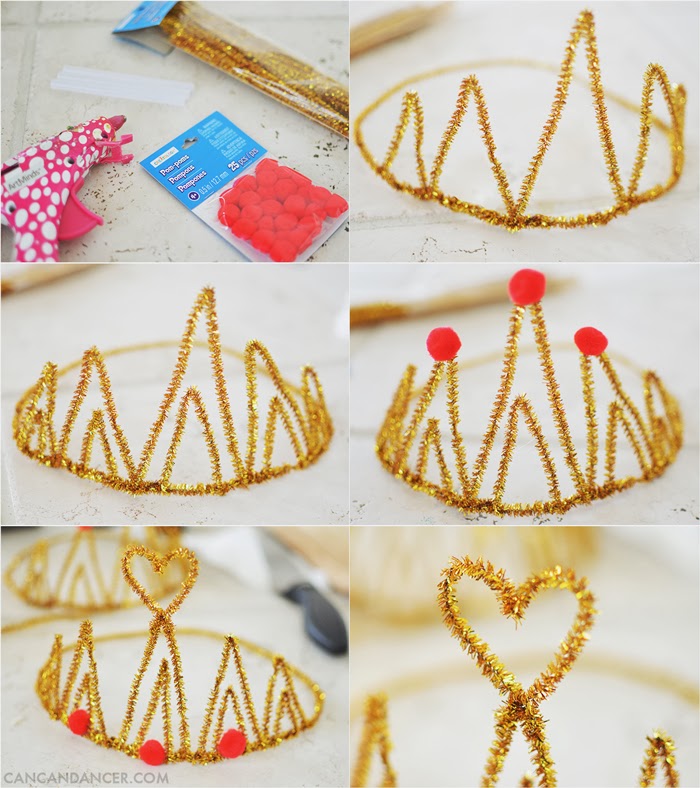
I decided to embrace my inner child and had a blast making birthday crowns with pipe cleaners and pom poms. Check out the very simple tutorial below:

1. Gather your supplies: pipe cleaners, pom poms, a hot glue gun, and glue sticks.

2. Start by creating the band for your crown. I used two pipe cleaners to create the base ring.

3. Wrap pipe cleaners around the base you created, forming triangle shapes.

4. I did a second tier of triangles to fill the crown out more. On my crown, I added a heart shape.

5. Glue pom poms on as your pretend gems, and enjoy!

I didn’t need booby pins to hold my crown on, even while dancing.

So stylish. 🙂

Happy Crafting!


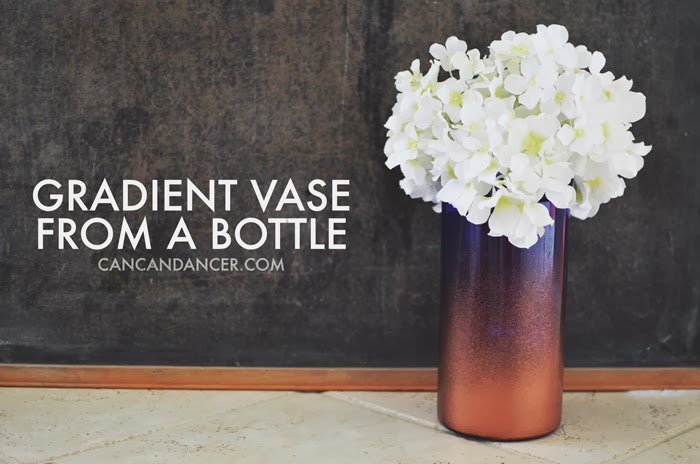
Gradient Vase from a Bottle

Hello World,

My favorite craft projects involve repurposed materials. I previously showed two techniques for sprucing up vases with spray paint. Check them out here.

Last summer I found a tutorial for cutting bottles with yarn, nail polish remover, and a lighter- and failed miserably. I blogged about my Pinterest fail, and asked for suggestions to succeed next time around. I decided to give the technique another try, and actually succeeded this time!

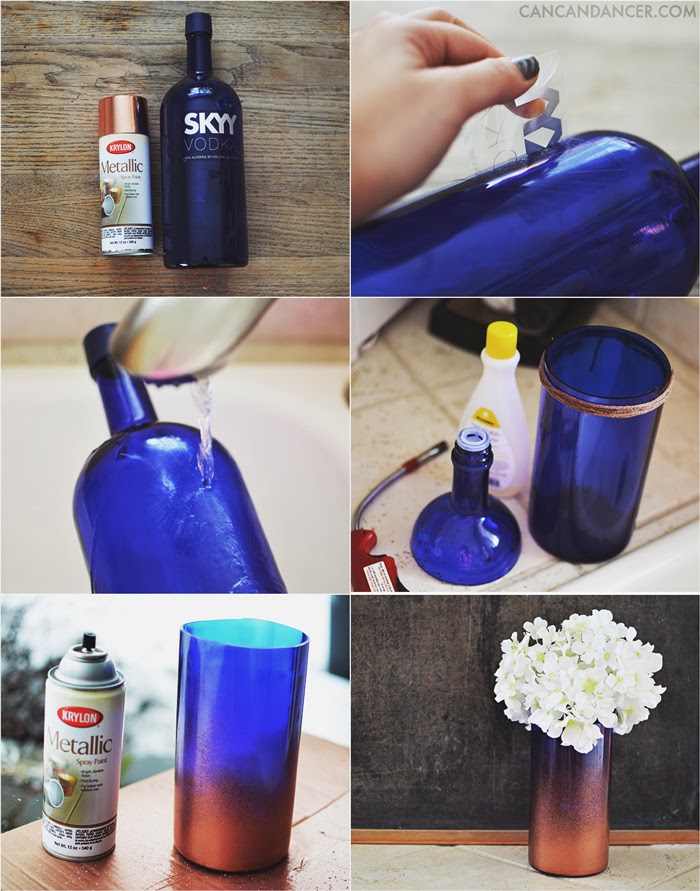
Check out how to make your own gradient vase below:

1. Gather your supplies: spray paint and a bottle. If you want to try cutting your vase you also will need: nail polish remover, yarn, sandpaper, and a lighter.

2. Remove all labels from your bottle.

3. Wash your bottle. If you have sticker residue, let the bottle soak in sudsy hot water. Load a scrubby with soap and then have at the sticker residue. Dry your bottle.

4. If you want to cut the top of your bottle check out this tutorial. From my experience, I rotated my bottle more quickly, and for more than 30 seconds. Dull down the sharp edges with sand paper. If you don’t want to risk accidentally lighting anything on fire, skip this step.

5. In a ventilated area, spray paint your bottle. For a gradient effect, spray more towards the bottle, and quickly work your way up the bottle.

6. Allow to dry. In my last photo, I placed the top of the bottle upside down inside the vase portion to help hold my fake flower stems in place.