jewelry

Driftwood Jewelry Organizer

Driftwood Jewelry Organizer

Hello World,

I love the beach. Having sand between my toes, sun on my skin, and a beach bag full of found treasures makes me happy as a clam at high tide. Because I don’t live near an ocean, I collect rocks and driftwood instead of sea shells. (Fun Fact- I have never found a whole sand dollar, only bits and pieces. The Pacific Ocean is rough on those guys!)

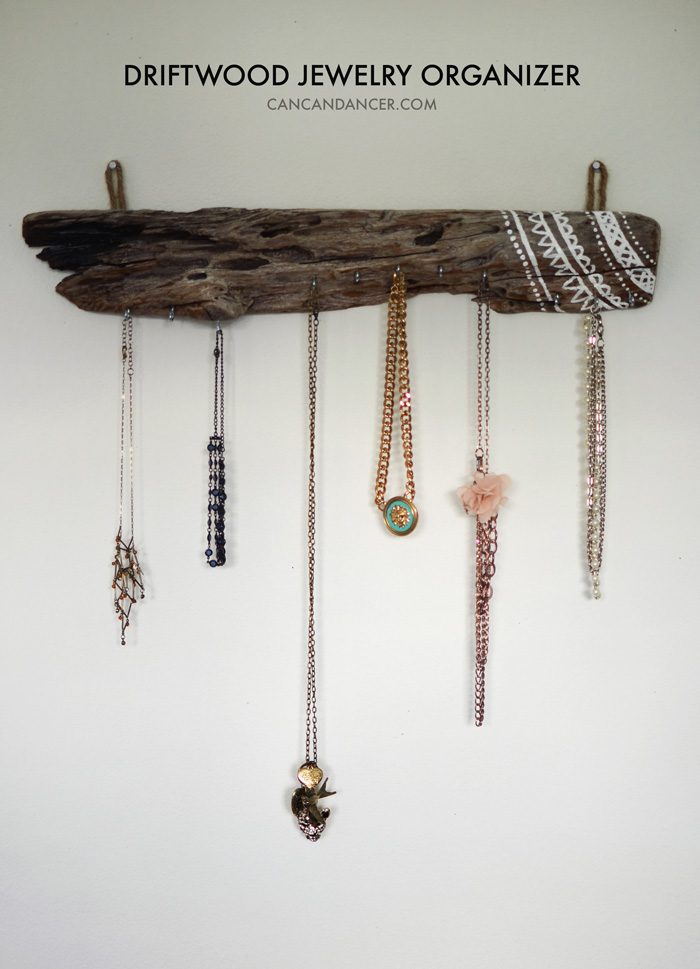
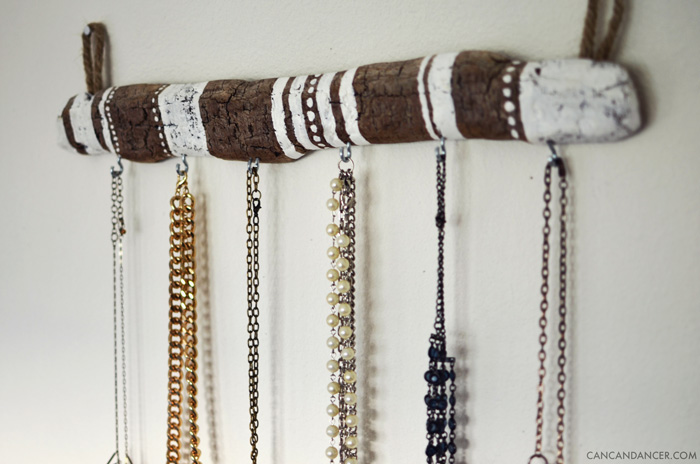
Back to my driftwood collection- I have long ones displayed in a vase, other interesting ones decorating my shelves, and then a pile of make-something-with-mes sitting outside. Well, I finally put a little dent in that pile, and made two jewelry organizers:

Driftwood Jewelry Organizer

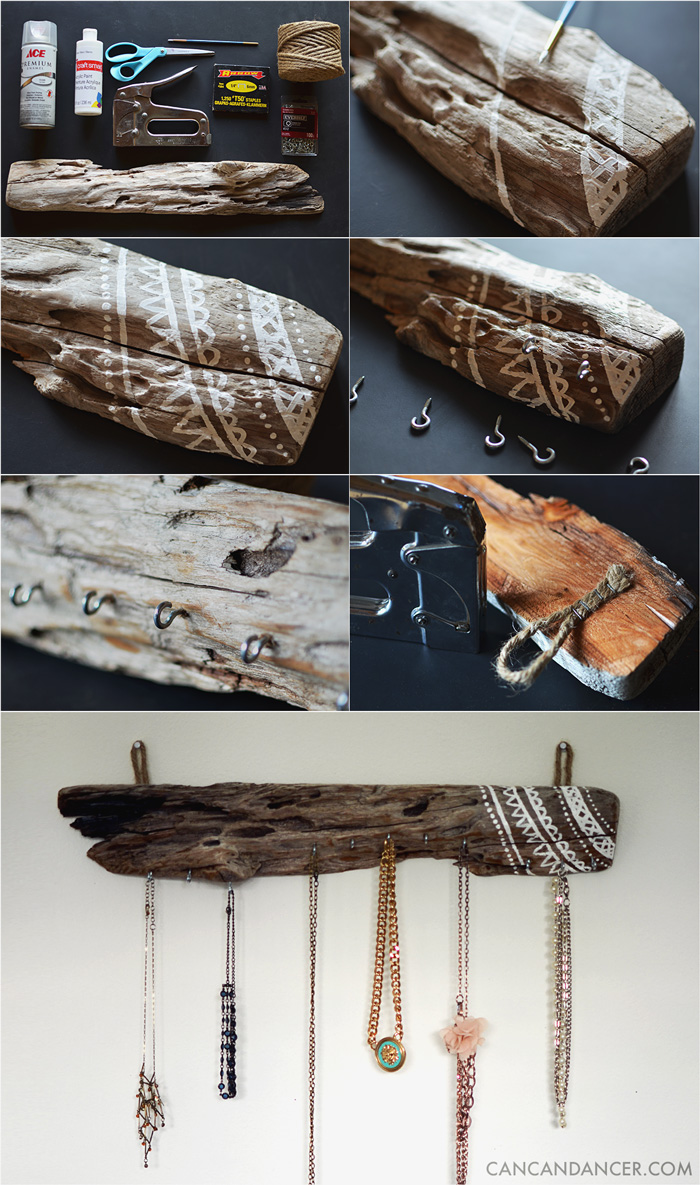
1. Gather your supplies: clean driftwood, screw-in hooks, a clear sealant (spray paint or polyurethane), acrylic paint, paint brush, stapler, staples, rope, and scissors.

2. If you want to decorate your driftwood, paint a design and allow it to dry.

3. Seal your driftwood and allow it to dry. This will make it darker and slightly glossy, but it will preserve it. (Note- be careful with woodworm. My piece of driftwood had shallow surface bites on it, but I kept it outside for months (away from other wood), where it could cook in the hot sun. When it doubt, throw it out or insecticide it.)

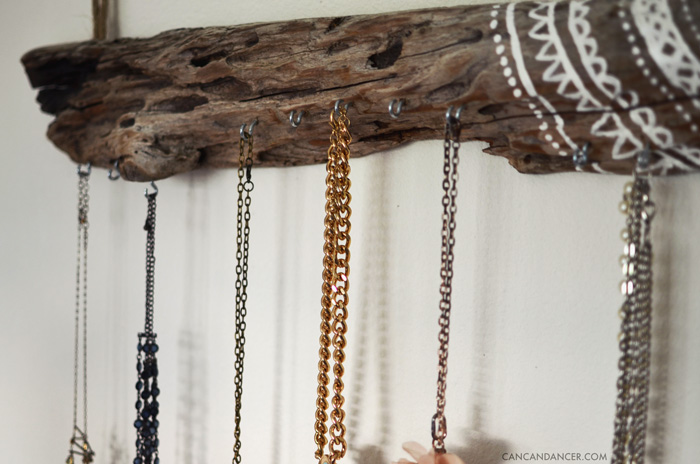
4. Screw your hooks into your wood. I followed the flow of my driftwood instead of placing them in a straight line.

5. Staple two short pieces of rope to the back of your wood- one on each end. This is how you will hang it. (You’ll probably notice that my wood is bright orange on the backside. This is because I sawed the back of it off, so it would be flush with the wall.)

6. Hang and enjoy!

driftwoodjewelry4

Driftwood Jewelry Organizer


For my second jewelry organizer, I used a flatter piece of driftwood and painted a more basic design.

Happy Crafting!

Rings, earrings, and so many more pretty things! (Now on Etsy)

Hello World,

Last week I sold my last listed ring on Etsy, and was a busy little bee this week making so many new goodies. I have expanded my store to sell other items besides zipper flowers, including: rings, bobby pins, earrings, and I just listed my first necklace!

I also bought my first can of chalkboard paint last week and have been painting up a storm. (Project post coming soon.) I repainted an old chalkboard and absolutely love using it as a background for my Etsy photos. My jewelry pieces just pop so well against the black!

Mint Chrysanthemum Ring with Adjustable Filigree Band – So pretty and bright for (almost) spring!
Bohemian Spirit Brass Necklace – I am OBSESSED with this necklace. Maybe it’s because of my inner gypsy.
Mint & White Chrysanthemum Bobby Pins – If I could work a top knot I would totally pair these with one.
Bright Purple Zipper Earrings – I made so many pairs of these in different neon colors. I think they are so fun!
Happy Crafting (and Etsy-ing!)

DIY Chain & Braid Necklace

Hello World,

When I go shopping at the mall, I don’t just look for items I can wear as is. I look through clearance sections for items that I can repurpose, update, or easily fix. I love it when I find a dress that has a broken strap or a missing button. I can fix that in no time and get a great deal.

Sometimes it can be a better deal to buy an item and dissect than to go buy the supplies at a craft store. Last week, I went to Rue 21 and found a heavy gold chain bracelet for only $2. The only problem was it was way too big for my wrist. I simply removed the lobster clasp and repurposed the chain to make a necklace:

braidnecklace1

1. Gather your supplies: chain, jewelry cord, scissors, and a ruler.

2. Cut six strands of jewelry cord. I made each of my cords 34 inches long.

3. Fold three of the cords in half and feed these loops through one end of your chain.

4. Bring the tail ends of the cords through the cord loop and pull tightly.

5. Due to the loop, you will have 6 pieces of cord to work with. You can either braid two small braids, or one thicker braid.

6. Tie a knot at the end and repeat this process for the other side of your necklace.

7. Trim the tail ends of your braids.

8. Wrap some jewelry cord around both braids, and tie knots to secure it. If you are worried about it coming undone, add some glue to secure it.

Happy Crafting!