jewelry

Going Stag Jewelry Holder

Hello World,

Guess what? I have another Darby Smart kit to show you today! The original kit was designed by Los Angeles-based designer, Joanna Reynolds. I think this kit is such a clever idea for a jewelry holder.

I live in Idaho, and most of my friends have actual animal heads mounted in their living rooms. I am not very outdoorsy, and have never been hunting. I know GASP. I went to a high school where the senior guys wore flannel cutoffs, thought mullets were cool, and would go hunting before school sometimes. It just was never my scene. (Plus, I don’t really like the taste of venison.)

So I thought this was a nice alternative to having an actual head mounted in my bedroom, and it can be completely customized to your own style!
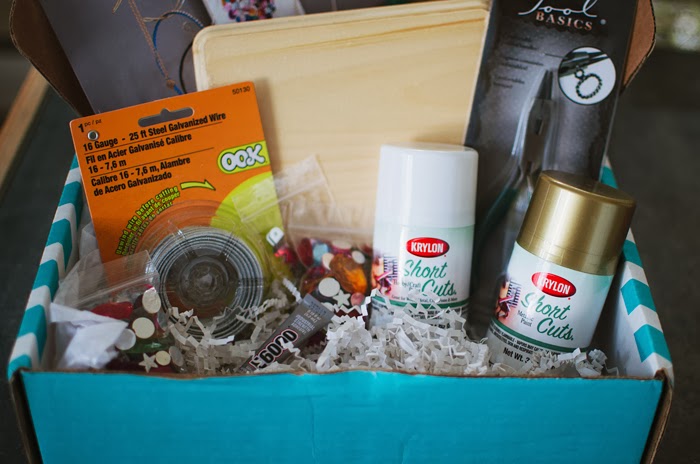
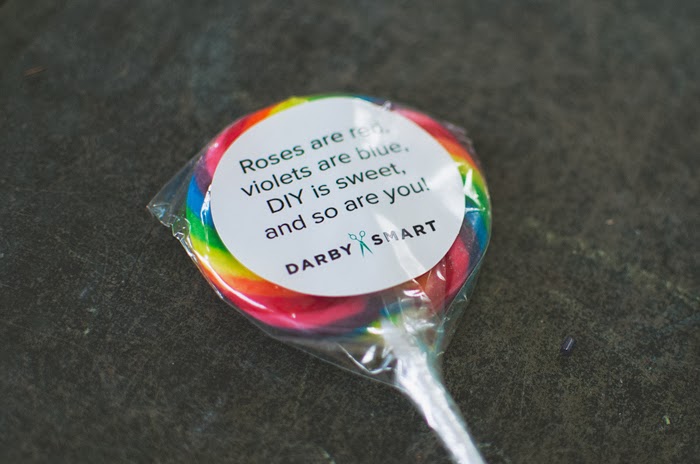
Darby Smart even included this super cute lollipop in the Valentine’s Day spirit!

The kit originally comes with two mini cans of spray paint, a bunch of gem stones, glue, wire, pliers, a wooden plaque, and a metal hanging hardware. Note: I used other supplies in my stash to make my version.
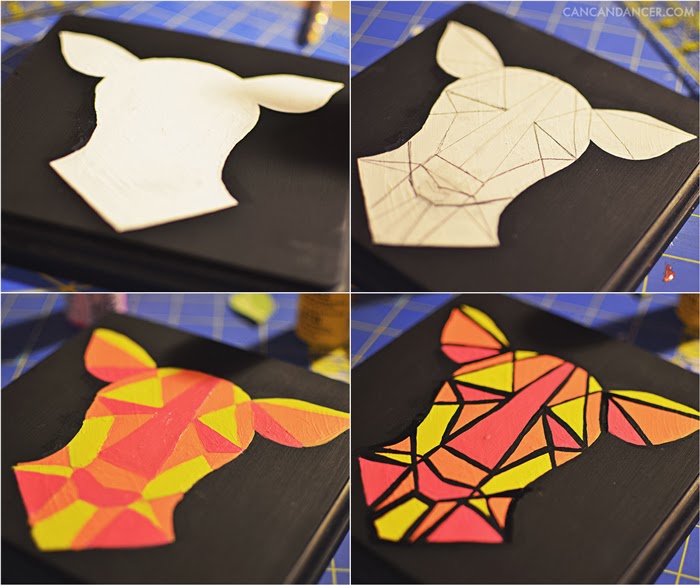
I originally painted the wooden plaque white and hand painted a realistic deer head on it. I was planning on gluing the gemstones onto the plaque as a necklace design on the deer, but I couldn’t get the ears right. In the middle of my perfectionist frustration, I painted the entire plaque black and went with a geometric design instead, in neon colors (using my own acrylic paint).

If you want to try this kit out, but want to paint a design, Darby Smart sells some acrylic paint colors separately too here. I didn’t end up using all the supplies from this kit, and will be saving the gem stones for another project.
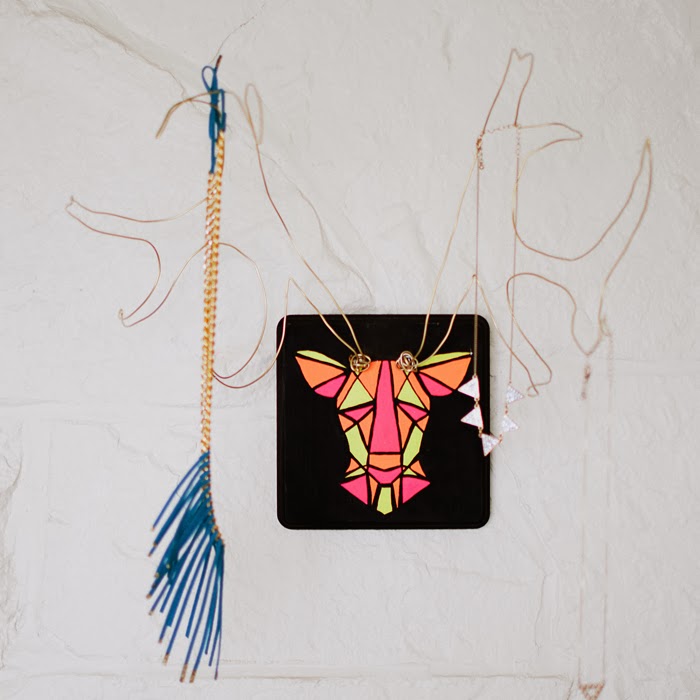
I really like the gold wire antlers with the brightly painted plaque. Does the fringe necklace above look familiar? That was my original prototype for my Darby Smart kit!
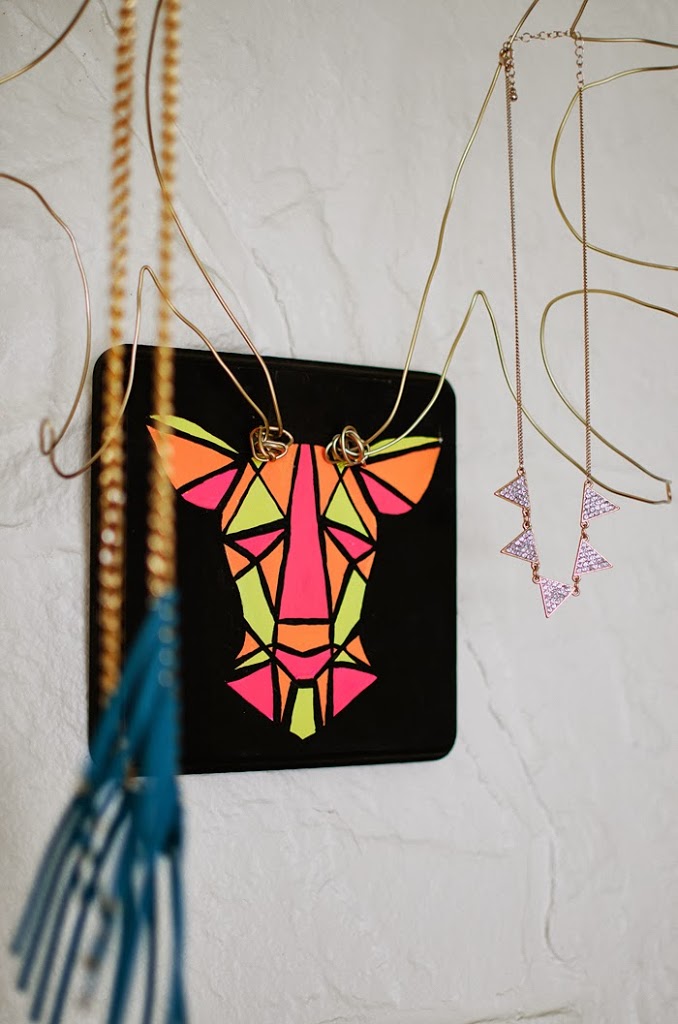
If you think this kit is a rad idea as well, you can check out the original gem-stone-tastic kit here. (I know I’ve said it a million times, but seriously sign up for their emails or follow them on Facebook, they send/post coupon codes periodically. Who doesn’t like a deal?)

Happy Crafting!

PS- Unlike my other kit posts, this was my first complimentary kit from Darby Smart and all opinions are my own.

Ladder Fringe Necklace

Hello World,

I love a good necklace. You can wear them layered with a scarf, or by themselves to spruce up an outfit. Check out the tutorial below to see how to make your own bohemian necklace:

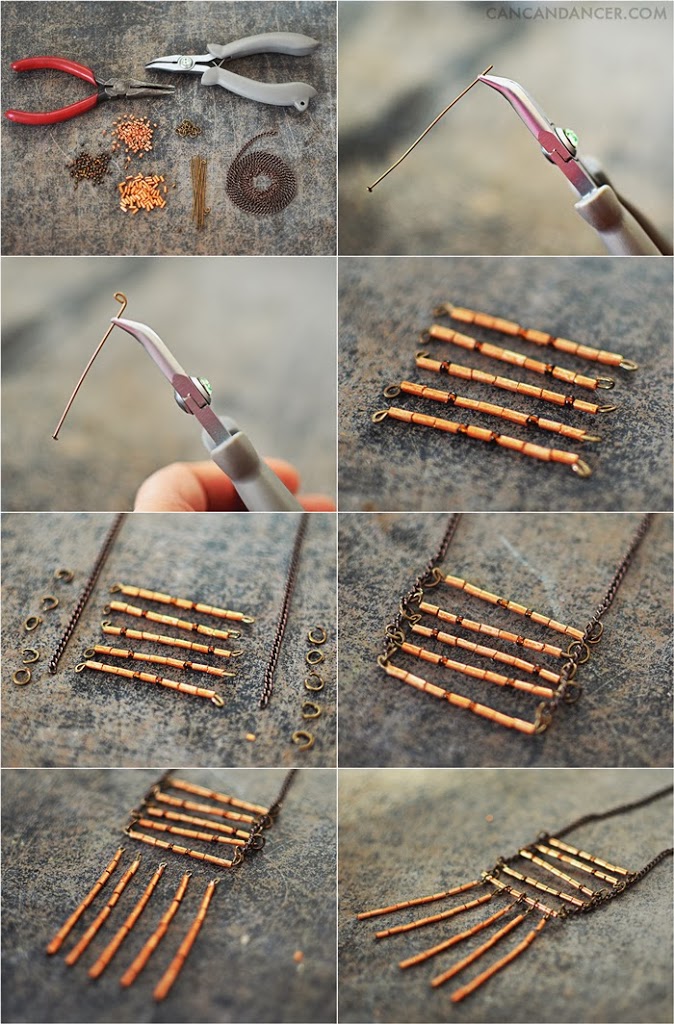
1. Gather your supplies: pliers, beading pins, beads, jump rings, and chain.

2. I didn’t have eye pins in my stash, so I instead made my own by bending the pin around the tip of a pair of pliers.

3. I then trimmed the flat head tip off the pin, and added my beads onto this end.

4. After adding all my beads onto a pin, I bent the other end into a loop, securing the beads.

5. Instead of closing the chain like a traditional necklace, instead line up your beads pins with each tail end of your chain.

6. Attach your beaded pins to the chain with jump rings using your pliers.

7. Create your bead fringes by adding beads onto flathead pins.

8. Attach your bead fringes to the end of your necklace with jump rings.

This is my first version. I want to create another with turquoise beads, longer pins, and a tapering fringe. (similar to my Darby Smart necklace)

Happy Crafting!

DIY Jewelry Display

Hello World,

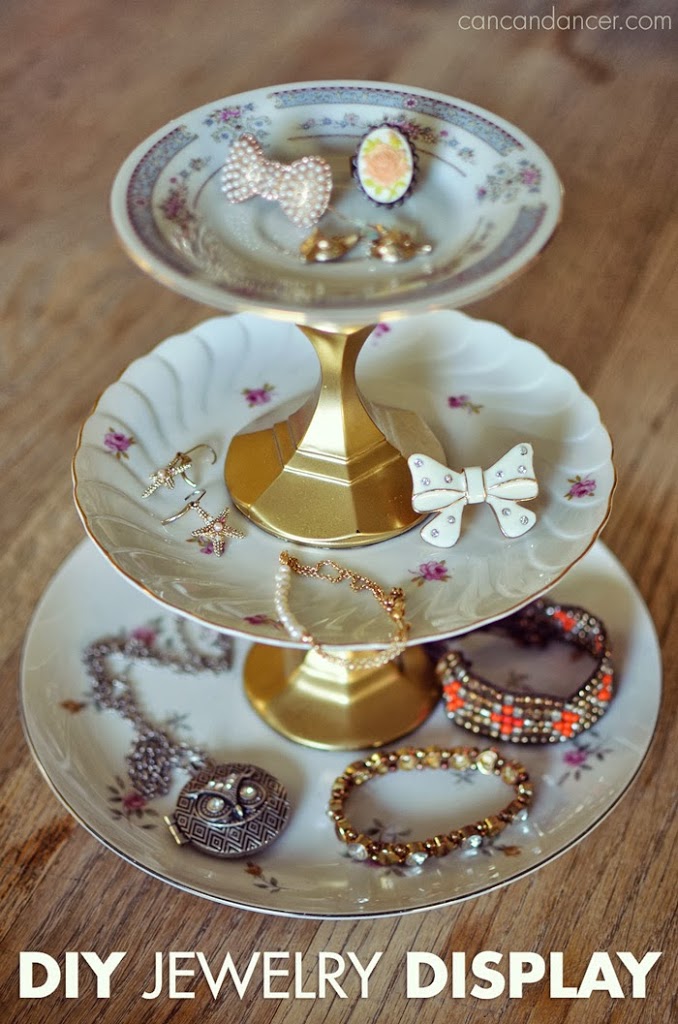
Have you seen those darling jewelry stands made with vintage plates at consignment shops or craft fairs, but not wanted to fork over $25-$40 for one? Well, I went thrifting, and found 3 plates and 2 candle sticks for less than $4!

Check out the tutorial below, to make one of your own:

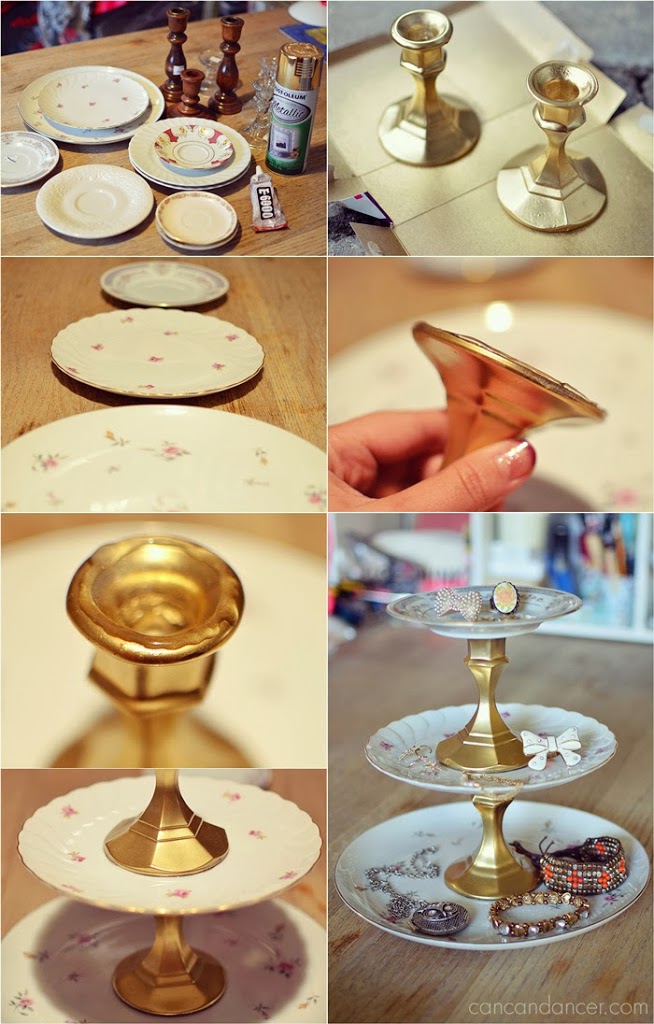
1. Gather your supplies: vintage plates, candle sticks, E6000 or caulk, and spray paint if you don’t like the color of your candle sticks. (Maybe, I bought more plates than I needed, but some of them were only $0.35 each!)

2. Remove any stickers, wash and then dry your candle sticks and plates. Spray paint your candle sticks if you wish, I’m on a gold kick lately.

3. Decide on which plates to use. I used 3 different sizes so my display, with the smallest plate on top.

4. Apply a nice amount of E6000 or caulk to the bottom of your candle stick, and place that baby down on the top of your first plate.

5. Apply E6000 or caulk to the top of that candle stick, and then place your next plate on top of it.

6. Repeat for the last candle stick and plate.

7. Allow to dry overnight and then enjoy!

Happy Crafting!