gift

DIY Monogram Coasters

DIY Monogram Coasters

Hello World,

I have finally hit the age where many of my friends have started getting married and having children. As a recent college graduate, buying my to-be-married friends a kitchen aide mixer or something super impressive is slightly out of my budget.

I went to my first bridal shower this last weekend, and scoured the internet for advice on what to give. Most of the advice I came across said that the bridal shower gift is usually less expensive than the wedding gift, with an acceptable price range being $25 – $75. Gifts can come from the registry if you want to play it safe, or you can go against the grain and give something handmade.

At first I thought about giving a spa set with bath items and toiletries, but decided against that because Pinterest was flooded with similar images and I had this feeling someone else probably had done that idea. I then scrolled through the bridal/wedding registry and noticed they asked for many kitchen items like: bakeware, pots, cooking utensils, etc.

Being Italian, I finally decided on giving a Italian dinner date night basket. (I figured food was safe, because it will eventually be used. Maybe after the fit-into-the-dress diet, but still useful.) I also read that giving monogram gifts is bad luck. In my case though, both the bride and the grooms’ last names start with the same letter.

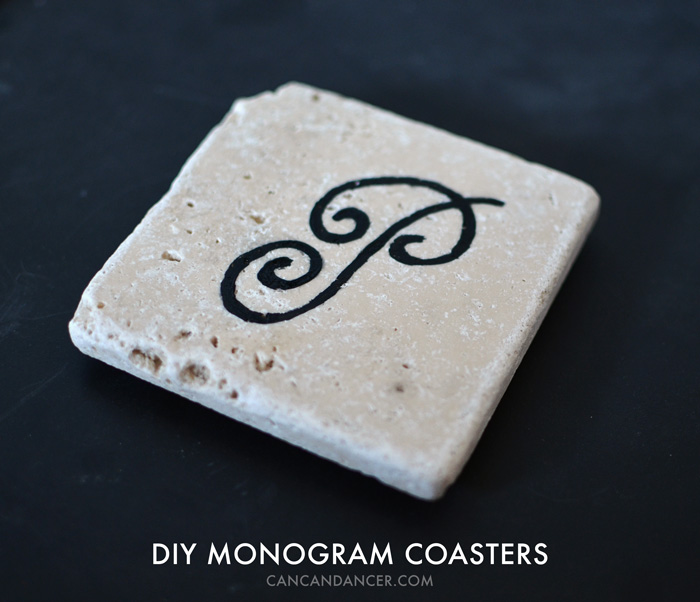
To add a dash of handmade to the basket, I made some simple coasters:

DIY Monogram Coasters

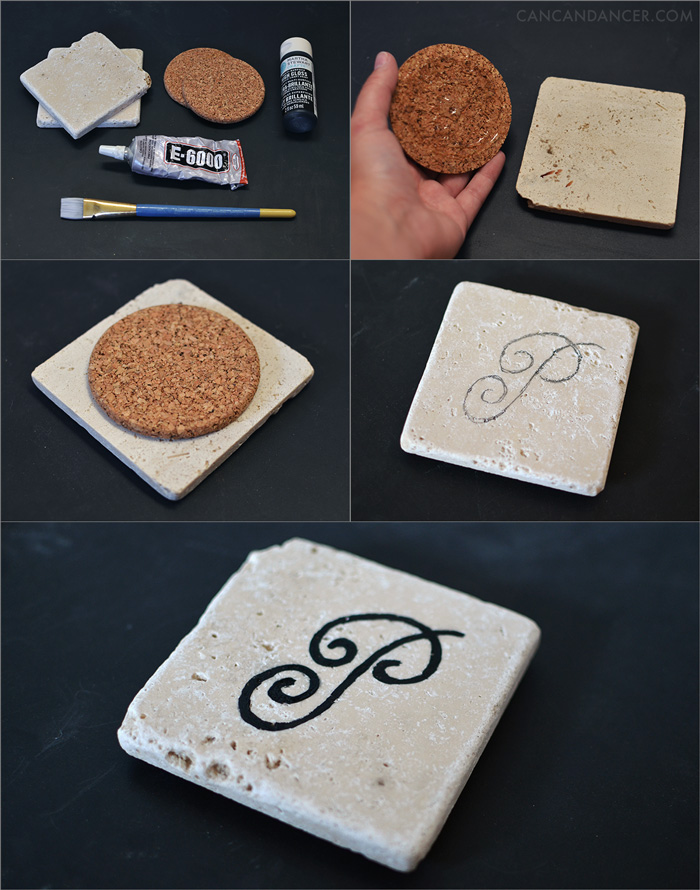
1. Gather your supplies: small tiles, cork or felt bases, strong glue, paint, a paintbrush, and a clear sealer (not pictured).

2. Apply glue to your cork base and attach to the bottom of your tile.

3. With a pencil, I sketched out a single-letter monogram.

4. Paint your design and allow to dry.

5. Repeat with your other coaster(s) and spray them with clear spray paint or apply Mod Podge to waterproof them.

Bridal Shower Present - Italian Dinner Date Night

Here is the basket I gave. It included: a pasta scoop, a slotted spoon, organic pasta sauce, whole wheat pastas, extra virgin olive oil, a bottle of red wine, the coasters (not pictured because they were drying) and a metal colander.

Bridal Shower Present - Italian Dinner Date Night

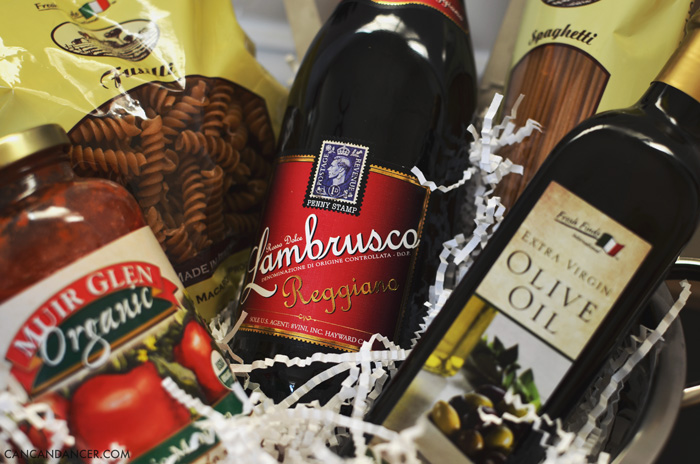
The wine, pastas and extra virgin olive oil were also all made in Italy! I added crinkle paper shreds (from one of my Darby Smart boxes), wrapped the entire thing in cellophane, and topped it with a simple white bow.

This type of basket would also work as a house-warming or holiday gift.

Happy Crafting!

How to Re-Wick Candles

How to Re-Wick Candles

Hello World,

I love buying candles, but I dislike how there is always unused wax in the bottom of the containers. In the past, I have melted the wax and used it in a wax warmer, but lately I have instead been re-wicking my candles, so I can light them again. Check out the simple tutorial below:

How to Re-Wick Candles

1. Gather your supplies: a burned down candle, wicks, wick bases, pliers, strong glue (I used e6000), a glass container, and a pot partially filled with water, and an oven mitt.

2. Place your burned down candle in the partially filled pot of water. Allow water to boil and wax to completely melt.

3. Crimp your wick base to your wick threading with pliers. (Use the appropriate thickness of wick, if you use on e that is too thick, you risk the chance of your glass container cracking while the candle is burning).

4. Glue this wick to the base of your glass container. Allow to set.

5. Carefully pour your melted wax into your glass container. Wipe out your old container with a paper towel if you want to repurpose it.

6. Steady your wick if it has shifted crooked. You can tape the tip to a pencil if you are worried it will shift as the wax cools.

7. Optional: I bought soy wax flakes, and partially melted some of them and scooped them on top of my cooled, re-wicked candle, to create a candle that resembled an irish cream drink.

I also recently went thrifting, and picked up a few glass containers for $0.10 each and made some of my own candles with them. Making candles is so much cheaper than paying $20 each for them in the mall!

candles

Happy Crafting!

DIY Slipper Socks

Hello World,

Need a last minute gift idea? Or just want to make a little something for yourself? I made my own slipper socks with scrap fabric and a thrifted sweatshirt, making this a very inexpensive DIY project.

Check out the tutorial below:

slipper-socks2

1. Gather your materials: decorative fabric for the top of the slipper, a thicker fabric (to make these extra cozy! I used a thrifted sweatshirt), pins, scissors, a sewing machine (or needle and thread).

2. Make your own pattern by tracing your foot, or use the pattern pieces I used. Download them here.

3. Fold your decorative fabric in half, wrong sides together. I used a stretch knit, so I didn’t worry about the grain. Place the first pattern piece (the one that looks like a 90’s telephone- see the slight resemblance?) down along the fold. Pin and cut.

4. If you add a half inch of seam allowance around all the pattern pieces, you will roughly end up with a size XL Women’s slipper sock. If you don’t include seam allowance, roughly a size L. For those with smaller feet, just trim the pattern pieces accordingly to fit your foot size.

5. Place the first pattern piece on your thicker fabric along the fold. (I used the sleeve of my sweatshirt.) Pin and cut.

6. Place your second pattern piece (the one that slightly resembles a foot) down on your thicker fabric. Pin and cut through two layers of fabric at the same time. The reason for this is because you will notice the second pattern piece is asymmetrical. This is to accommodate the big toe. Cutting through both layers at the same time helped it so I didn’t end up with two left feet.

7. Repeat steps 3-6 for the cutting out the other slipper sock. When cutting out your second pattern piece this time around though, place the pattern piece right side down on your fabric (so you end up with both feet). You will end up with four pieces per slipper sock, these will make the liner and the shell.

8. Fold your top pieces in half, right sides together. Pin the heel areas closed and sew.

9. This will leave you with asymmetrical loops of fabric.

10. Place your liner fabrics right side together on top of each other.

11. Pin around the entire edge of your pattern pieces.

12. When you get to the heel area, you will have excess fabric. Pinch and pin the heel area down to the second pattern piece.

13. At this point your work will start to resemble a slipper sock!

14. Sew around the entire circumference of your slipper sock.

15. Repeat pinning process with the shell fabric pieces.

16. Place your liner piece inside your shell piece, right sides together.

17. Sew them together, along the ankle area. Leave a small gap near the back seam.

18. Turn your slipper sock right side out via the hole you left.

19. Push your liner into your shell, and sew the hole closed.

20. Repeat with the other slipper sock.

Tada! You have some custom-made slipper socks! If you are worried about slipping while wearing them, just take puffy paint and add some dots to the sole of your slipper socks. (My mom used to do this on my socks when I was little.)

Happy Crafting!