Hello World,
I have been on an ocean kick lately: from accessories, to the bottles of wine I buy, to home decor. I have found it difficult to find beach-inspired home decor though that isn’t too ‘loud.’
With that being said, I decided to make some simple seashell garland. I currently don’t have any power tools, so I used a wrapping method to make my garland (instead of drilling holes into each shell.)
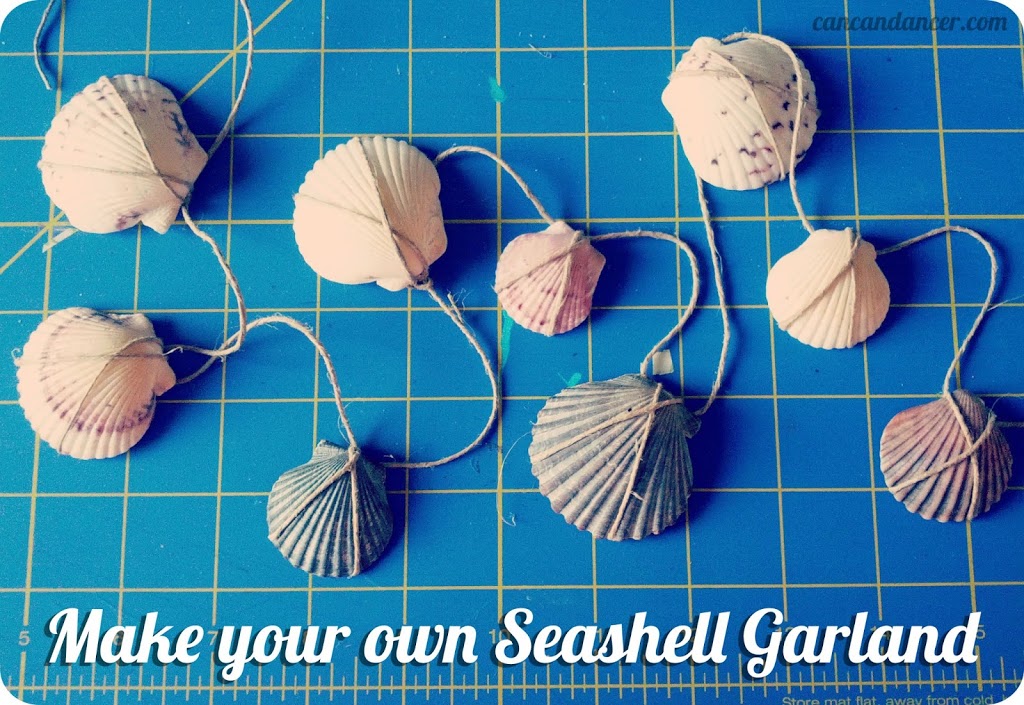
Check out below for the instructions:
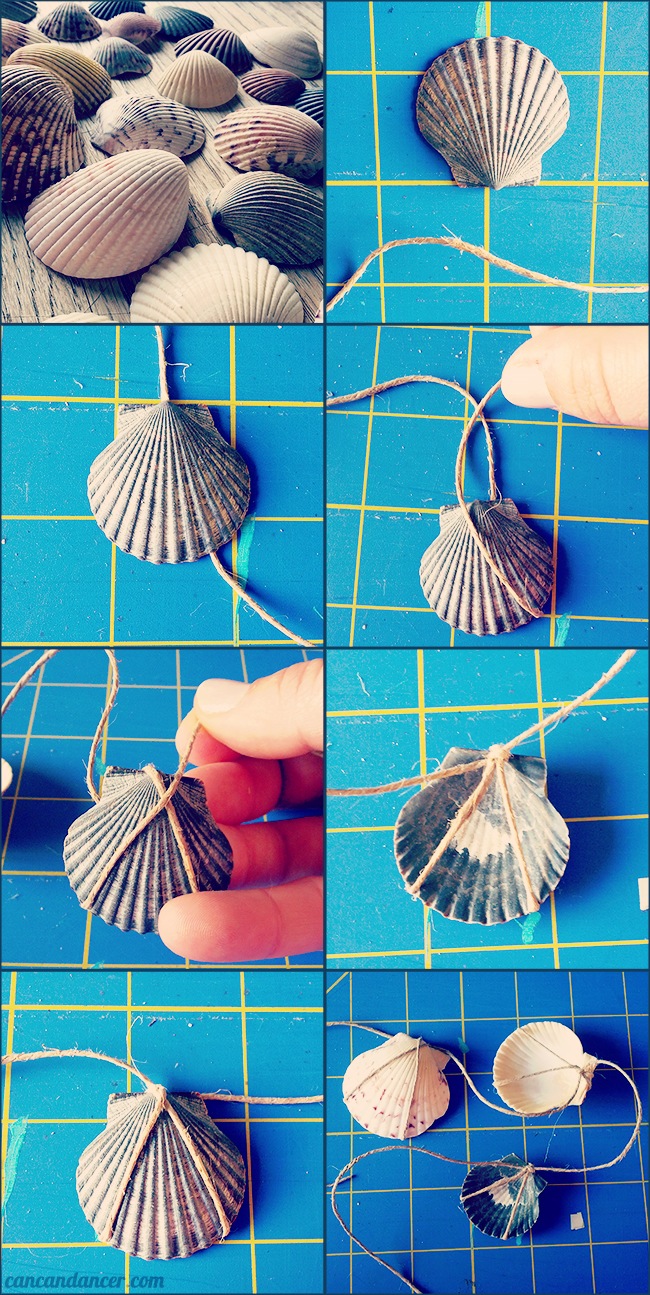
1. Gather your supplies: seashells (I found a nice, big bag at a thrift shop for $2), twine (mine is hemp) and scissors.
2. Pick your first sea shell. I picked ones for this project that had a nice ‘bulge’ on the top. (So my twine wouldn’t slide off.)
3. Lay your seashell on top of your twine, with your tail end above it. (I didn’t cut my twine until I was done with my garland.)
4. Wrap your twine around your shell, and loop it around the back, making an upside down ‘V’ in the back.
5. Continue wrapping your twine around the front, making an uneven ‘X.’
6. With both ends of your twine at the top, pull it tightly around the shell. Tie a knot, trapping the back ‘V’ in the knot.
7. If your twine ends are aiming in wonky directions, simply feed the twine under your knot to force it to lay more flat.
8. Continue with the rest of your shells. I left 3-4 inches of twine between each shell.
Happy Crafting!