DIY Oversized Dreamcatcher

dreamcatcherintro2

Hello World,

I usually don’t post about my personal life on here, but today’s tutorial is different. It holds a deeper meaning to me. My grandma (I called her Granny) passed away almost two years ago, and my family was given some of her things. Granny was very bright, loved to read, collected quirky cat figurines, and had doilies all around her home. I have had one of her doilies, and finally found a symbolic way to use it.

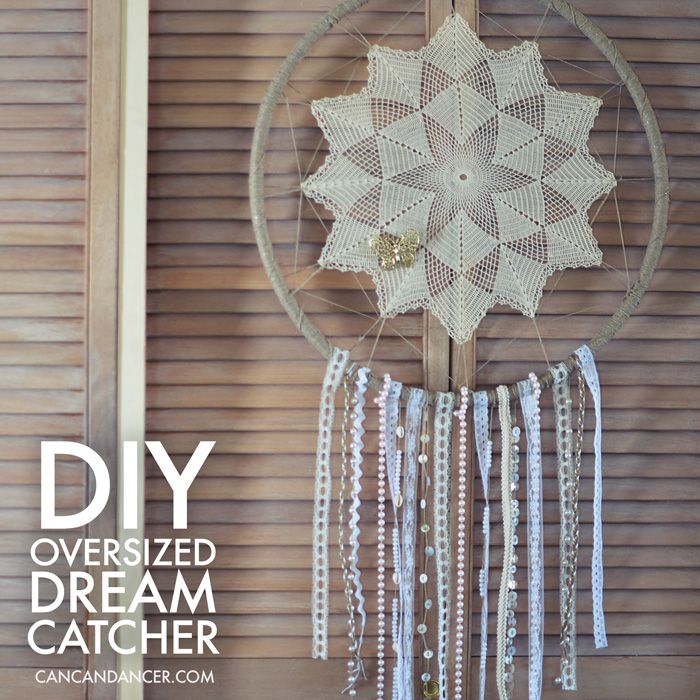
Granny liked to focus on the positive, and didn’t let negativity get to her. I find this attitude towards life similar to a dreamcatcher. In some Native American cultures, dreamcatchers are believed to filter out bad dreams, letting only the good dreams through. So I used one of her doilies to make an oversized dreamcatcher, as a happy reminder of her, and to remind me focus on the positive, no matter what life throws at me.

Check out the tutorial below:

dreamcatcher

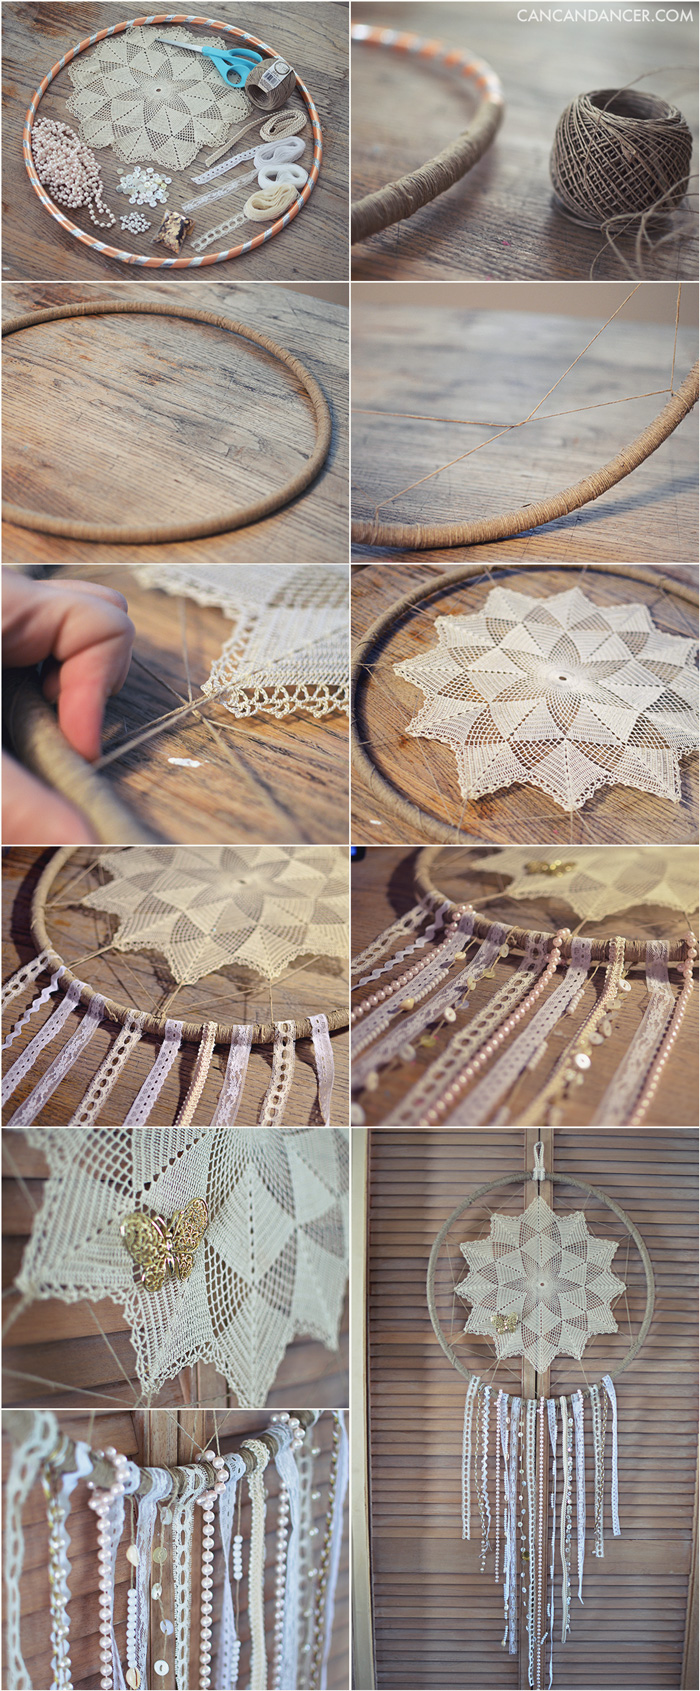
1. Gather your supplies: a small hula-hoop (mine was from the dollar store), a doily, twine, scissors, various lace trimmings (I found mine at thrift shops), beads, buttons, and fabric glue (not pictured).

2. Pop in your favorite movie, and start wrapping your twine around your hula hoop. Continue until you have completely covered it.

3. Take note of how many points your doily has. Mine had 12.

4. Start by tying a tail end of twine to your hoop. 1/12 along the way of my hoop, I pulled tightly, and looped my twine around my hoop. I repeated this until I had a 12 sided polygon inside my hoop.

5. I continued around a second time, this time looping my twine through the center point of each previously-created polygon side. My doily was large, so I didn’t continue working around the twine spiral. If yours is smaller, continue working your way around. Tie a knot when you reach your stopping point.

6. To attach my doily, instead of working it into the twine spiral, I just looped twine through one of the corners, and tied it to the hoop. I hid my tail ends my wrapping them around the hoop a bit.

7. Attach your various lace trims to your hoop. Either knot them onto it, or fold them over and glue in place.

8. Add any other trimmings to your dreamcatcher. I tied on pearl strands, twine braids, and other beaded strands.

9. To hang it, I looped a piece of trim around the top of my hoop and glued the tail ends together to create a loop. I also added a vintage brooch to the doily of my dreamcatcher.

I haven’t added feathers to mine just yet, as I haven’t stumbled across the perfect feathers yet.

Happy crafting! Be happy!


Thrifted Dresser Facelift

Hello World,

I bought this dresser two years ago for $25 at a thrift store. I liked that it was made of real wood and with some TLC it would be like new again. I even has ‘Massachusetts’ stamped on the back, so I’m guessing that is where it was made. Well, two years passed and I didn’t do anything to it except line the drawers with pretty contact paper.

Fast forward to last week, and I finally decided to give my dresser a well-needed makeover. I have started replacing or updating my mismatch broke-college-student furniture, and am aiming to decorate my room in neutrals with pops of metallic.

dresser2

This dresser needed some love. It had a crooked drawer, and dings and dents like nobody’s business.  I started by removing all the hardware. These drawer pulls in particular left dents in the drawer faces, so using a different set of knobs would mean intense sanding.

dresser

At first, I hand-sanded the drawers, but that was going to take hours, so I borrowed my dad’s electric sander. I used a rough grid sandpaper first to remove the stain and most of the dents. Some of the edges were hard to get with the electric sander, so I folded sandpaper and sanded those areas by hand.

Next, I sanded the entire dresser with a finer grit sandpaper to smooth it out. After sanding, I wiped the dresser down with a damp rag and let it dry. To paint my dresser, I whitewashed it by watering down interior satin-finish paint. (Roughly 1/4 paint 3/4 water in a small bucket.) I did two coats of the whitewashed paint, and spray painted my knobs.

I actually wish I had left the knobs in their original color, but for now I am just letting them be. My dresser matches my room so much better now, and I might go in and sponge darker paint on some of the edges, for a more distressed look.

Happy Crafting!

DIY Bleach Fringe Crop Top

fringeintro2

Hello World,

Are you heading to Coachella or any fun festivals this year? Maybe you just love the fashion from these events, like I do. My style is usually a little edgier, but in the summer I do like to embrace my inner flower child, and throw in some boho pieces. And I might have a weakness for anything with fringe. Every time I go thrifting, I search for a white leather, fringe jacket- like the one Lana Del Rey wears in “Born to Die.”

I made the fringe top below with a $1.80 Forever21 tank top, but this could totally be done with a shirt you already own.

fringetank

1. Gather your supplies: bleach, a container partially filled with water, a tank top, paintbrush, scissors, and cardboard.

2. Slide your cardboard into your shirt, so the bleach doesn’t bleed through inconsistently.

3. If you use straight bleach on your shirt, it might eat right through the fabric. Dilute it by first adding a tablespoon to half a cup of water. If that is too weak, add more bleach. Also be sure to do this project in a well-ventilated area.

4. Dip your brush in your diluted bleach, and start ‘painting’ your design on your shirt. Tip: draw your design smaller than you desire, the bleach with spread slightly. That’s why my cheetah spots are a little bloated.

5. Continue until you have painted out your entire design. If you want spots brighter, you can go over them again with more bleach.

6. Cut the bottom hem off your shirt.

7. Cut up towards the top of your tank, in either half inch or quarter inch sections. Make your fringe as long or short as you want.

8. Once you have completely cut your fringe pieces, gently pull on each string so it curls up on itself.

9. Tie a knot at the base of each fringe piece if you want your fringe pieces to be skinny all the way up.

10. You can leave your tank like this, or create a crisscross pattern like I did. I just knotted each fringe piece with its neighbor.

11. I did this a second time by tying each fringe piece again with its neighbor. You could continue all the way to the bottom if you wanted a weaved look.

12. Trim any pieces that seem a little too long. Pop that baby on and twirl around- you know you want to. 🙂

Happy Crafting!