sewing

Embroidered Tote (Made with a Darby Smart kit)

Hello World,

Earlier this month I received my first Darby Smart kit and made this cute DIY marquee sign. Well, I bought another kit, and after watching a few episodes of Vampire Diaries, I finished it!

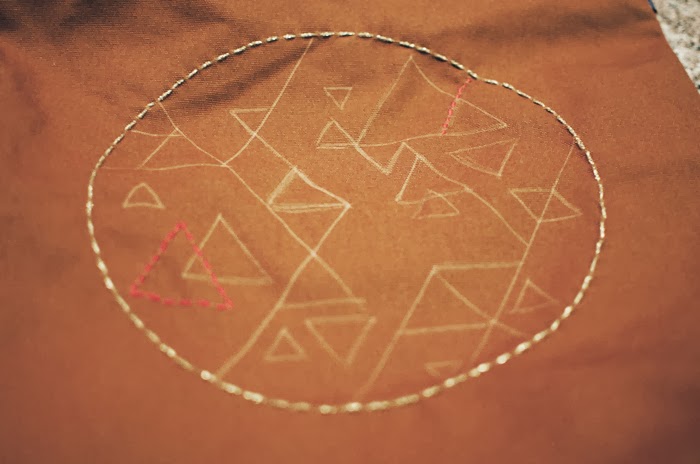
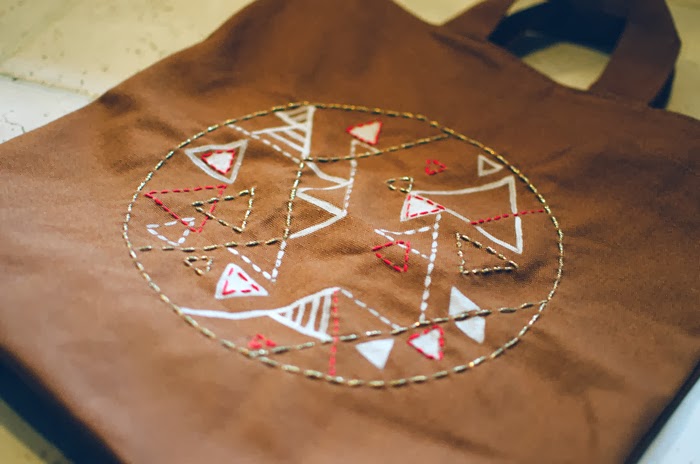
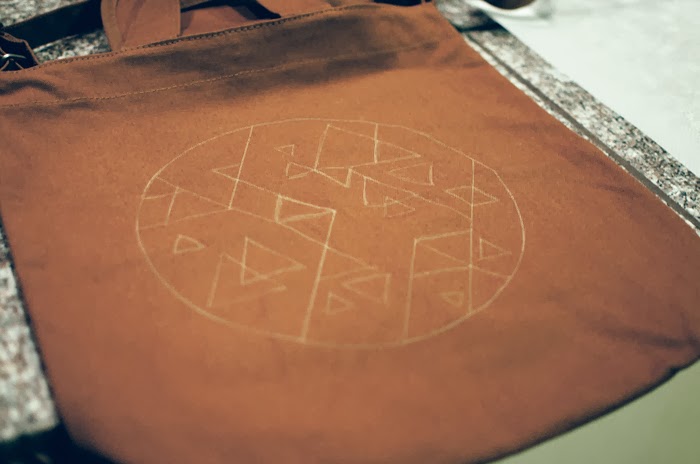
I bought the Cross-Stitch Tote kit (designed by Ana of We Love Citrus) which included a Baggu duck bag! I really like Baggu bags, they have minimal metal accents and are so sturdy! I personalized my tote with both embroidery and fabric paint. I decided on an abstract triangle-centric design, as I have been on a geometric kick lately.

Check out more Darby Smart kits here, and sign up for their emails if you love coupons like I do!

PS Do you watch Vampire Diaries? Are you Team Damon or Stefan? I just started season 4 on Netflix and am back on team Stefan. He is so gorgeous. THAT.HAIR

PSS I was not paid to write about Darby Smart. I just love all things DIY.

DIY Slipper Socks

Hello World,

Need a last minute gift idea? Or just want to make a little something for yourself? I made my own slipper socks with scrap fabric and a thrifted sweatshirt, making this a very inexpensive DIY project.

Check out the tutorial below:
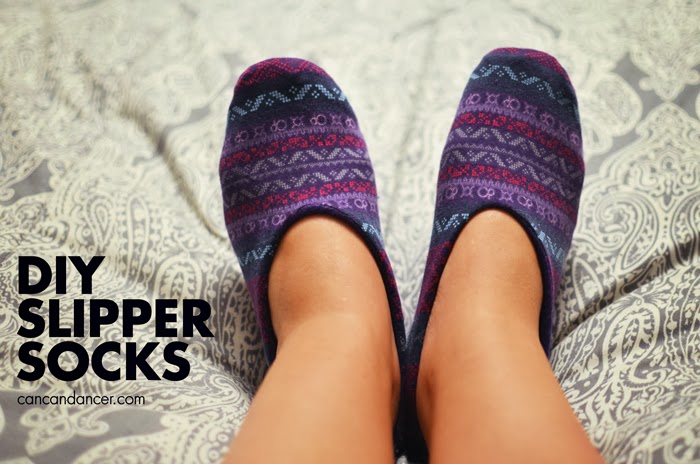
slipper-socks2

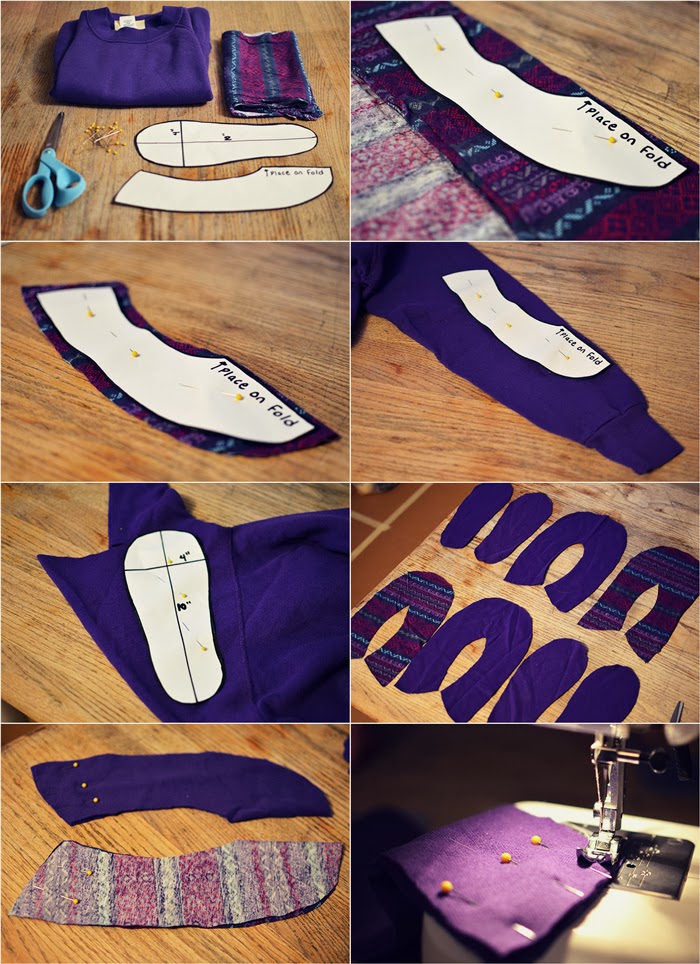
1. Gather your materials: decorative fabric for the top of the slipper, a thicker fabric (to make these extra cozy! I used a thrifted sweatshirt), pins, scissors, a sewing machine (or needle and thread).

2. Make your own pattern by tracing your foot, or use the pattern pieces I used. Download them here.

3. Fold your decorative fabric in half, wrong sides together. I used a stretch knit, so I didn’t worry about the grain. Place the first pattern piece (the one that looks like a 90’s telephone- see the slight resemblance?) down along the fold. Pin and cut.

4. If you add a half inch of seam allowance around all the pattern pieces, you will roughly end up with a size XL Women’s slipper sock. If you don’t include seam allowance, roughly a size L. For those with smaller feet, just trim the pattern pieces accordingly to fit your foot size.

5. Place the first pattern piece on your thicker fabric along the fold. (I used the sleeve of my sweatshirt.) Pin and cut.

6. Place your second pattern piece (the one that slightly resembles a foot) down on your thicker fabric. Pin and cut through two layers of fabric at the same time. The reason for this is because you will notice the second pattern piece is asymmetrical. This is to accommodate the big toe. Cutting through both layers at the same time helped it so I didn’t end up with two left feet.

7. Repeat steps 3-6 for the cutting out the other slipper sock. When cutting out your second pattern piece this time around though, place the pattern piece right side down on your fabric (so you end up with both feet). You will end up with four pieces per slipper sock, these will make the liner and the shell.

8. Fold your top pieces in half, right sides together. Pin the heel areas closed and sew.

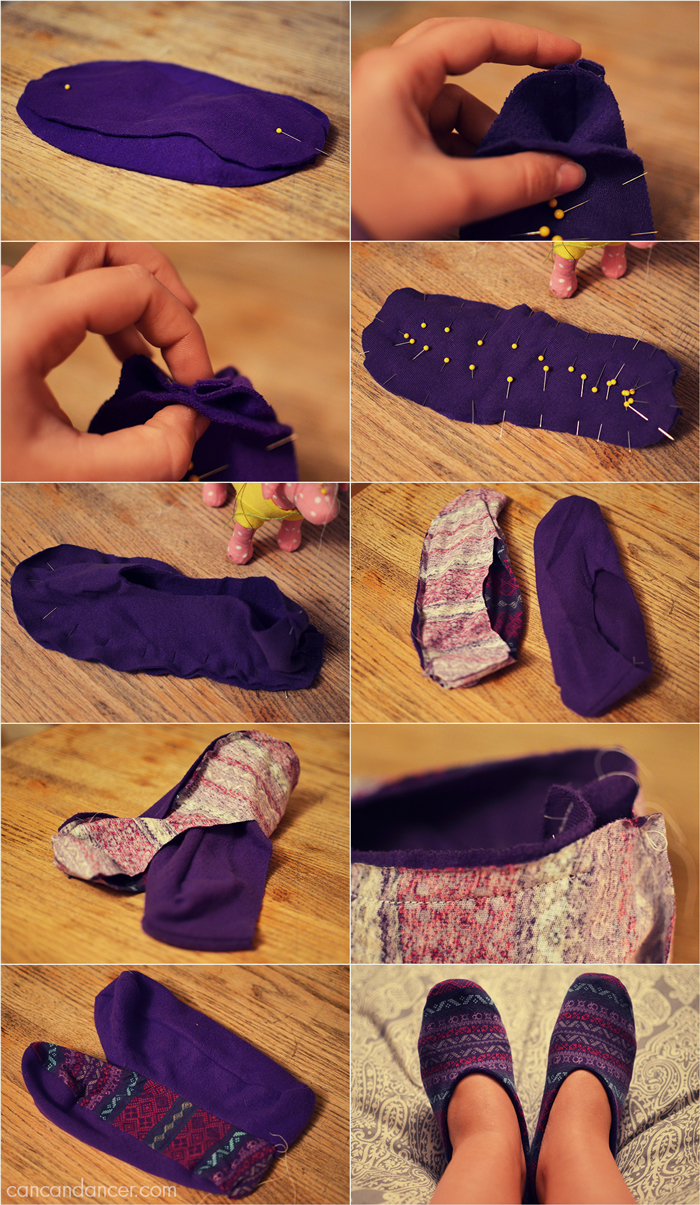
9. This will leave you with asymmetrical loops of fabric.

10. Place your liner fabrics right side together on top of each other.

11. Pin around the entire edge of your pattern pieces.

12. When you get to the heel area, you will have excess fabric. Pinch and pin the heel area down to the second pattern piece.

13. At this point your work will start to resemble a slipper sock!

14. Sew around the entire circumference of your slipper sock.

15. Repeat pinning process with the shell fabric pieces.

16. Place your liner piece inside your shell piece, right sides together.

17. Sew them together, along the ankle area. Leave a small gap near the back seam.

18. Turn your slipper sock right side out via the hole you left.

19. Push your liner into your shell, and sew the hole closed.

20. Repeat with the other slipper sock.

Tada! You have some custom-made slipper socks! If you are worried about slipping while wearing them, just take puffy paint and add some dots to the sole of your slipper socks. (My mom used to do this on my socks when I was little.)

Happy Crafting!
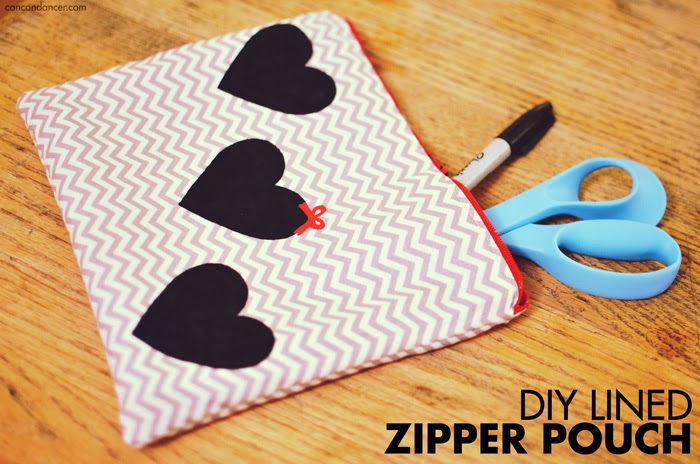
DIY Lined Zipper Pouch + Freebie Friday

Hello World,

Today I have both a tutorial and a giveaway for you! Check out the tutorial below to learn how to make your own customizable zippered pouch, and enter the giveaway to win the one featured in this tutorial:

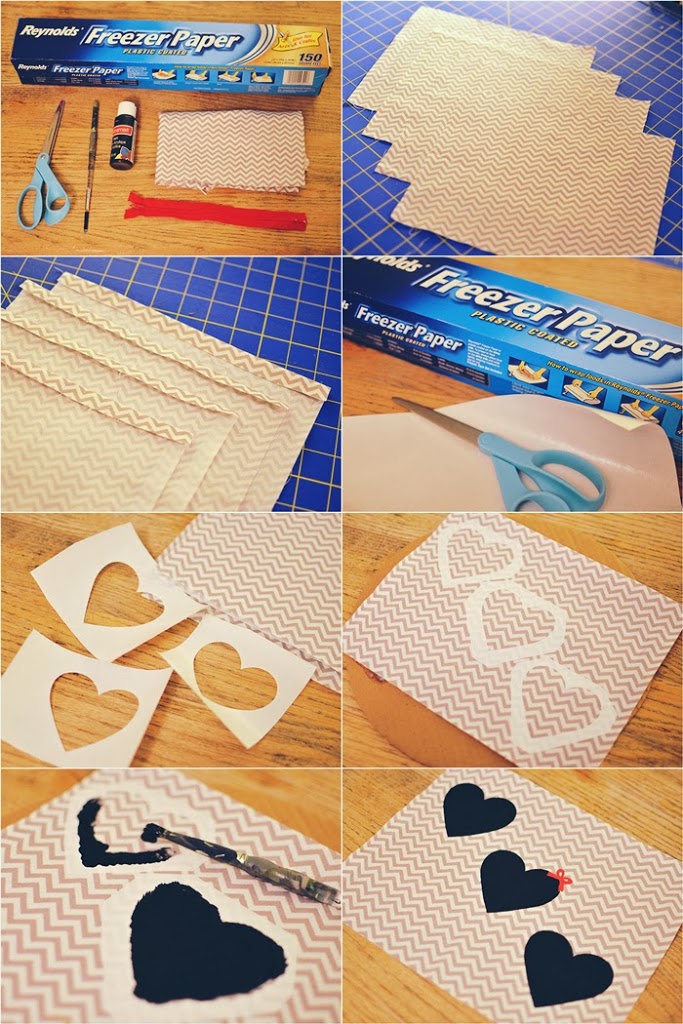
1. Gather your supplies: fabric, a zipper, scissors, acrylic or fabric paint, a foam or paintbrush, freezer paper, an iron and ironing board, and a sewing machine or needle and thread.

2. Cut out 4 rectangles of fabric that are the same length as your zipper.

3. Fold the top edge of each rectangle over 1/4″ inch and iron flat.

4. Cut a strip of freezer paper. This will be used to make your stencil.

5. Cut your designs out of your freezer paper. If you draw on your freezer paper, draw on the matte side of the paper, not the shiny side.

6. Iron your freezer paper onto your fabric, shiny side down.

7. Paint gently within each freezer paper stencil. Be careful around your edges, so paint doesn’t leak out of your stencil.

8. Allow to dry and gently remove your contact paper. Iron both sides of your design to set the paint.

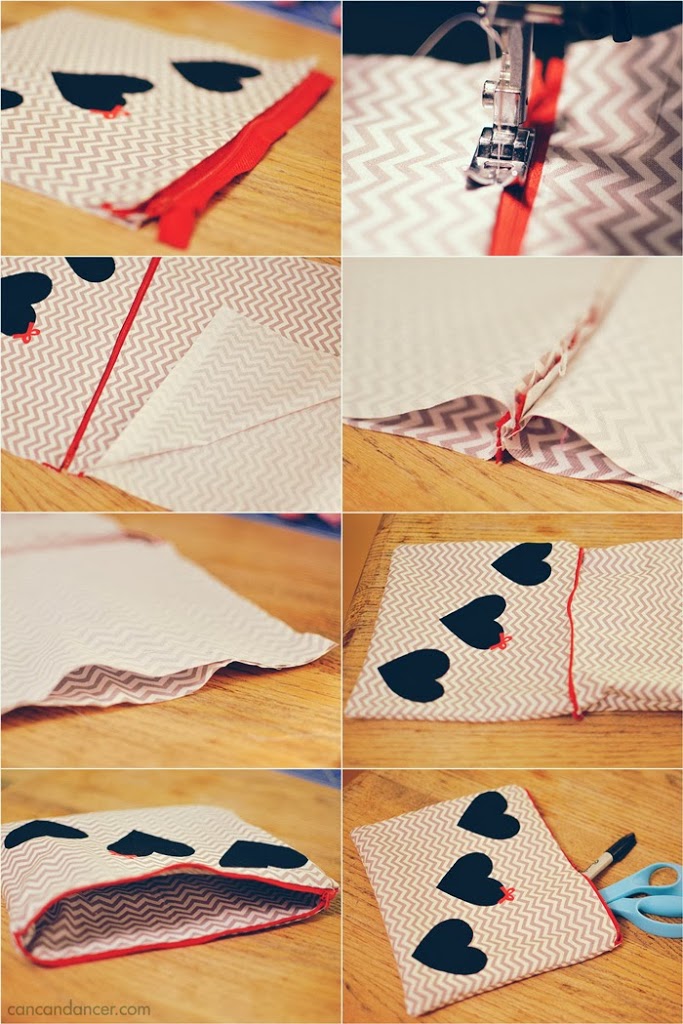
9. Sandwich one edge of your zipper (right side up) in between two rectangles of fabric (wrong sides together).

10. Sew through all three layers (fabric shell, zipper, fabric liner).

11. Repeat steps 9 and 10 for the other half of your pouch.

12. Now that everything is sewed to your zipper, unzip your zipper. Fold your shell on top of your other shell fabric piece. This places your two shell pieces on top of each other, right sides together, and does the same with your liner pieces.

13. Sew around the edges of your entire rectangle, leaving a gap on the liner edge.

14. Turn your bag right side out via the gap in the liner.

15. Sew this gap closed, and push your liner into the body of your pouch.

16. Tada! You have made your own lined zipper pouch!

I used the same fabric for the liner and the shell of this pouch, but using coordinating fabric would work great too. Use this type of pouch as a makeup bag, pencil case, mini iPad case, etc.

PS- Remember the giveaway I mentioned? Well, enter below and one winner will receive this chevron pouch, handmade by yours truly. Giveaway ends next Friday, November 22nd.

Happy Crafting!

a Rafflecopter giveaway