Hello World,
My latest Etsy Treasury and this video inspired the DIY project below.
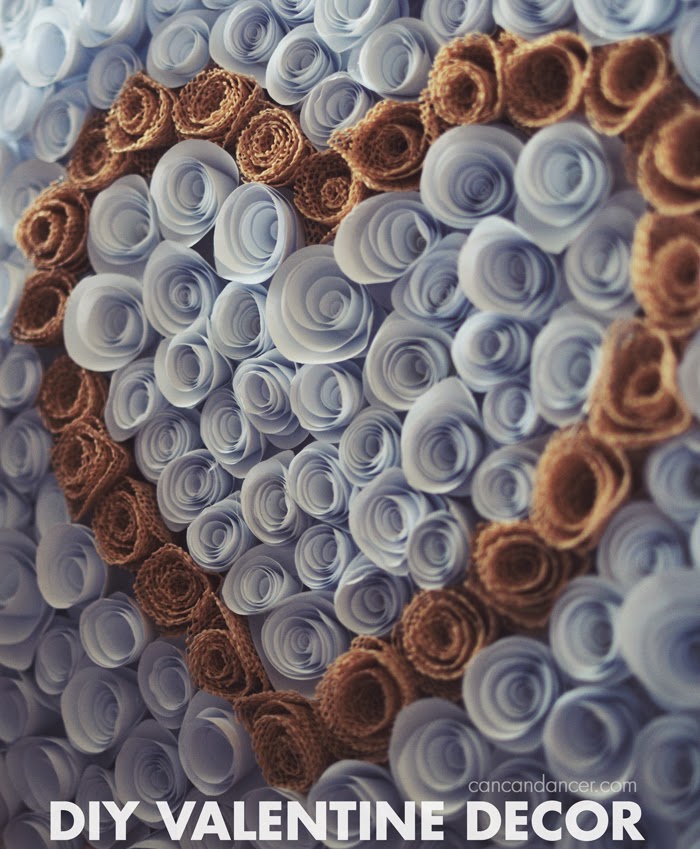
When I began this project, I just started making paper roses, without a plan for what I was going to glue them on. I figured once I made a decent pile of them, it would dawn on me.
After making it through a few episodes of The Originals (I actually like it way more than Vampire Diaries), my coffee table was covered with paper roses and scraps. Fast forward a few days, and those paper roses were still piled on my coffee table, waiting to be utilized.
I wanted to glue them to something inexpensive, so I went thrift shopping and to a dollar store (where I picked up a shelf liner). I originally was going to glue the roses to the shelf liner, but just ended up making more roses with it. I just love the textured roses!
Fast forward a few more days and it dawns on me. I have a pizza box in my recycling bin. I could glue all these roses to it instead of a canvas. Thankfully one of my New Year’s resolutions wasn’t to avoid carbohydrates. Check out the inexpensive tutorial below:
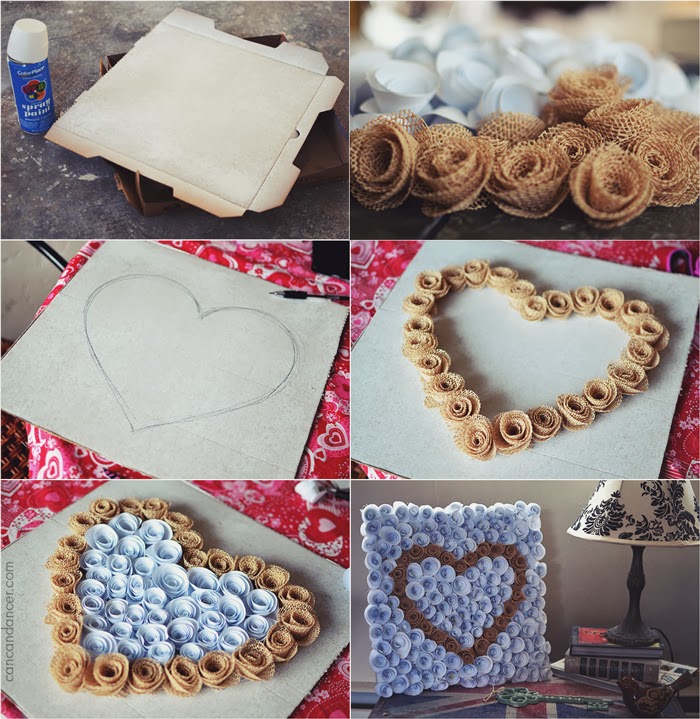
1. Gather your supplies: paper or various materials (lace, burlap, a shelf liner, etc), a hot glue gun, glue sticks, scissors, a base to glue the roses to (hello pizza box!), and spray paint.
2. Make all your roses by cutting out paper swirls and twirling them into a rose shape. Check out this video tutorial for a better explanation.
3. I spray painted the lid to my pizza box white. This way if there were gaps between my roses, the brown cardboard wouldn’t be visible.
4. Trim your cardboard, draw out your design, and start hot glueing your roses down.
5. Continue glueing until the cardboard is completely covered.
6. Tada! You have some super inexpensive Valentine decor!

I think I’ll make another version of this, and glue burlap roses to some old barn wood. Maybe I’ll make a giant cursive monogram.
Happy Crafting!


