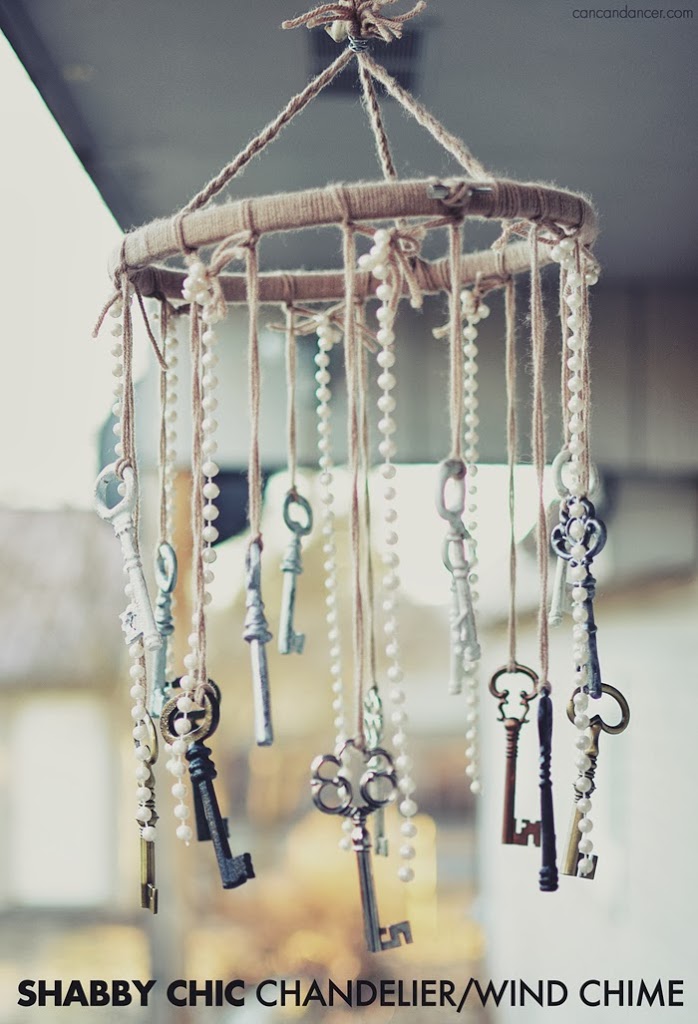
pearls

DIY Halloween Costume #2 – Mermaid

DIY HALLOWEEN COSTUME #2 – MERMAID

Hello World,

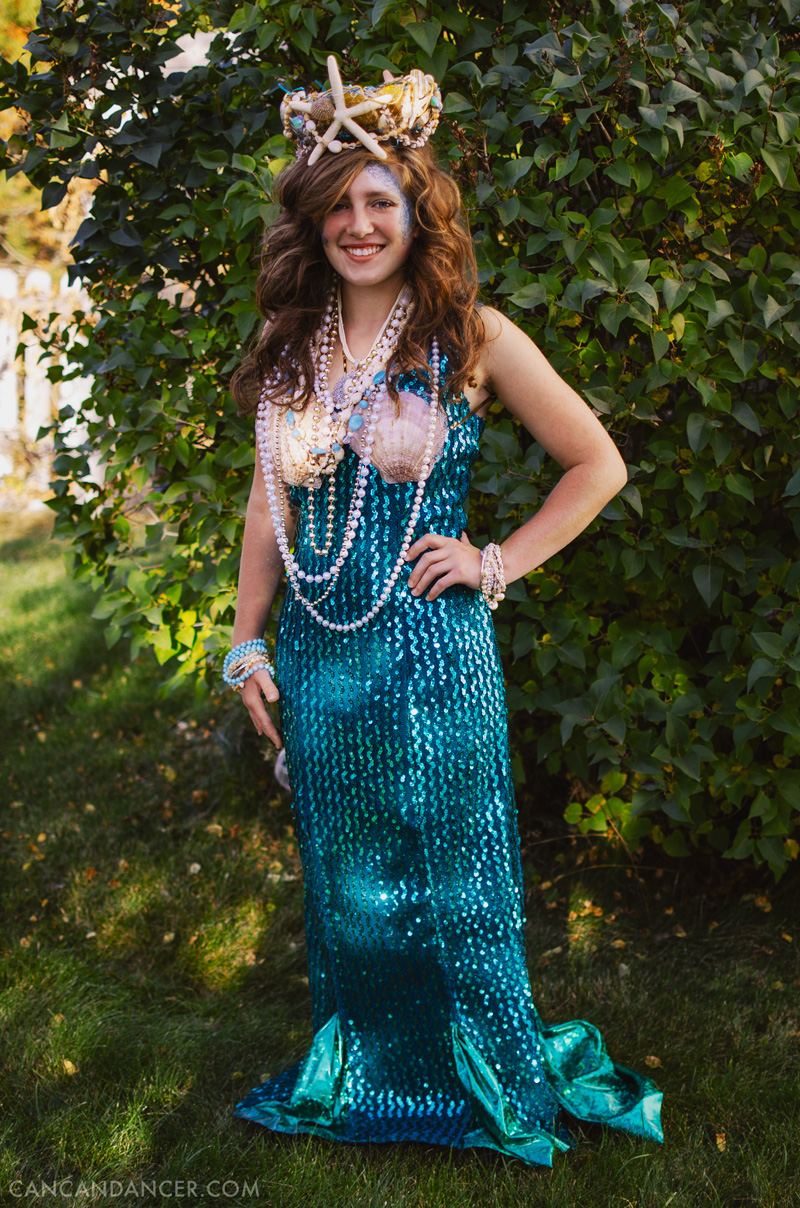
In my last post, I shared a DIY Glinda costume my mom had put together. For the second costume in this series, I’m sharing her DIY mermaid costume with you today,. To switch it up, my sixteen year old sister was kind enough to model it (with her mermaid-tastic hair).

My mom bought the teal sequin dress at a thrift shop, and sewed the three panels (two skinny ones on the front, one large one on the center back) on the bottom to flare it out and make it look more fin-like.

DIY HALLOWEEN COSTUME #2 – MERMAID

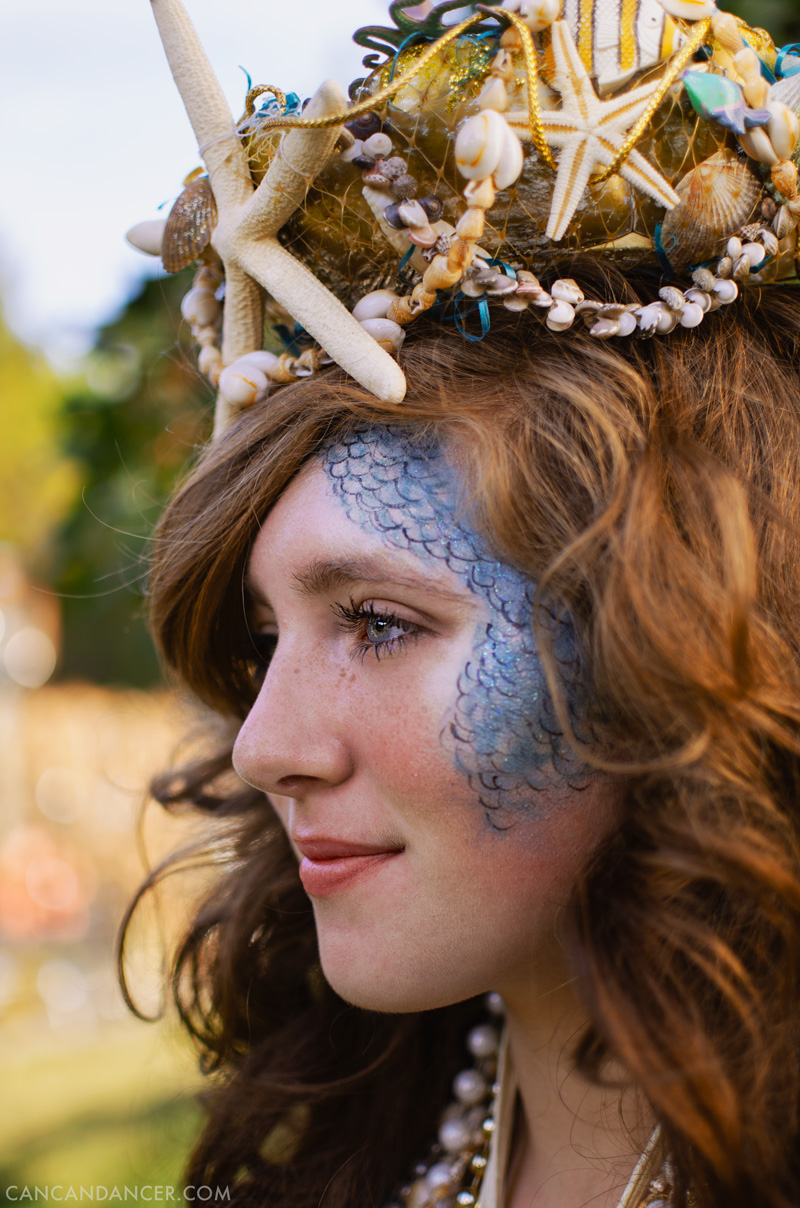
For my sister’s makeup, I started by applying foundation to her face as a base. I then used my finger to apply light yellow and light green eyeshadow from her cheek bone area to her forehead. Next, I used a small eyeshadow brush and drew overlapping semi circles with teal eyeshadow to give the appearance of scales. Next, I drew scales with liquid black eyeliner. (I used the $1 e.l.f. eyeliner, and it worked great.) To finish off her mermaid makeup, I applied some glitter eyeliner to random areas of the scales.

DIY HALLOWEEN COSTUME #2 – MERMAID

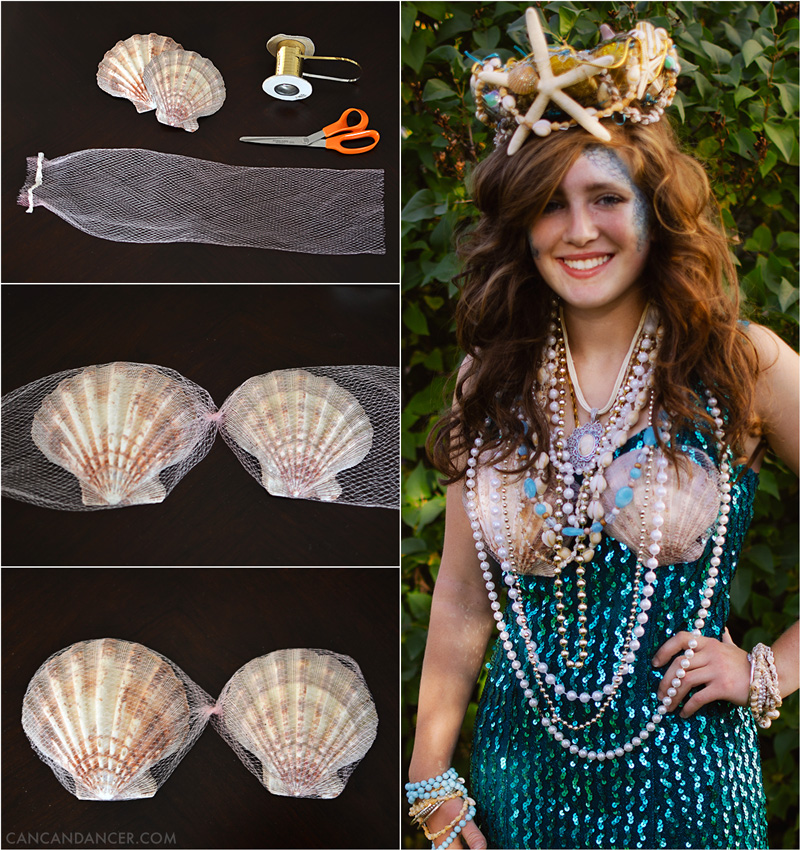
To make the shell top, my mom found two large shells (try to find ones that are similar sizes, so your chest doesn’t look lopsided) and pushed them into a netted produce bag. We twisted the center of the bag, and knotted each end of the bag, trapping the shells inside. Next, we hid the knots in the back side of the shell. We looped ribbon to the center of the top (to make a halter) and to each end to make straps (similar to a string bikini top). We tied the halter portion around my sister’s neck, and knotted the other ends together in the back.

DIY HALLOWEEN COSTUME #2 – MERMAID

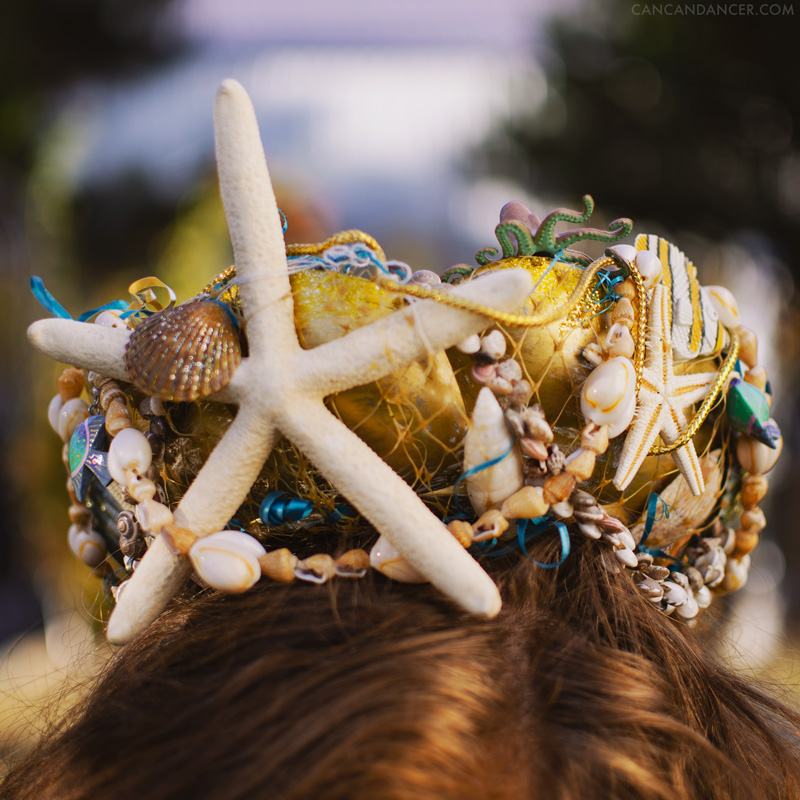
My mom actually made the base of her crown with a plastic pie-container lid! She cut an ‘X’ in the center of the lid so it would better sit on her head, and covered it with glittery gold paint. Next, she tied grocery-bag netting around it, and trapped shells, starfish, and plastic under-the-sea toys in the netting. She layered more ribbon and puka shells to fill it out. To top it off, she tied a large starfish to the front netting. We kept it secured to my sister’s head with a few large bobby pins.

DIY HALLOWEEN COSTUME #2 – MERMAID

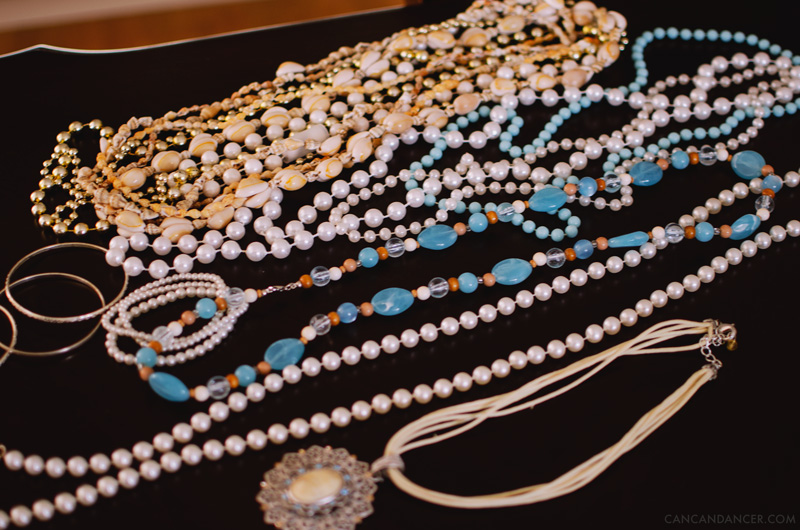
To finish off the costume, my sister wore many pearl, puka shell, and beaded necklaces of varying lengths. She also wore bangles and pearl bracelets for a “look at this stuff, isn’t it neat” look. (Yes, Ariel is my favorite Disney princess.)

Happy Costuming!

Shabby Chic Chandelier/Wind Chime

Hello World,

One of my friends gave me a bunch of keys for my birthday last year and a few more for Christmas this year, and I finally got around to using them to make some home decor.

I made a shabby chic chandelier/wind chime with the keys (she got them from Michael’s) and some pearl garland I picked up at a yard sale for $0.50. Below is just the first stage of it. I probably will add more beads, tiers, and lace trim to it as I come across them while thrift shopping.

Check out the tutorial below to see how to make your own:

keys1

1. Gather your supplies: large keys, beads or pearl garland, scissors, yarn, an embroidery hoop, pliers, and wire.

2. Star off by knotting the tail end of your yarn to your embroidery hoop.

3. Wrap the yarn around the embroidery hoop, covering the tail end as you work your way around the hoop.

4. Continue wrapping yarn around your hoop until it is completely covered.

5.  Loop some yarn through your first key, and pull the tail ends through the loop you created, catching the key in the loop. Tie this first key strand to your embroidery hoop.

6.  Continue with more keys, equally spacing them out. I used the silver/white keys for the shorter tier of my chandelier.

7.  Continue adding keys to your hoop until you are satisfied. I did alternating lengths for my keys.

8.  With the tail ends of each of the key strands, I tied them to their nearest neighbor. I tied my pearl strands to these yarn loops. Trim the tail ends if you wish, but I left mine long in case I decide to add more beads in the future.

9. Cut out 9 pieces of yarn that are all the same length. Place them in groups of three, fold them in half and loop them around the embroidery hoop.

10.  Braid each of these yarn groups and knot the ends. (If you want a more secure chandelier, you can use the wire as your hanging mechanism instead of yarn.)

11.  Bring your three braids ends together and secure them by wrapping wire around them.

12.  I created a small wire loop and attached this to my wire wrapping to be used as a hanging point. Add more materials to your chandelier if you want it more complex, hang, and enjoy!

Happy Crafting!