Month: March 2012

Fanny Pack made with Scrap Fabric

Hello World,

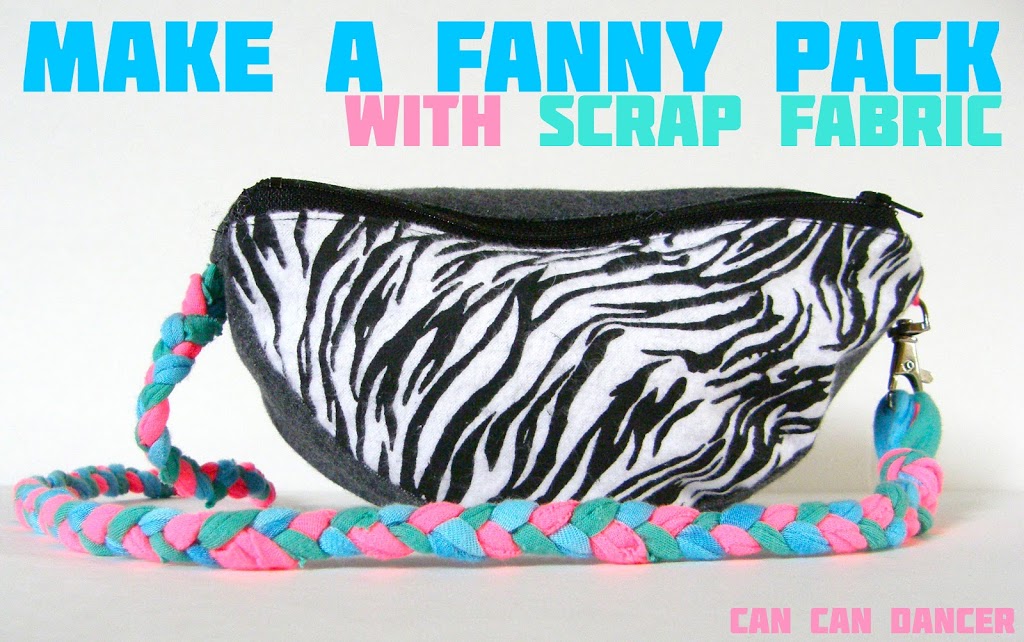
Over spring break I went to a 12,000 person rave in Seattle.  I didn’t want to carry a purse, so I whipped up a fanny pack with a fabric from my scraps pile.  I used flannel, sweatshirt fleece and t shirt scraps. My fabric choices were a little crazy, but hey its a rave and everyone dresses a little weird. lol  Buying a fanny pack just for one night didn’t seem very sustainable, and making one is so easy!
10-tutorial1

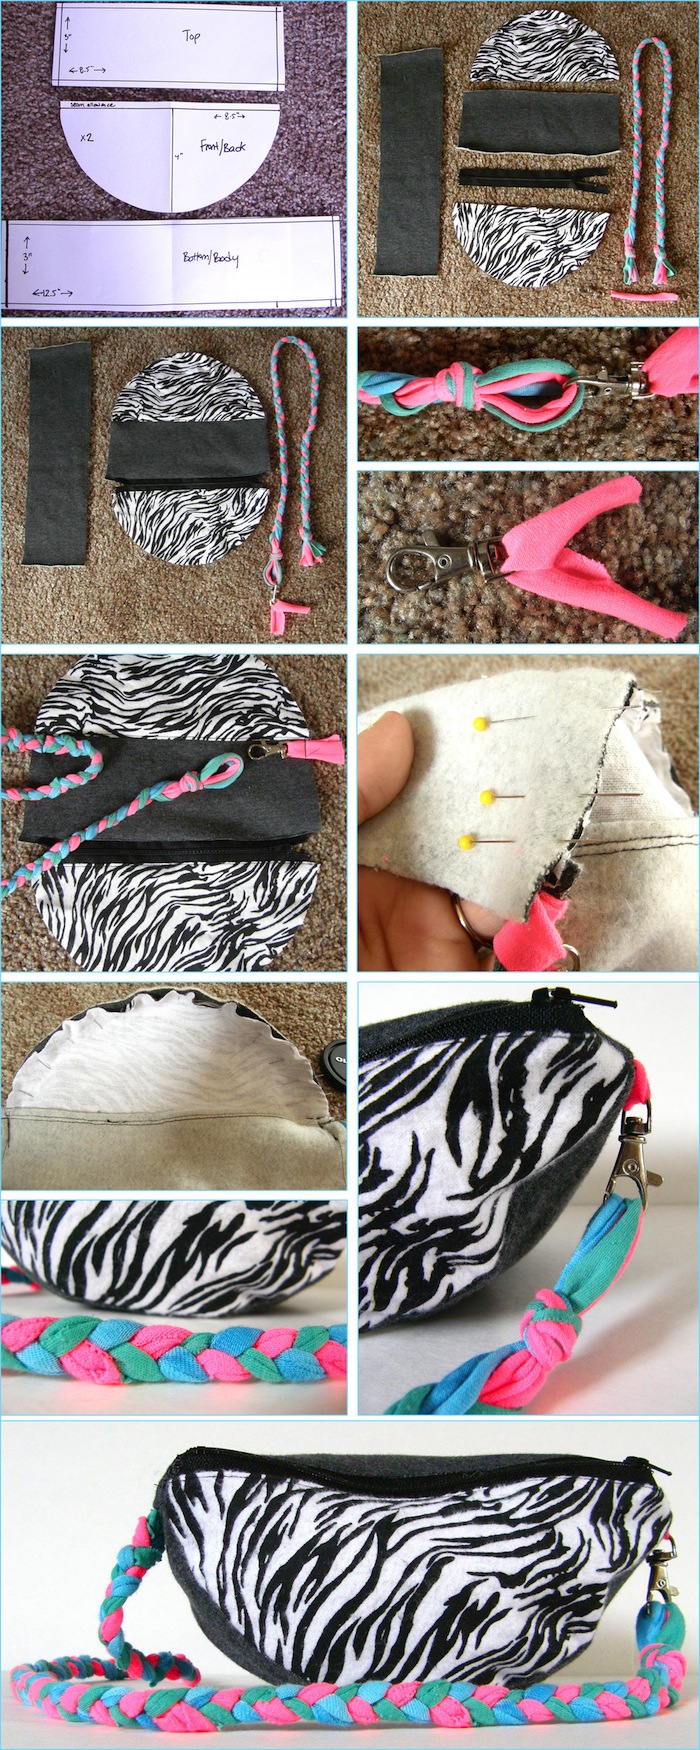
1.  Here are my pattern pieces.  They weren’t perfect but they fit pretty close together.  I wouldn’t add seam allowance if you make one, I had to trim it off once sewn together because I had too much excess.

2.  Cut out your pattern pieces and find something to use for the waistband.  You could use a necklace, an old belt, even a ribbon could work.  I made a very long braid with t shirt scraps.  (The hot pink is actually leftover from my previous tutorial.)  When I made my braid, I folded all of my strips in half so I would have a loop at the other end.

3.  Sew the two semi-circles to the small rectangle (gray top piece).  Insert the zipper between one semi circle edge and the matching edge of the short rectangle.  You’ll end up with a oval-ish shape.

4.  I used a hook from a broken necklace for the closure of my waist piece.

5.  If you use this method, cut out a 2 inch scrap of fabric and feed it through the loop side of the closure piece.

6.  Sew your waist pieces onto the oval shape you created.  NOTE:  I sewed mine on the wrong side and I had to seam rip them off and re-sew them because my fanny pack hung awkward.  Sew them on the opposite side (aka near the zipper).  Raw edges to the outside.  (see picture)

7.  Now I didn’t get a good picture and this is hard to explain, but you will need to attach the long (gray) rectangle piece to each of the semi circle rounded edges (zebra).  Sew right sides together with your waist (braid) pieces safely inside.

8.  After those two edges are sewn, sew the short sides (gray) to the short matching edges (gray too).  Make sure you unzip your zipper during this last step, so it is easier to turn right side out.

9.  Turn your fanny pack right side out, and your ending shape is a semi-cylinder fanny-pack.
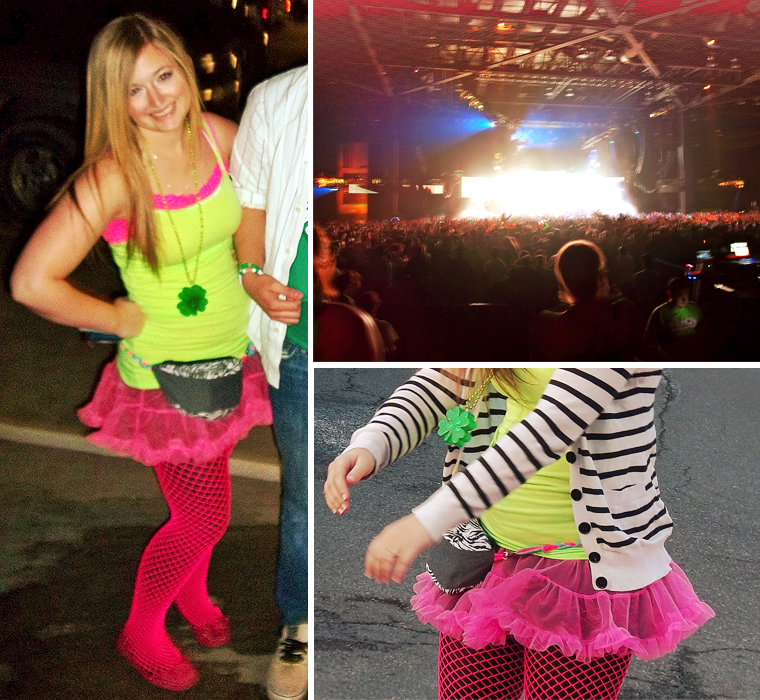
My fanny pack (even though I wore it in the front, lol) held up really well.  It lasted through the entire rave and I fit a smart phone, camera, wallet and pepper spray all in it just fine.

These are the only pics I have of it from the rave.  The bottom right picture is from a jumping picture fail. lol  I also wore two sets of nylons, which gave my legs the look of an optical illusion.

Neon Tshirt Reconstruction

Hello World,

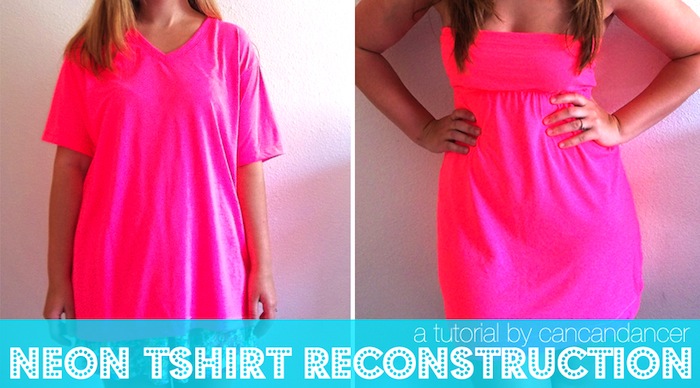
I actually made this last summer, and just had never made a tutorial for it.  I love this dress, it is sooooo bright!!!

9-tutorial21

9-tutorial22

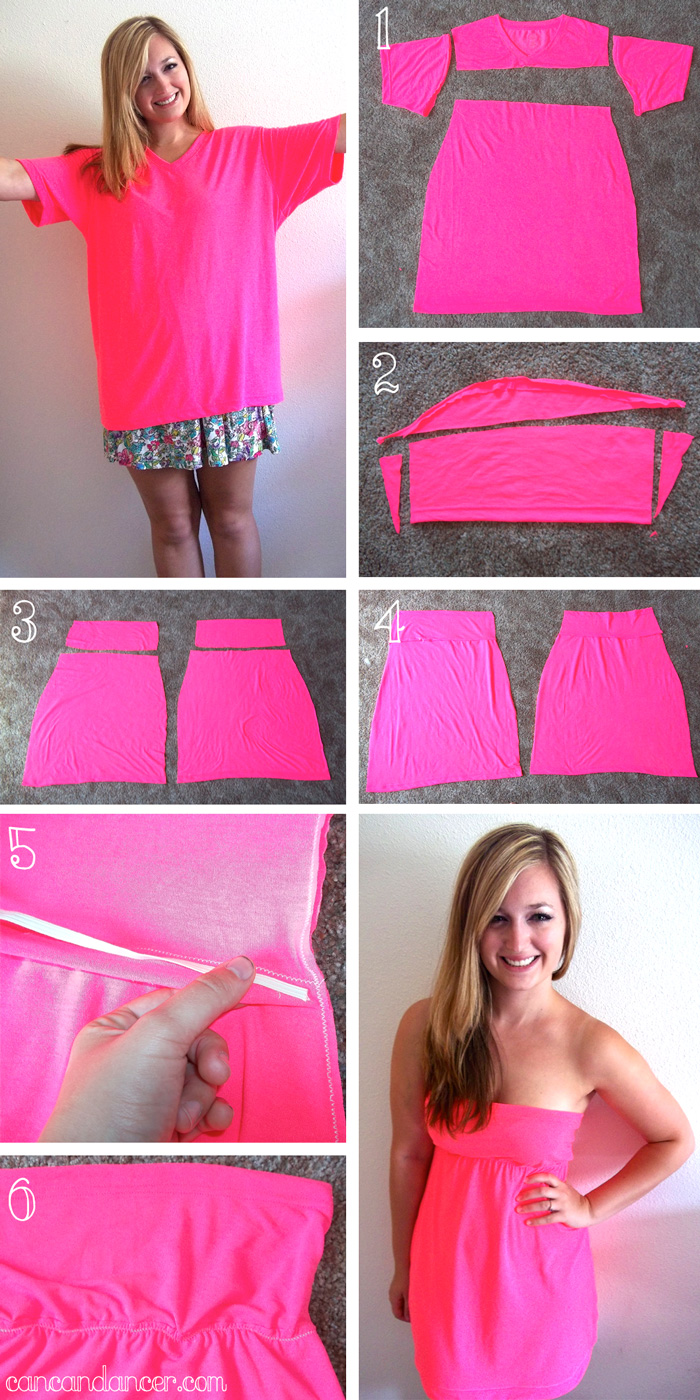
1.  You will need a very large tshirt.  Cut off the sleeves, and then cut a straight line right below the neckline. The sleeves will become the top of the dress, and the large chunk will become the body of the dress.

2.  Take the two sleeves you cut off, and cut the side seam of the sleeve open on each of them, and lay them flat.  This will give you a nice long strip of fabric. (This will be the top of the dress, so test the rectangle pieces against your bust for coverage. As in-measure from your bra band to however high you want to cover your bust.)   Cut out 2 identical rectangle pieces. Don’t cut off the finished sleeve hem- later you can use this as the top hem on the dress.

3.  Match up the top (previous sleeve) portions with the matching body (large chunk) portions.

4.  Sew (right sides together) the top pieces to each body piece.  Then sew up the side seams entirely.

5.  Sew elastic for the waist/under bust.  Sew it it straight onto the dress, stretching the elastic as you sew. (If you hate working with elastic, you could also belt the dress here while wearing it instead.)

6.  Trim access and turn dress right side out.  My shirt was stretchy enough not to need top hem elastic, but if you need it, just feed it through the top hem.

Please excuse my lazy summer hair.

Follow Can Can Dancer via Bloglovin for more DIY tutorials.

Tank Top to Beach Tote

Hello World,

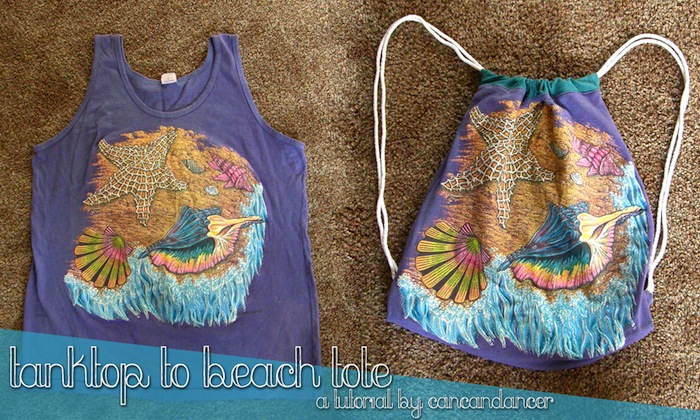
Here is a tutorial for turning a tshirt or tank top into a drawstring beach bag. I have had this shirt in my stash for a while, I just loved the bright colors, but I would never wear it as a shirt. Problem solved!

8-tutorial21

8-tutorial1

1.   Grab a tshirt or tank top you want to reconstruct.

2.   Cut out the front and back of your bag.  I made mine a square at first, but then made it more of a trapezoid instead.  (I didn’t have much trim room on the top of the shirt)

3.   My shirt didn’t have enough space for the top edge, so I cut out two contrasting pieces.

4.   Make the top piece half an inch longer than the top edges lengthwise.

5.   Hem the two short edges of each green piece.  This way the top piece is the same length as the bag body.

6.   Fold the top small piece in half lengthwise, wrong sides together.  Sew this to the top edge of your main piece, right sides together. Do this for both the front and back pieces. This will be the casing for your straps.

7.   Top stitch for a clean finish.

8.   Cut out two pieces of cord, ribbon, or fabric that are each 54 inches long.  (27 inches when folded in half)

9.   Sew the bottom edges of the bag together.  Then feed each of your cords through each of the casings you created on the short edges.  (Take one end of a cord, attach a safety pin to one end and feed it through the (green) top casing. Repeat on other side with other cord.))

Once the cords are fed through the casings, aim the majority towards to the interior of the bag. (So the cords end up on the outside/right sides in the end.)

10.  Sew up the sides of the bag, right sides together.  Do not sew the top corners together, otherwise your drawstrings won’t be able to scrunch.

11.  Place the raw ends of the cords at the bottom corners of the bag. I backstitched over them to be safe.

12.  Here is the bag inside out completely sewn.  Trim any access.

And tada you have a beach bag!  (I’ll pretend it’s warm outside until I can use mine. lol)