Month: November 2011

Puppy Pin Cushion

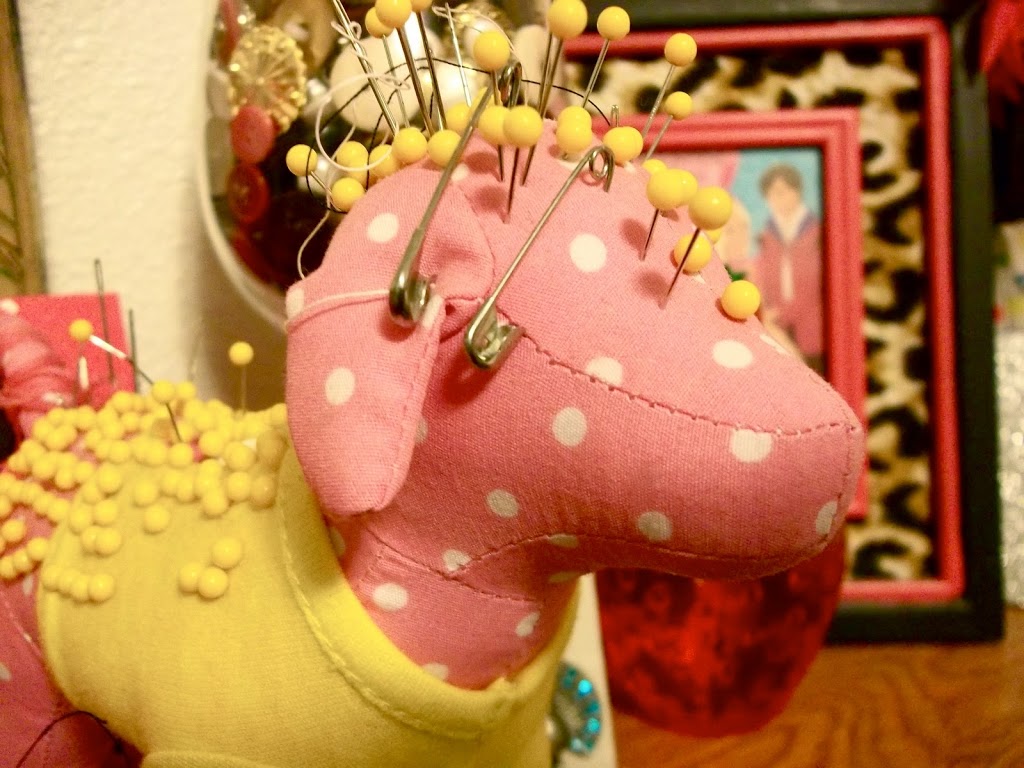
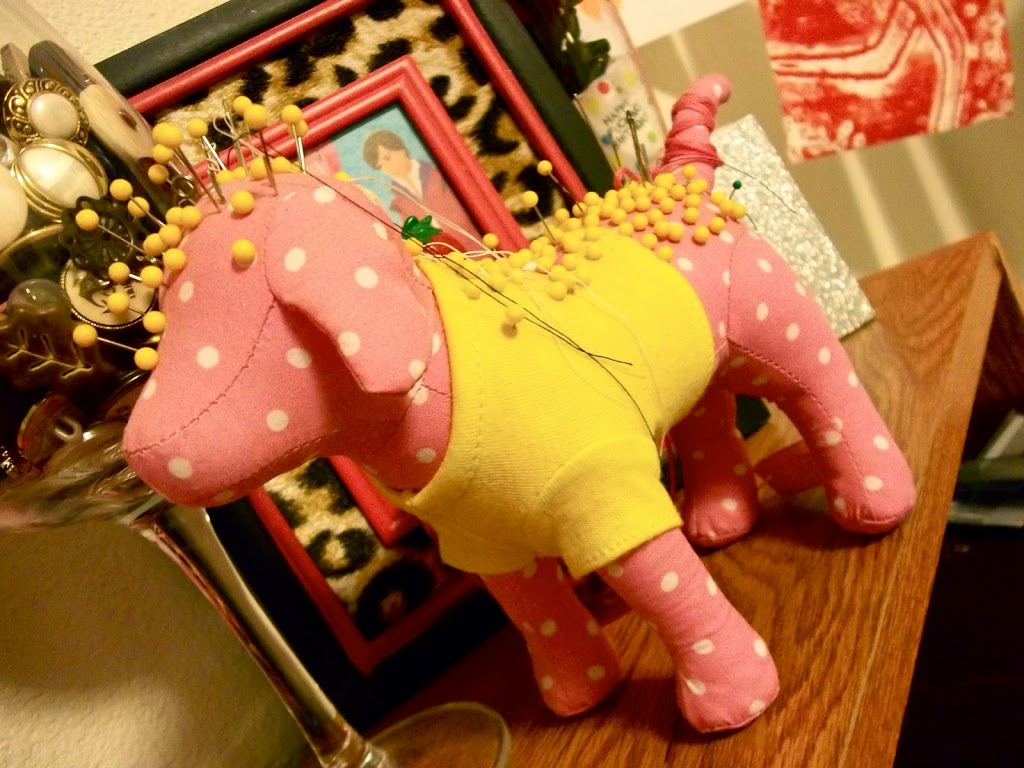
I usually end up going to Victoria’s Secret during their semi-annual sale, and one time they were giving away these stuffed puppies.  These puppies are not squishy, they are very firm.

One day I was sewing, pulling pins out of my traditional tomato pin cushion, and my boyfriend walks over and starts pushing pins into the puppy’s head.  Why didn’t I think of that!?  It fits way more pins than my old one, and it gives this silly stuffed animal on my desk a purpose.

I also have some safety pins stuck into his head.  (I use them when I thread elastic through a casing)

I’m betting this could be done with any really firm stuffed animal. The fabric on the puppy is pretty elastic.  When I pull a pin out, there isn’t a very visible hole where the pin once was. I’m guessing its plain cotton, similar to quilting fabric.

DIY Ornaments

I was feeling in the Holiday spirit, so I made some ornaments for all the other sororities on my campus.  Other sororities go caroling during the holidays and give out handmade ornaments, so it seemed like a cute idea to do as well.

I just bought clear glass ornaments at Michael’s (which are 40% off this week), fake “snow flurries,” and some cute clearance bin ribbon.

First, I filled the ornaments.  I just used my finger to push the fake snow inside.  It was a little messy, so I put a shallow box underneath as I stuffed.  I filled them about halfway with snow.  Luckily, I had blue paint sitting around, so painted the letters for the other chapters on each ornament.  I let the front sides dry, and then painted another coat of the paint.  On the backs I painted a heart and KKG.

These were so easy to make,  I want to make myself some with maybe beads inside.  It also could look neat if you put water-downed paint inside the ornament.  It could drip down the inside, or you could shake it up for a marbleized look.

Nightstand Makeover

I found this nightstand at a thrift store for less than $10.  I thought it was a steal since it was made with real wood and not particle-board.  It needed some work though.  It was scratched, nicked, and not so pretty in some areas.

I sanded the nightstand, and filled the imperfections with wood putty. Next, I sanded it again, and rolled on two layers of primer.  I then painted the body grey, and the drawer a pretty periwinkle color.  After looking at it, I freehanded a design on the top with a scribe paintbrush.

The paint was leftover from a sculpture I made, and since the paint was outdoor latex-based paint, it hasn’t chipped yet.

makeover2

The butterfly print is from my printmaking class, from another student when we had a print exchange.