tree

Fa La La La La

Hello World,

From my last blog post, we have established that I love Christmas decorations.

I love DIY holiday decor, but I also love a good sale. So I wait to buy my holiday decor until the week after Christmas. My first stop is always Target, where decorations are marked +75% off. Yes, most of the really pretty ornaments are usually gone by Christmas, but you would be surprised by all the goodies marked down to clearance! After Target, I run to Michael’s, Shopko, and pretty much anywhere else having a sale.

And with that, here is the process of how I decorated my petite tree this year:

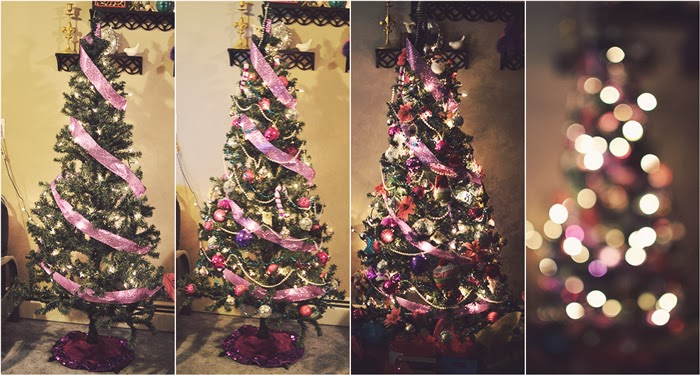
At Michael’s, they mark a bunch of their custom floral department ribbon way down after Christmas. I bought a 50 yard spool of ribbon for only $6.99.

Tree topper I knabbed at Target for less than $2. One of the gems is missing, but I’ll just camouflage that with a little puffy paint.

My favorite gifts to receive are actually Christmas ornaments. I love hanging them up every year and having moments of nostalgia. This one if my favorite.

This one is an ornament I made while I was in college. I painted the outside of a glass ornament and filled it with fake snow.

Happy Crafting!

DIY Feather Ornaments

Hello World,

I have a confession. I love Christmas. I love the lights, decorating my tree, playing “Sleigh Ride” by the Spice Girls- pretty much everything involving Christmas. Maybe you can blame it on my past retail experience, but I am one of those crazy people that decorates for Christmas before Thanksgiving.

So with that, I have a very simple DIY project for you! Last weekend, my local Goodwill put out all of their Christmas decor, and I picked up some inexpensive glass ornaments. I already had feathers in my crafting stash, so this was a pretty inexpensive holiday project.

This project is great for creating ornaments to match your holiday decor palette, or could be great to give as a gift. Check out the instructions below:

1. Gather your supplies: glass ornaments, feathers, and scissors.

2. Remove the ornament topper.

3. Gently feed your feather into the glass ornament.

4. Trim feather if it is too long.

5. Replace the ornament topper and hang that baby up!

Happy Crafting!

DIY Wedding Guest Book

Hello World,

One of my friends was married last weekend, and she asked me if I would make her a guest book. She wanted a non-traditional guestbook, where each guest can sign a leaf instead of a bookpage. After the wedding, it can become a piece of home decor.

For this project, you will need plenty of free time, patience, and a steady hand.

june-2-intro21

Check out how to make own below:

june-261

1.  Gather your supplies: canvas, frame, acrylic paint, paint brushes/rollers, and chalk/pencil. (I had contact paper, but ended up not using it to isolate areas.)

2.  Head outside or in a ventilated area, cover your work area to protect it from paint.

3.  I bought this frame for $30 (originally $60) at Michael’s. I couldn’t find a simple silver frame, so I bought some spray paint to cover it. I did 3 coats of spray paint, allowing my paint to dry between coats.

4.  Paint your canvas. I used a roller for the grey base to avoid visible brush strokes.

5.  After letting two coats of paint dry, I disliked how the grey seemed greenish. Instead, I made my own dark grey paint by mixing generic black and white paints from Michael’s together.

6.  Determine how large you want your tree to be, and sketch it out with your chalk/pencil.

7.  Paint in your tree body and draw out every single leaf. I numbered each of them to keep track. I ended up with around 150 leaves once I was finished.

8.  Paint inside your leaves. I did two coats of blue paint. TIP: Completely cover your chalk/pencil marks when you paint your leaves. I thought I could just wipe the outlines away, but it removed my grey paint. I had to repaint around the edging of my leaves (which was time consuming).

9.  I added a small heart with their initials, to the tree trunk, with a thin sharpie. Then, frame your guest book.

10.  Tada! If you ship this, I recommend not procrastinating. My shipping cost just as much as the project did because I had to expedite it.

Happy Crafting!

P.S. The two other no-sew tutorials are still coming, I just wanted to blog about this first. 🙂