repurpose

DIY Floral Letter

DIY Floral Letter

Hello World,

Want to know why I love DIY-ing so much? It’s an affordable and fun way to create items that are totally custom to your unique style! I love projects that I can make while watching a movie. Today’s project is just that! I had everything except the fake flowers in my craft stash, so this project only cost me $3.00 to make.

Check out the tutorial below:

DIY Floral Letter

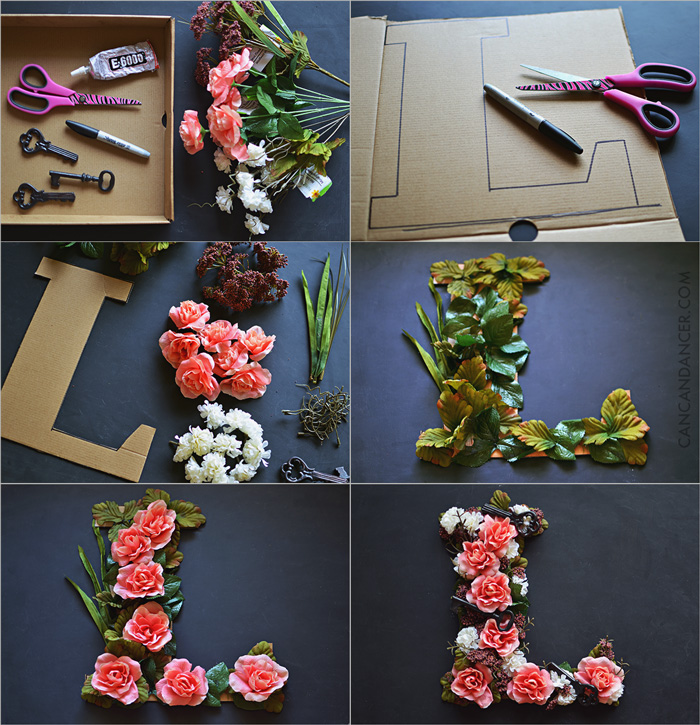
1. Gather your supplies: fake flowers (I bought mine at Dollar Tree), cardboard, scissors, a writing utensil, and an adhesive. I took a photo of e6000, but didn’t want to wait for it to dry, so I switched to hot glue at the last minute.

2. Draw out your letter on your cardboard and cut it out.

3. Pop the leaves and flowers off of your fake floral stems.

4. Cover your letter with a base layer of the fake leaves. Glue each of them in place.

5. Glue your large flowers to the letter.

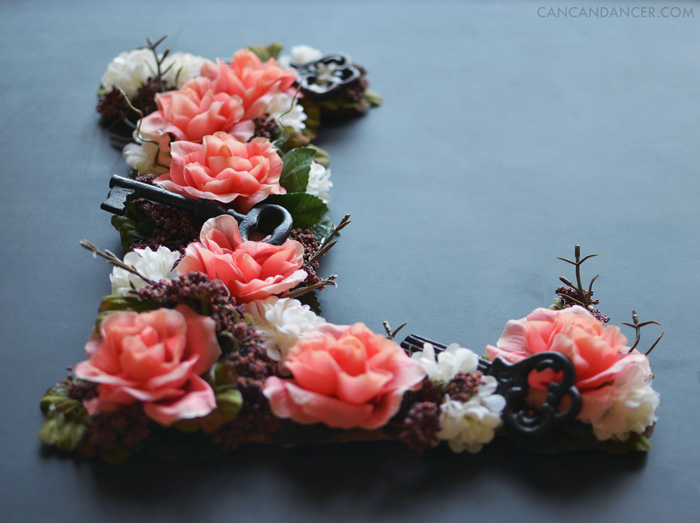
6. Continue gluing flowers to your letter until it is nice and full. I also glued some vintage-style keys to mine.

7. Prop on a shelf or glue some string to the back so you can hang it. And enjoy!

DIY Floral Letter

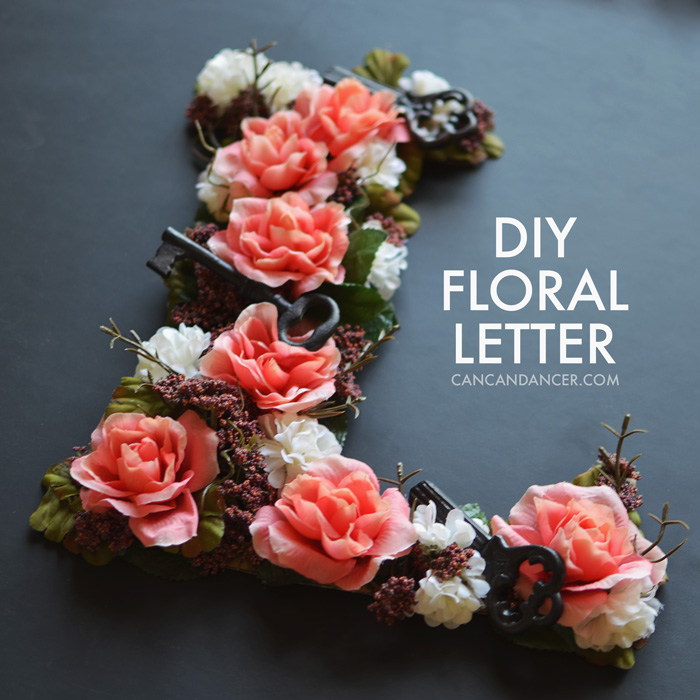
This could be a cute project to do with your initials, a decorative monogram, or an entire word.

Happy Crafting!


How to Re-Wick Candles

How to Re-Wick Candles

Hello World,

I love buying candles, but I dislike how there is always unused wax in the bottom of the containers. In the past, I have melted the wax and used it in a wax warmer, but lately I have instead been re-wicking my candles, so I can light them again. Check out the simple tutorial below:

How to Re-Wick Candles

1. Gather your supplies: a burned down candle, wicks, wick bases, pliers, strong glue (I used e6000), a glass container, and a pot partially filled with water, and an oven mitt.

2. Place your burned down candle in the partially filled pot of water. Allow water to boil and wax to completely melt.

3. Crimp your wick base to your wick threading with pliers. (Use the appropriate thickness of wick, if you use on e that is too thick, you risk the chance of your glass container cracking while the candle is burning).

4. Glue this wick to the base of your glass container. Allow to set.

5. Carefully pour your melted wax into your glass container. Wipe out your old container with a paper towel if you want to repurpose it.

6. Steady your wick if it has shifted crooked. You can tape the tip to a pencil if you are worried it will shift as the wax cools.

7. Optional: I bought soy wax flakes, and partially melted some of them and scooped them on top of my cooled, re-wicked candle, to create a candle that resembled an irish cream drink.

I also recently went thrifting, and picked up a few glass containers for $0.10 each and made some of my own candles with them. Making candles is so much cheaper than paying $20 each for them in the mall!

candles

Happy Crafting!

Gradient Vase from a Bottle

Hello World,

My favorite craft projects involve repurposed materials. I previously showed two techniques for sprucing up vases with spray paint. Check them out here.

Last summer I found a tutorial for cutting bottles with yarn, nail polish remover, and a lighter- and failed miserably. I blogged about my Pinterest fail, and asked for suggestions to succeed next time around. I decided to give the technique another try, and actually succeeded this time!

Check out how to make your own gradient vase below:

1. Gather your supplies: spray paint and a bottle. If you want to try cutting your vase you also will need: nail polish remover, yarn, sandpaper, and a lighter.

2. Remove all labels from your bottle.

3. Wash your bottle. If you have sticker residue, let the bottle soak in sudsy hot water. Load a scrubby with soap and then have at the sticker residue. Dry your bottle.

4. If you want to cut the top of your bottle check out this tutorial. From my experience, I rotated my bottle more quickly, and for more than 30 seconds. Dull down the sharp edges with sand paper. If you don’t want to risk accidentally lighting anything on fire, skip this step.

5. In a ventilated area, spray paint your bottle. For a gradient effect, spray more towards the bottle, and quickly work your way up the bottle.

6. Allow to dry. In my last photo, I placed the top of the bottle upside down inside the vase portion to help hold my fake flower stems in place.