Hello World,
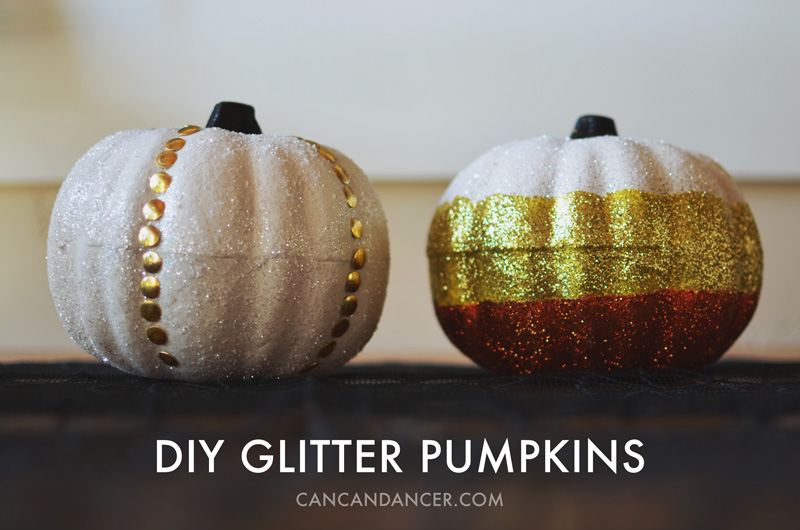
Halloween is one of my favorite holidays (and Christmas and Valentine’s Day). I pretty much just love decorating. (I love costumes too, and those will be the topic of upcoming blog posts.) Recently, I went to JoAnn Fabrics and came across a candy corn color-blocked pumpkin for $24.99. Instead of buying it, I made my own version with a foam pumpkin from the dollar store.
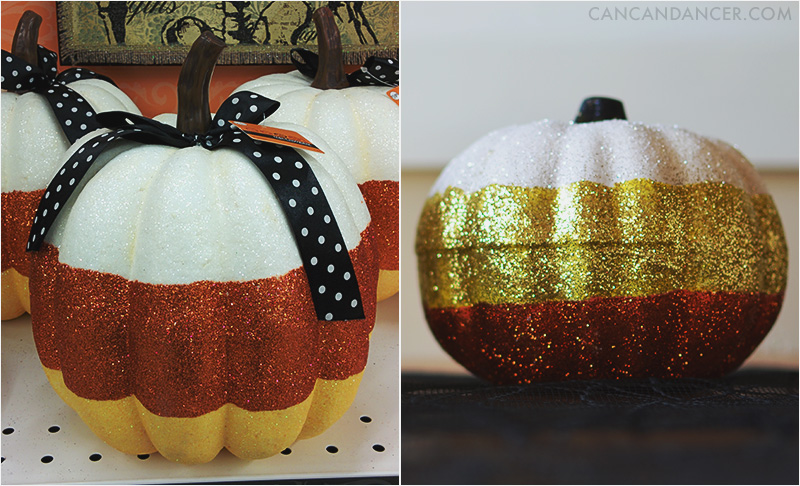
The left photo above is the pumpkin from JoAnn’s, and the right it my DIY version. I didn’t realize until the gold glitter was on the pumpkin that I had gotten my candy-corn colors in reverse. #youhadonejob but let’s just pretend it was a creative spin on it. 🙂
I already had all the supplies on hand, so this project only cost me a dollar! The glitter I bought a while back in a 12 pack from Ross for $4.99, which I have gotten so much use out of. Tutorials for two different versions of the glitter pumpkin are below:
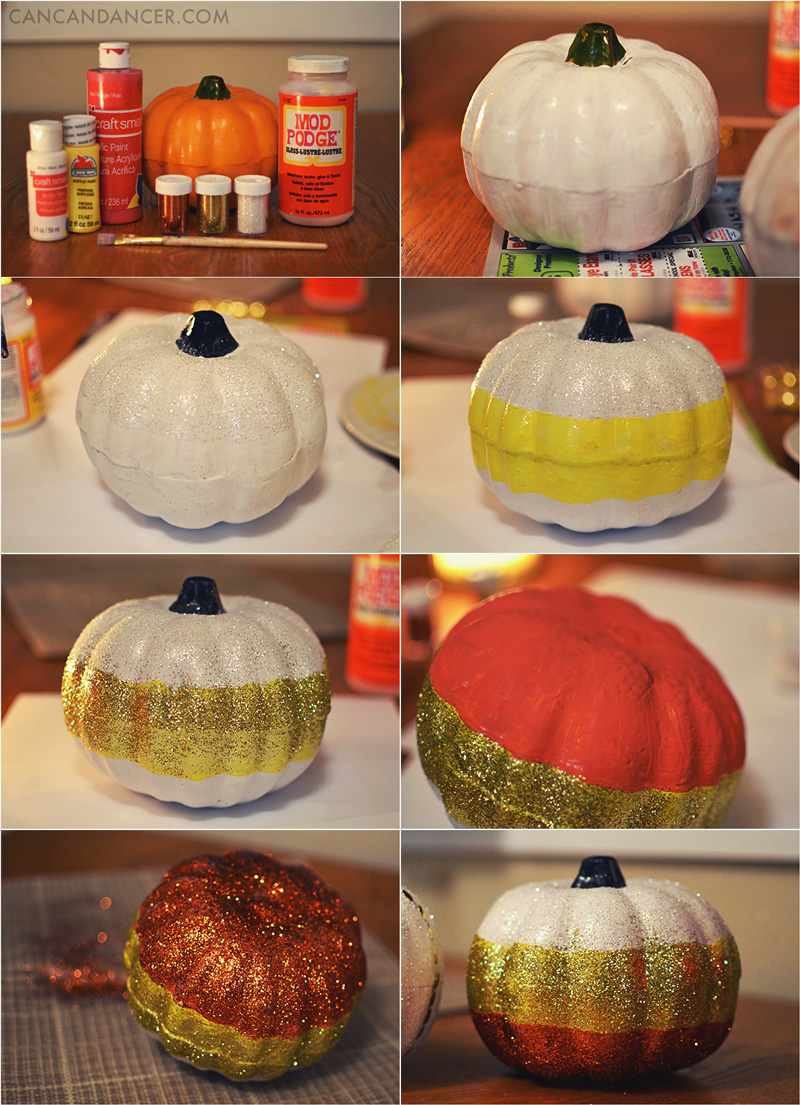
1. Gather your supplies: a foam pumpkin, acrylic paints, coordinating glitters, Mod Podge, a paint brush, and something to shake your glitter over (a paper plate, a placemat, or piece of paper).
2. Cover your pumpkin with white paint as a primer. Allow to dry and do a second coat so your original pumpkin color isn’t visible. Using paint will make it so we need less glitter later. Allow to dry.
3. Now you can go about this two ways: either mix Mod Podge and glitter together and paint that on the top third of your pumpkin, or apply a coat of Mod Podge to the top third of your pumpkin, and shake glitter onto the wet Mod Podge (while holding your pumpkin over your placemat). Give your pumpkin a light shake to rid of excess glitter, and allow that section to dry. Pour excess glitter back into your glitter container.
4. Apply your second color of paint to the middle third of your pumpkin. Allow to dry.
5. Repeat step 3 with your second color.
6. Apply your third color to the bottom third of your pumpkin. Allow to dry.
7. Repeat step 3 with your third color. My pumpkin had a green stem, so I painted the stem black. Allow to dry.
8. If you are afraid of glitter fall-off, apply a thin coat of Mod Podge to your entire pumpkin to seal it.
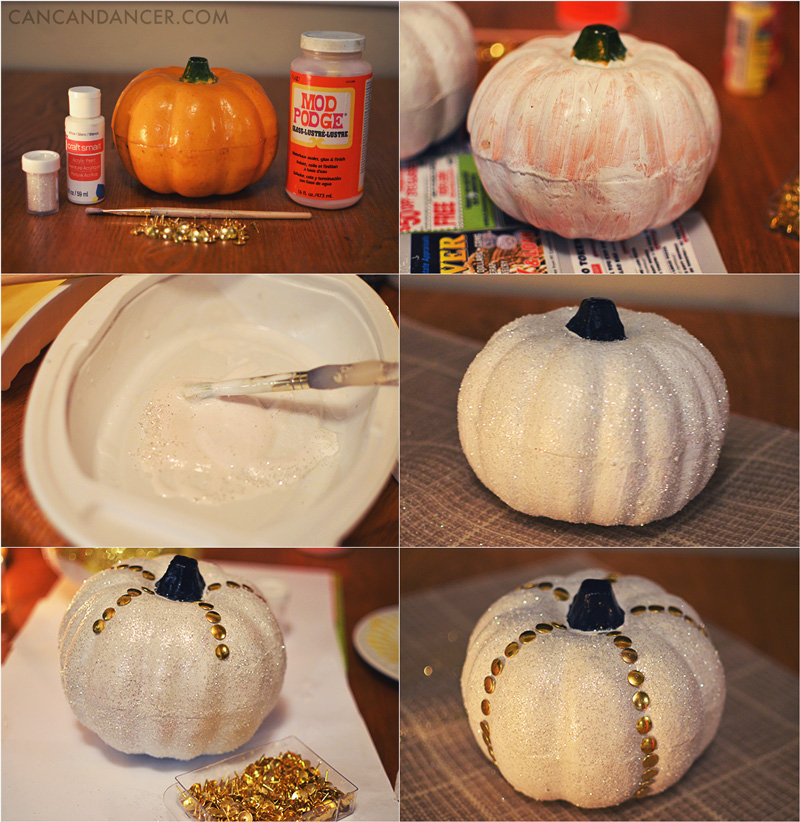
1. Gather your supplies: a foam pumpkin, acrylic paint, coordinating glitter, Mod Podge, a paint brush, thumbtacks (mine were from the dollar store) and something to shake your glitter over (a paper plate, a placemat, or piece of paper).
2. Cover your pumpkin with paint color of your choice. Allow to dry and do a second coat so your original pumpkin color isn’t visible. Using paint will make it so we need less glitter later. Also, my pumpkin had a green stem, so I painted the stem black. Allow to dry.
3. Now you can go about this two ways: either mix Mod Podge and glitter together and paint that your pumpkin, or apply a coat of Mod Podge to your pumpkin, and shake glitter onto the wet Mod Podge (while holding your pumpkin over your placemat). Give your pumpkin a light shake to rid of excess glitter, and allow that section to dry. Pour excess glitter back into your glitter container.
4. If you are afraid of glitter fall-off, apply a thin coat of Mod Podge to your entire pumpkin to seal it. Allow to dry.
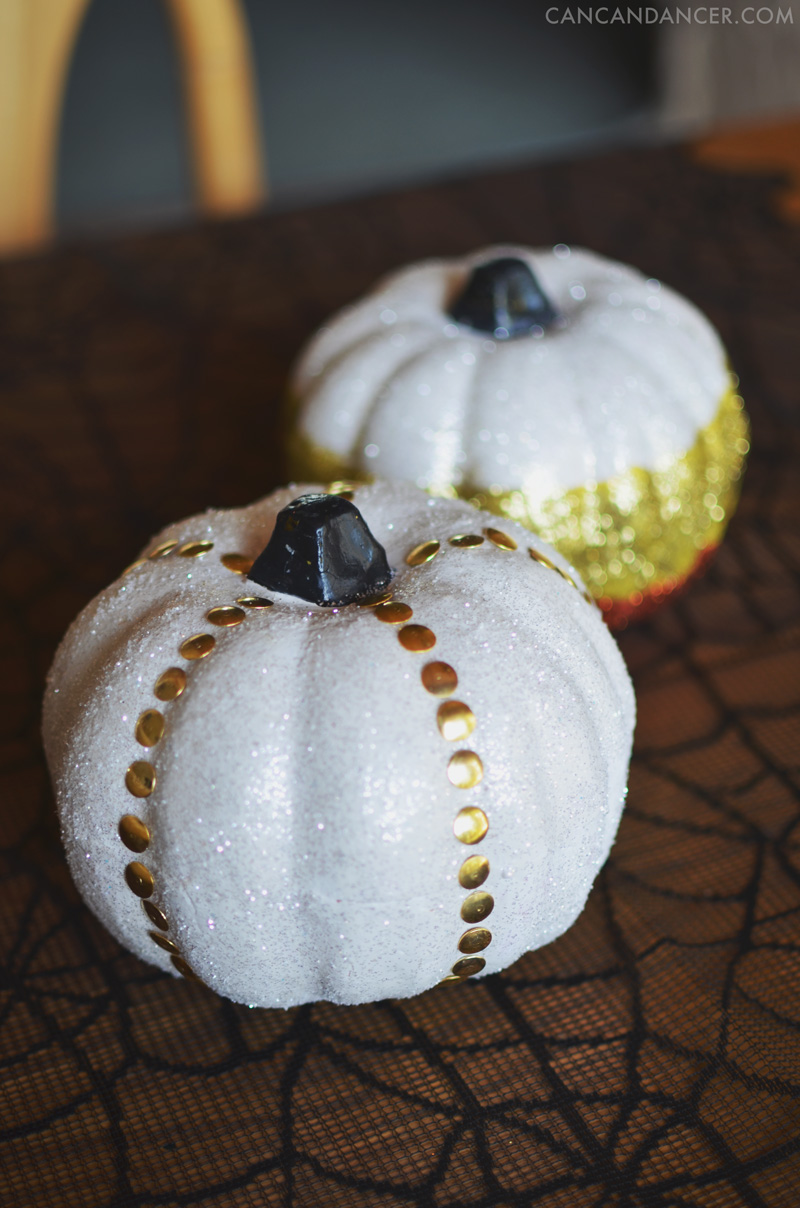
5. Push your thumbtacks into your pumpkin. I did simple vertical lines, following the curve of my pumpkin. If you are afraid of your thumbtacks falling out, you can apply glue to them prior to pushing them into the foam pumpkin.
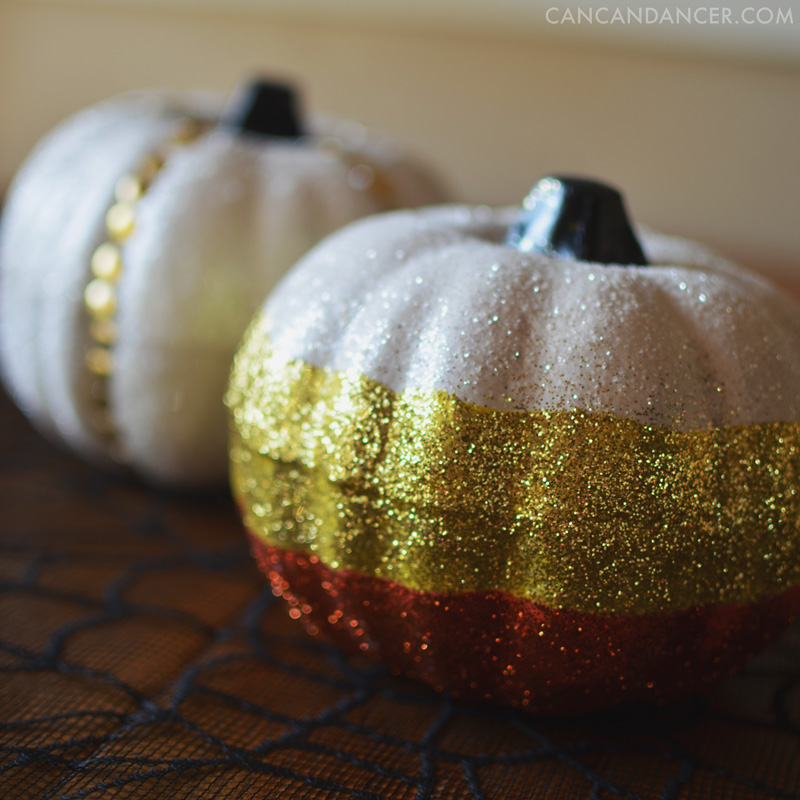
Aren’t they just so cute! I might actually head back to the dollar store and pick up another one and make a black glitter pumpkin with thumbtacks.
Happy Crafting!