
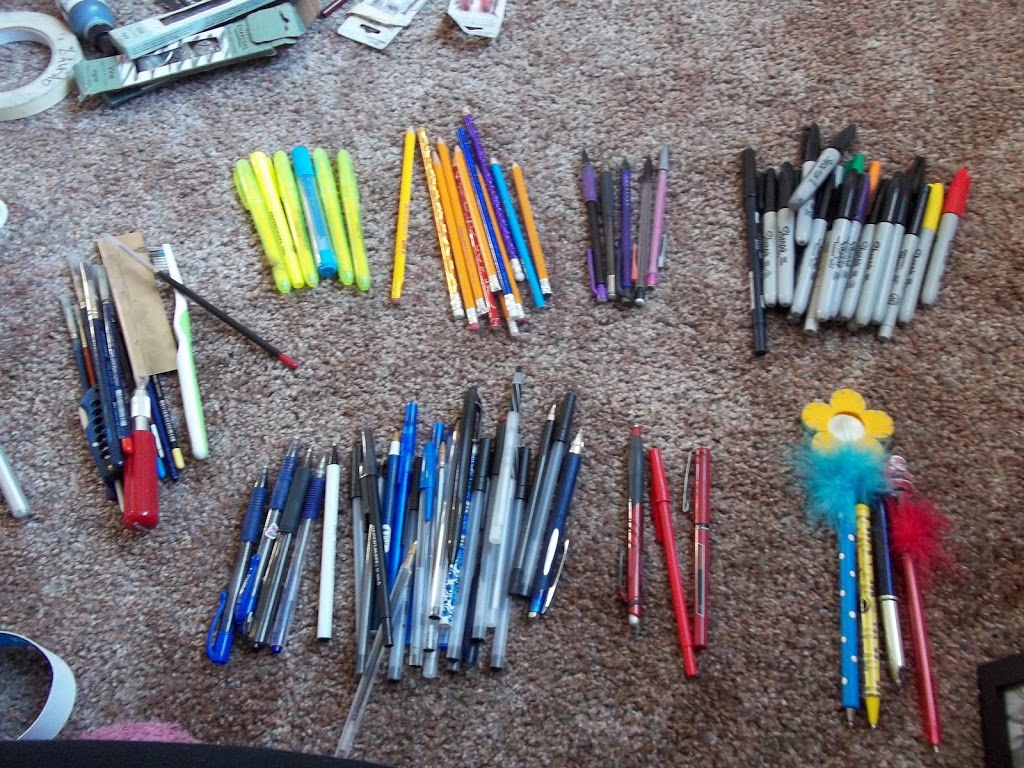
I had tins, pencil bags, and drawers with so many writing utensils in my apartment. I went through them finally, and half of the pens were already dead! Look how many I still have left! With all of these, I wanted a better way to organize them, so I made my own desktop organizer.
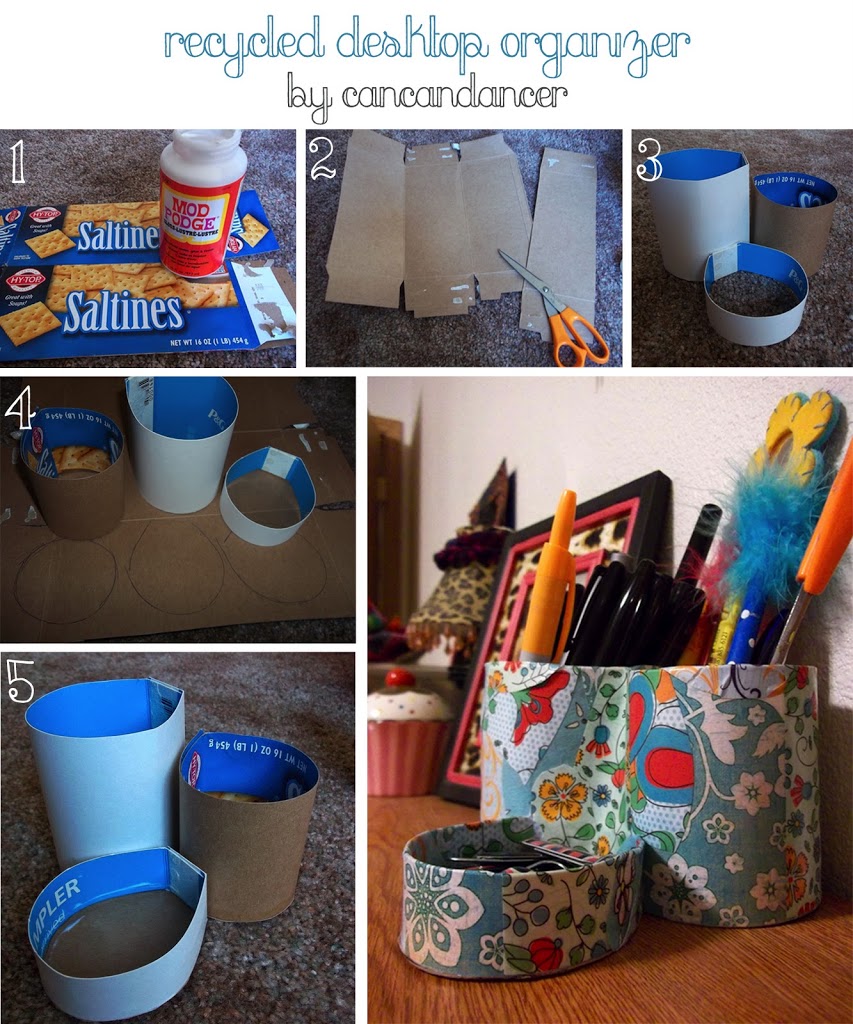
1. Gather your materials: used paperboard boxes (cereal, cracker boxes, ect.), Modge Podge or other water-based sealer, scissors, and paper or magazines to cover the the final structure.
2. Cut the box apart into long rectangles. (It helps if one of the sides still has a box flap on it.)
3. Roll the cardboard pieces into cylinders. If there is an original box flap still attached, it is easier to glue it together. Glue the pieces together by overlapping.
4. Trace the cylinders to get sturdy bases.
5. Cut the base circles out, and glue them to their partner cylinders. Glue the cylinders together, and then cut out magazine or paper pieces for covering. To cover, first put Modge Podge on the cardboard, place the image on the glue (making sure to avoid bubbles), and then brush Modge Podge on top of the image to seal it. Continue until entirely covered.
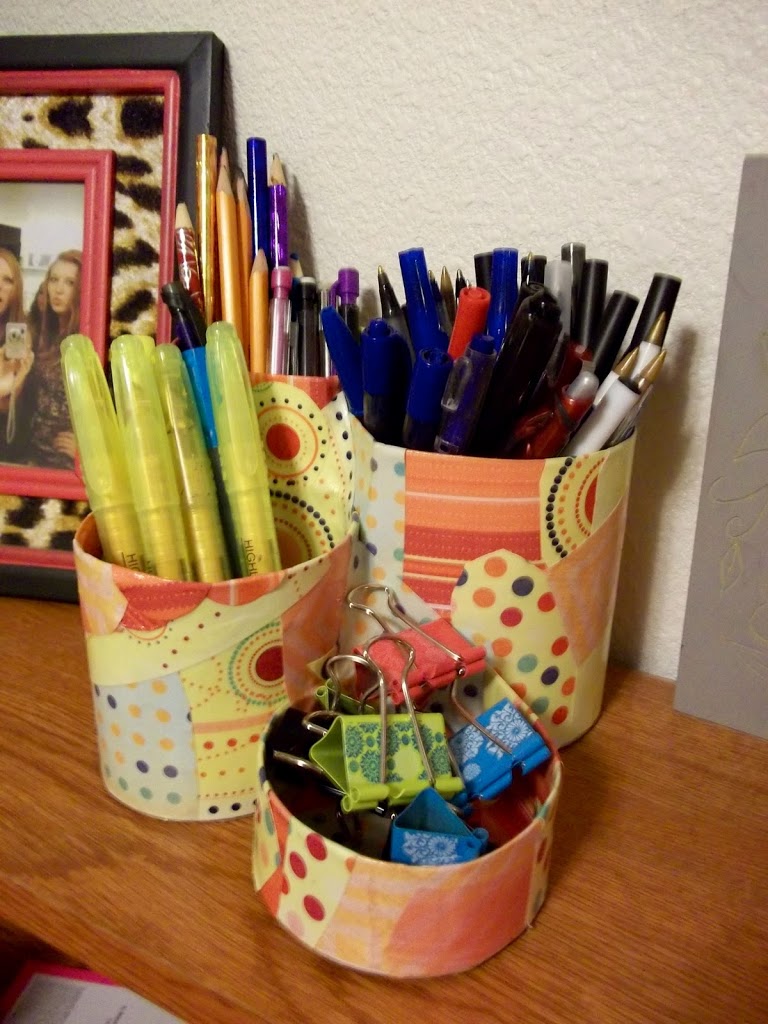
Here is the another organizer I made. Now it’s so much easier to find a pen.
